Integrate with Sensei
Sensei is a learning management system (LMS) plugin for WordPress that makes it easy to create online courses. You'll be able to create courses in your WordPress editor and customize them to your brand and course requirements. Protecting your courses using Memberful allows you to sell members-only access.
In this help doc:
- Install and activate Sensei.
- How Sensei's course hierarchy works.
- Add a course.
- Protect your course for members only.
Install and activate Sensei
Install Sensei and activate your plugin. Once you activate the Sensei plugin, you'll see a new option appear in your WordPress dashboard.
Click Sensei to access the Sensei settings and LMS.
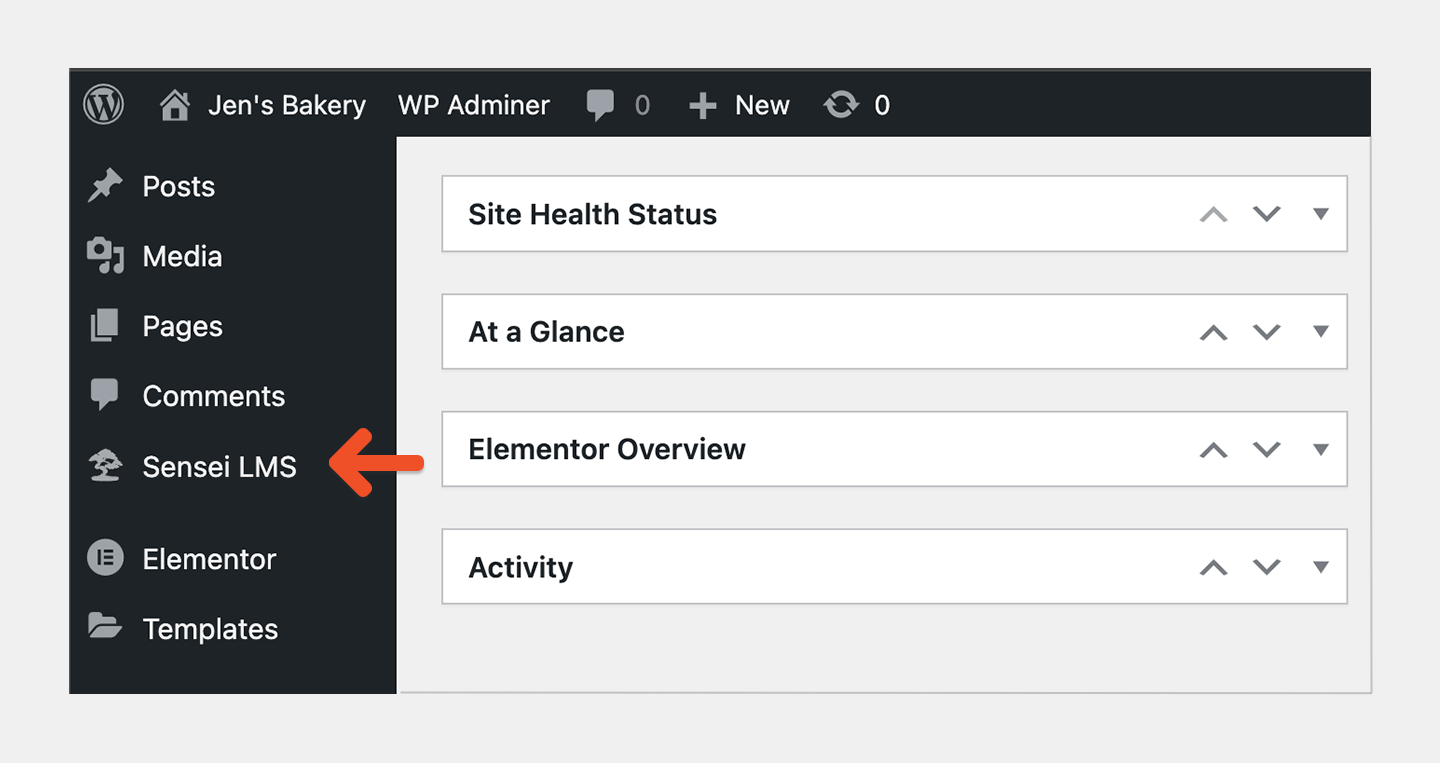
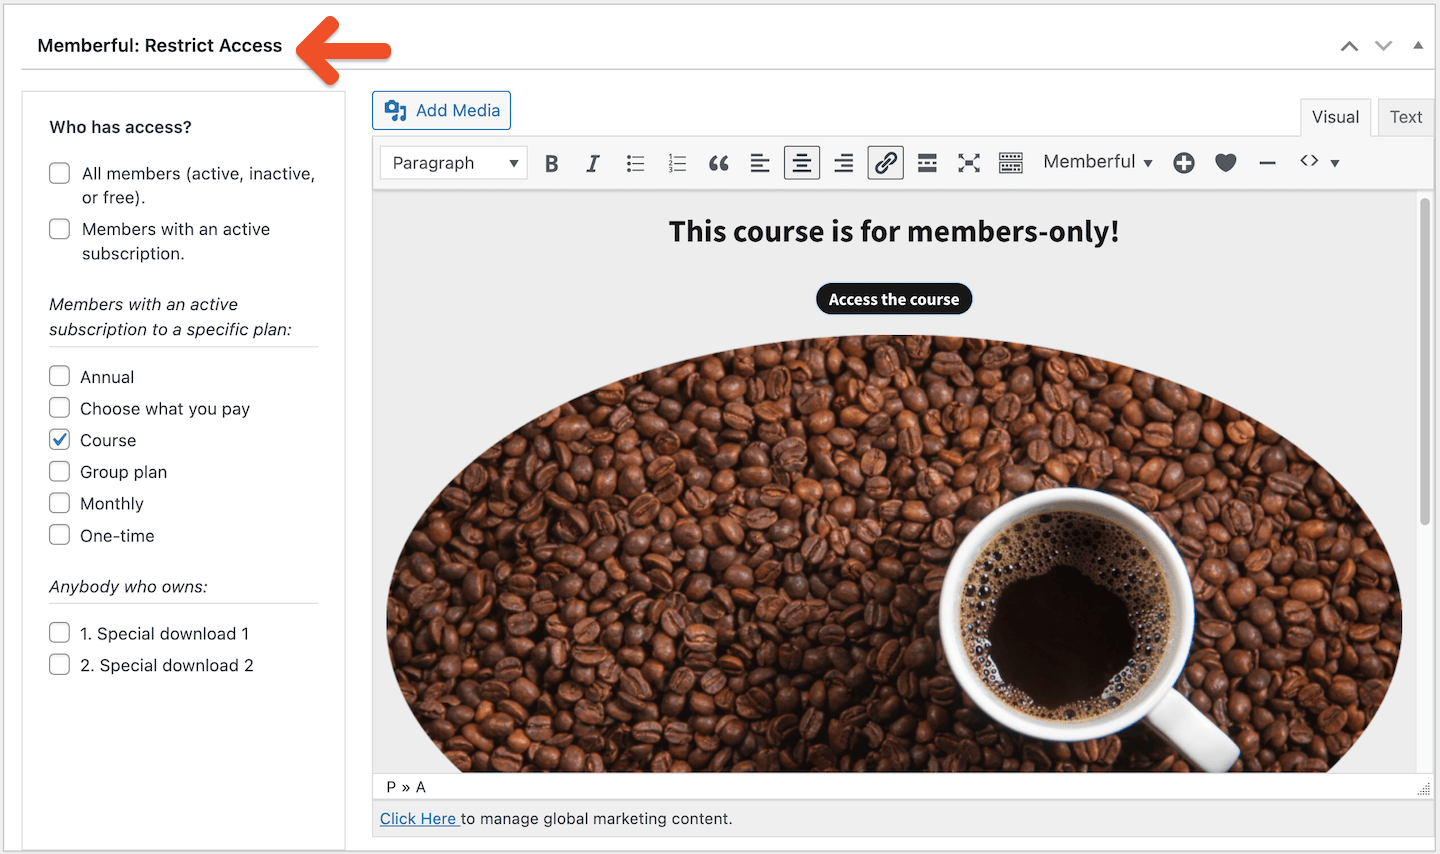
You will use the Memberful access restriction settings to restrict access to your course for members only instead of the WooCommerce integration.
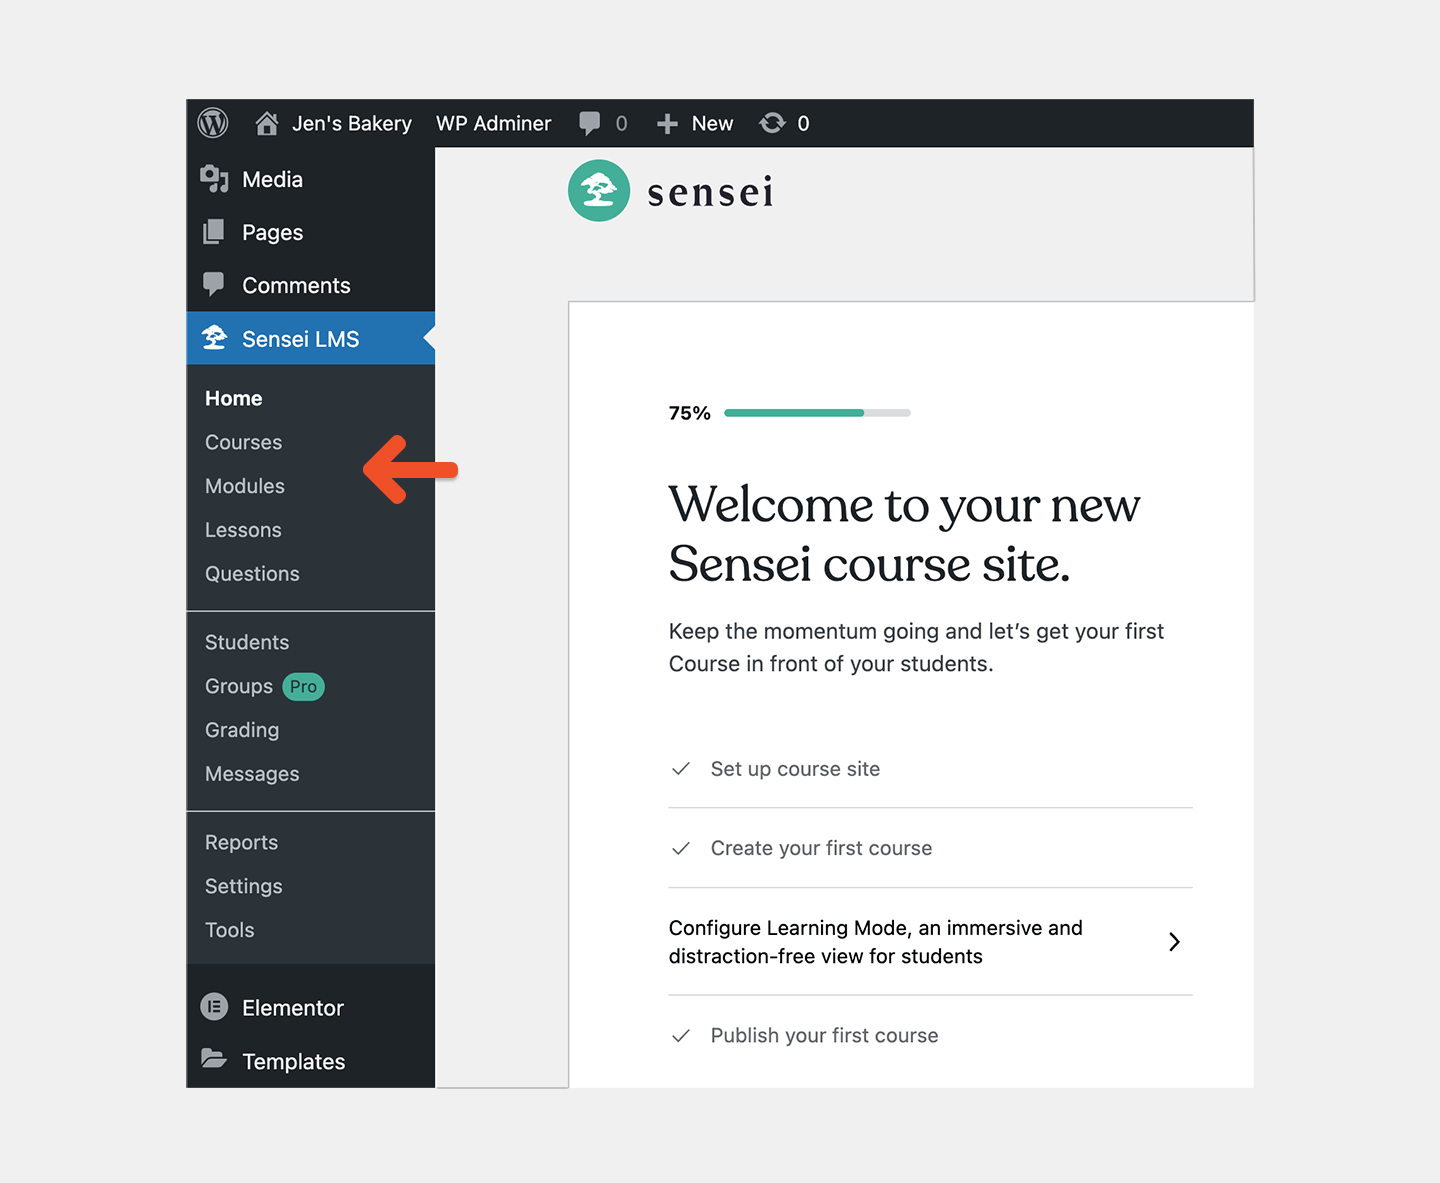
Sensei course hierarchy
Sensei courses are made up of Modules, Lessons, and Quizzes. Modules allow you to group lessons, but contain no content. Here’s an example of a basic course hierarchy:
Course title: Baking 101
Module 1: Baking Basics
- Lesson 1: Ingredients
- Quiz: Ingredients
- Lesson 2: Baking utensils
- Quiz: Baking utensiils
- Lesson 3: Measurements
- Quiz: Measurements
Please note that you can create a course made up only of lessons. Using modules to group your content is optional.
Add a course
- Go to Courses → All Courses from the WordPress dashboard and click Add New.
- Enter a course title and description, and fill in the relevant course information.
Add a module
- Navigate to Courses → All Courses from the WordPress dashboard and select the course you want to edit.
Click + Add New Module, enter a module name, and click Add New Module.
Navigate to Modules in the WordPress dashboard and select the module you created. Add a description like: “In this module you will learn how to make the most popular types of cookies such as chocolate chip, peanut butter, and oatmeal.”
Add a lesson
- To add a Lesson, go to Lessons → Add New from the WordPress dashboard.
- Assign the lesson to a course and module.
- Add the lesson content and information.
If you want to reorder the lessons in your course, navigate to Lessons → Order Lessons.
Add a quiz
- To add a Quiz to a lesson, scroll down to the quiz questions panel under the lesson.
- Add a new question and possible answers, and then click Add Question. Repeat to add all your quiz questions.
Protect your course for members only
Now that your course and lessons are built, you need to restrict access for members only.
- Navigate to your course from the WordPress dashboard and scroll to the bottom of the page to access the Memberful: Restrict Access meta box.
- Select a Plan or Plans to define which members can access the course. Repeat this step for each lesson in your course.
The content to the right of the Who has access? settings is shown to anyone without access. This is where you should add your Plan purchase link and marketing content—or a note that says: “Members-only content.”
Here’s what members will see once they purchase a Plan to access your course:
Related help docs: