Try the Memberful plugin on a live WordPress site
Want to test out the member experience? We’ve set up a demo site so you can see how Memberful works with WordPress.✔️ Browse a real site using the Memberful WP plugin✔️ Go through the signup process with a test credit card
✔️ See what the “logged in” experience could look like for your membersAccess the demo site >
Set up a WordPress website
Some terms you should be familiar with:- WordPress.org is software you use to create a website; hosting is not included.
- WordPress.com is a commercial company that offers the WordPress.org software, but also provides the hosting for it. Memberful only works with their Business plan or higher.
- A WordPress theme is something you install on your WordPress website to change the design and layout of the entire site.
- Web hosting is a service that stores your website on the internet.
- SSL is a technology that protects your information, and every website should have it today. It establishes an encrypted (secure) connection between your website and a web browser to ensure data passed between them remains private.
If you’re new to WordPress, check out our WordPress website help doc.
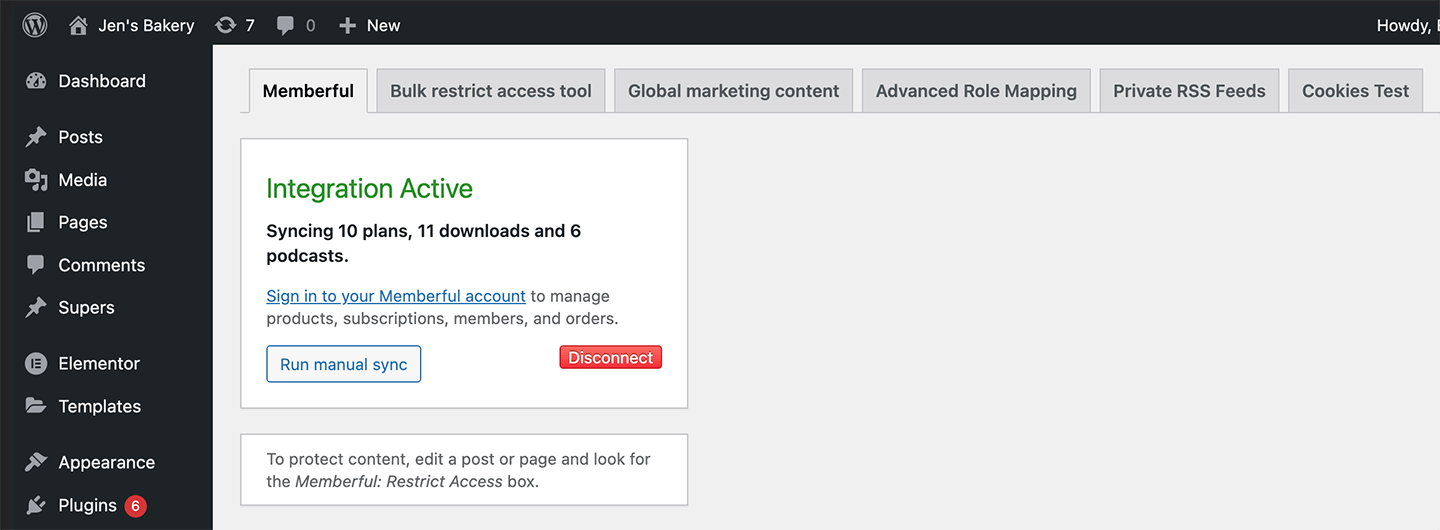
Sign up and install Memberful on your website
Sign up for Memberful and install the Memberful WordPress plugin on your website. You can try Memberful for free in test mode for as long as you need.
Create your plans and prices
Set up a membership plan that people can subscribe to. Go to Revenue → Plans and click Create plan.
Configure your redirect settings
By default, members are redirected to the page they were on before signing in. If you want members to be redirected to a different page on your site after their purchase (like a “thank you” page), configure the redirect URL in your Plan Settings.Add purchase links to your site
Copy the purchase link from your Memberful dashboard and paste it on your site. Alternatively, you can use the button options included with your WordPress theme. Learn more about adding purchase links to your site.
Restrict access to your members-only content
Next, you’ll want to restrict access to all of your members-only content using the Memberful: Restrict Access meta box found at the bottom of every page and post. Learn more about your content restriction options.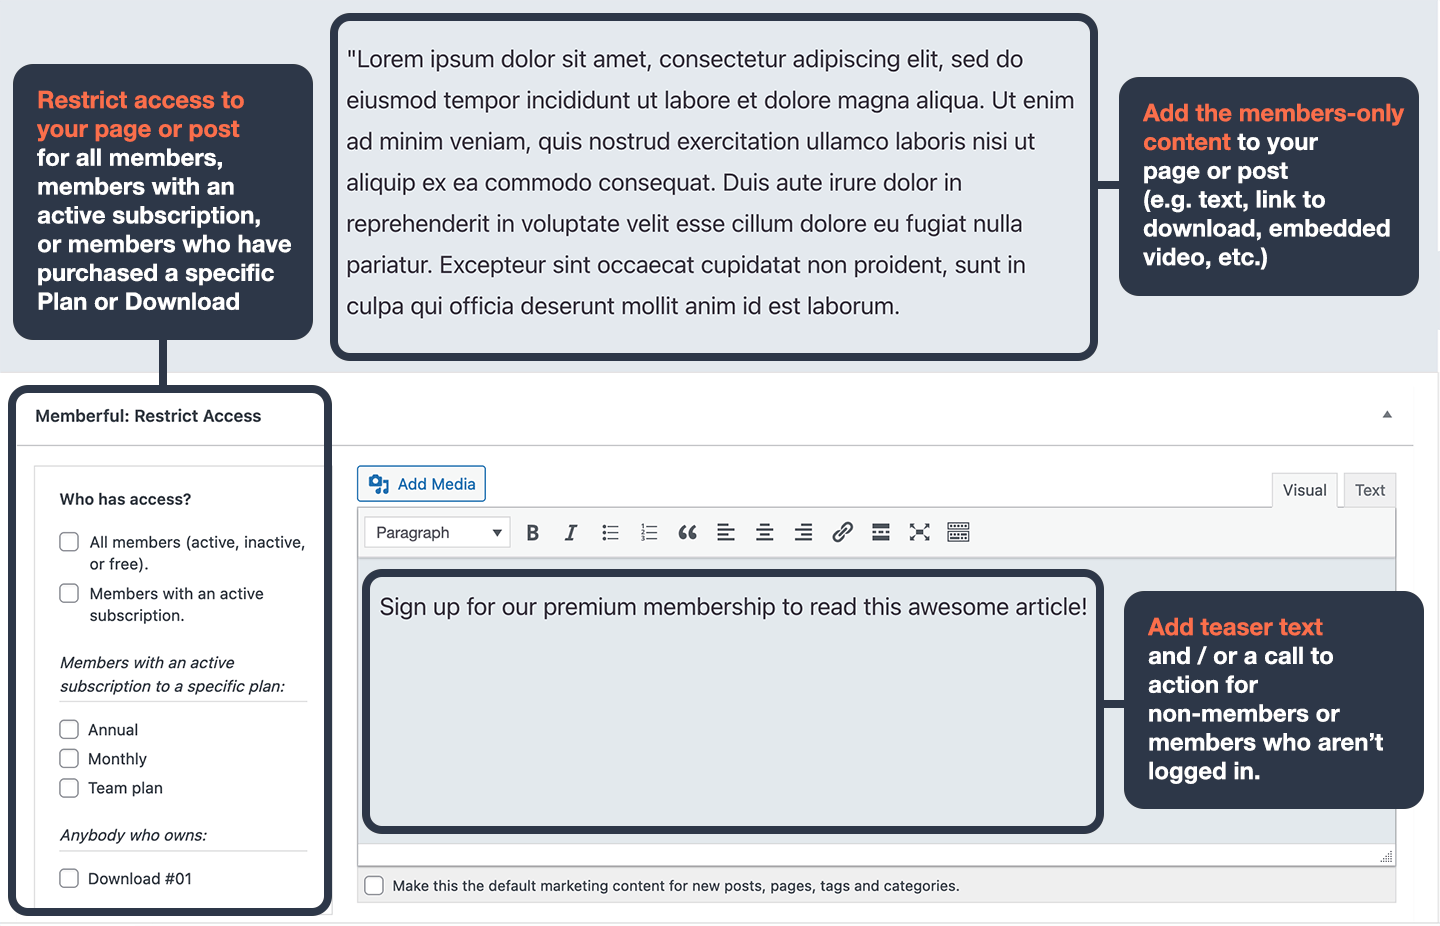
Want to restrict access to video content? Learn more about hosting videos and embedding them into protected posts.
Add account management links
Give members an easy way to sign in to your site and manage their Memberful accounts. You can add a sign-in link to any post or page or add sign-in, sign-out, and account links to your menu. Any member account management links in your theme and content (as well as links added by plugins) will need to be updated. Learn more about updating links in your theme, content, and plugins.Test the member experience
While your Memberful account is in test mode, you can use Stripe’s test credit cards to complete example member purchases and recreate their onboarding experience. Sign up with a different email address from the one associated with your website and Memberful account, as using the same email address can produce unexpected errors.Make a lasting first impression with an onboarding program that highlights your best content and gets new members excited from the start. Set the tone for success and engagement right from day one. Check out Operator for tips on designing an onboarding experience that wows.
Go live
When you’re ready to start processing orders, choose your currency and connect to your Stripe account via Settings → Stripe. We will automatically delete your test orders, delete test member accounts, and reset your Memberful dashboard metrics when you switch to live payments. All your other settings and customizations will be maintained. Nice work connecting to Stripe. Now you’re ready to start selling memberships to your audience. Here are a few ideas to make your launch a success:- Announce the membership on your social media pages.
- Link to the membership sign-up page in your social media profiles and upload special banners for launch month.
- Send a membership-specific email blast, and include a link to the membership signup page in your email signature.
- Host a livestream or post a video to announce the membership.