If you need to collect an address and / or a phone number, you can add those fields directly to the checkout form.
Build a form with up to 5 custom fields
Go to Website → Custom fields from your Memberful dashboard.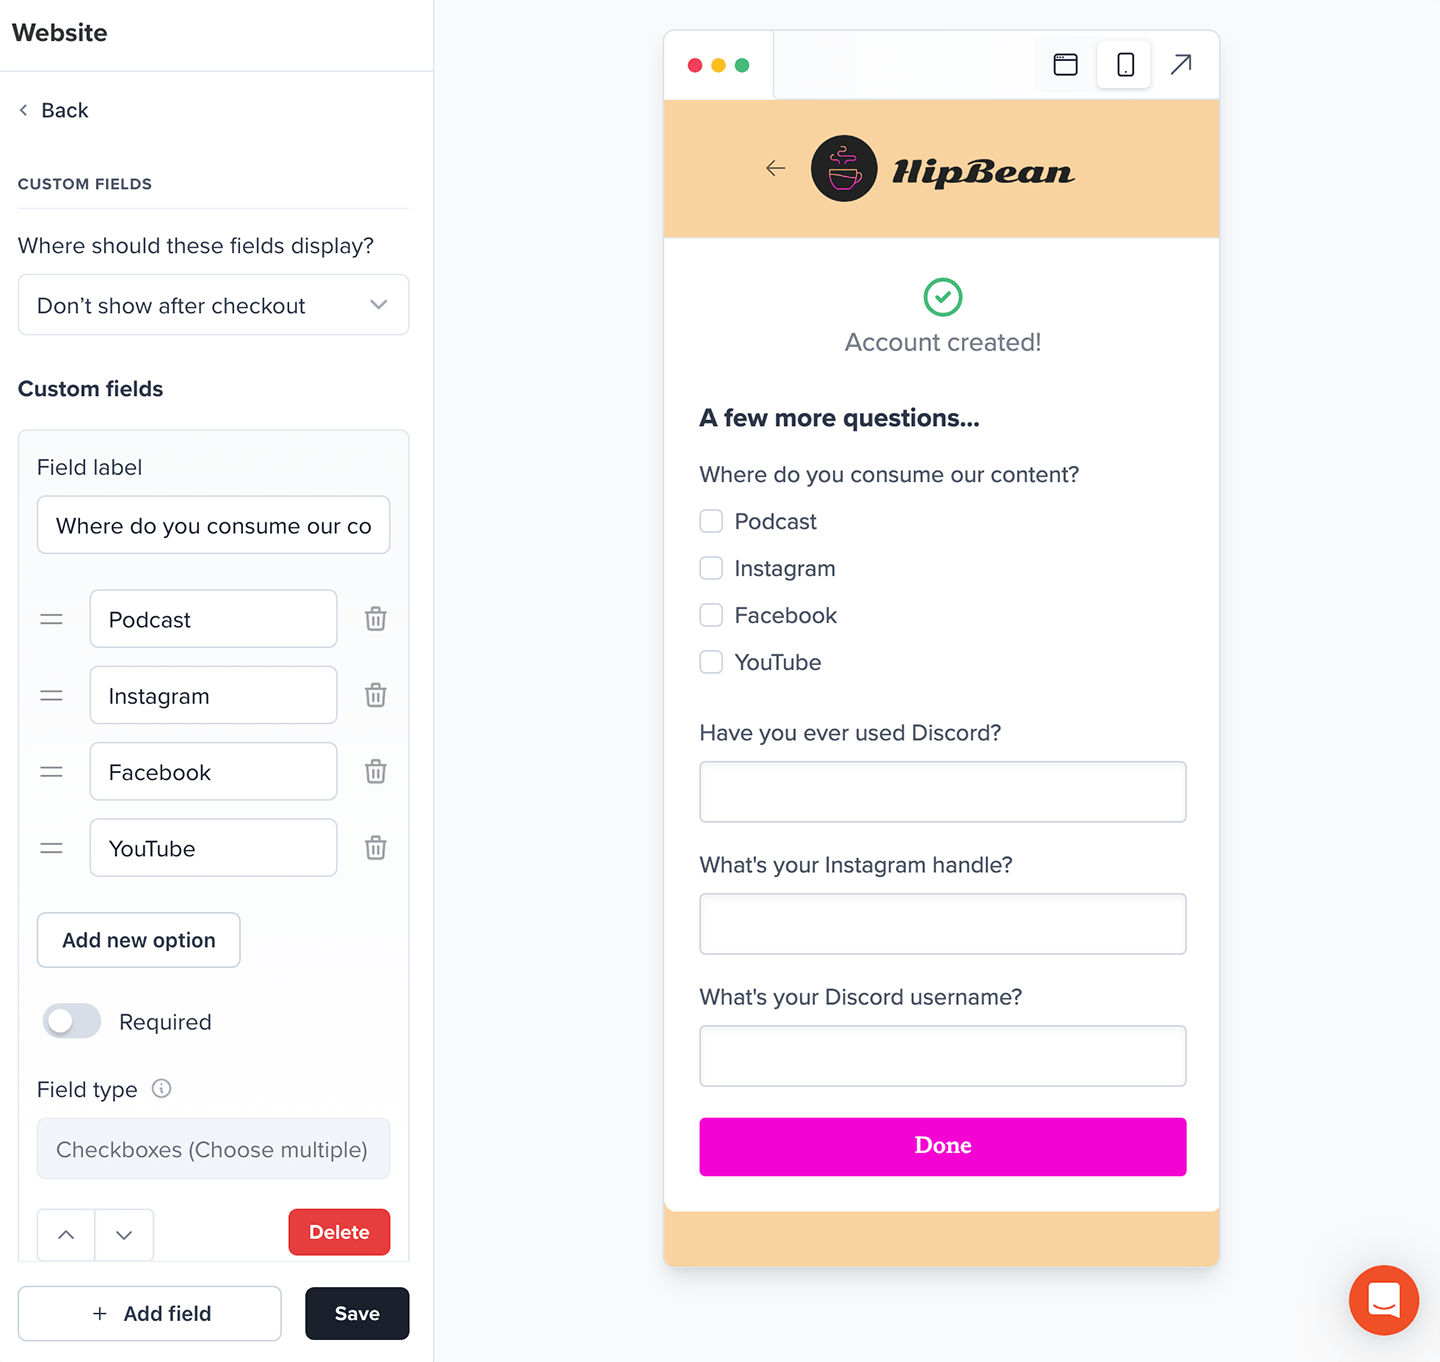
Choose when to display custom fields
By default, we display custom fields for all plans right after checkout or after free registration. If you don’t author any fields, we won’t include that as a step after checkout.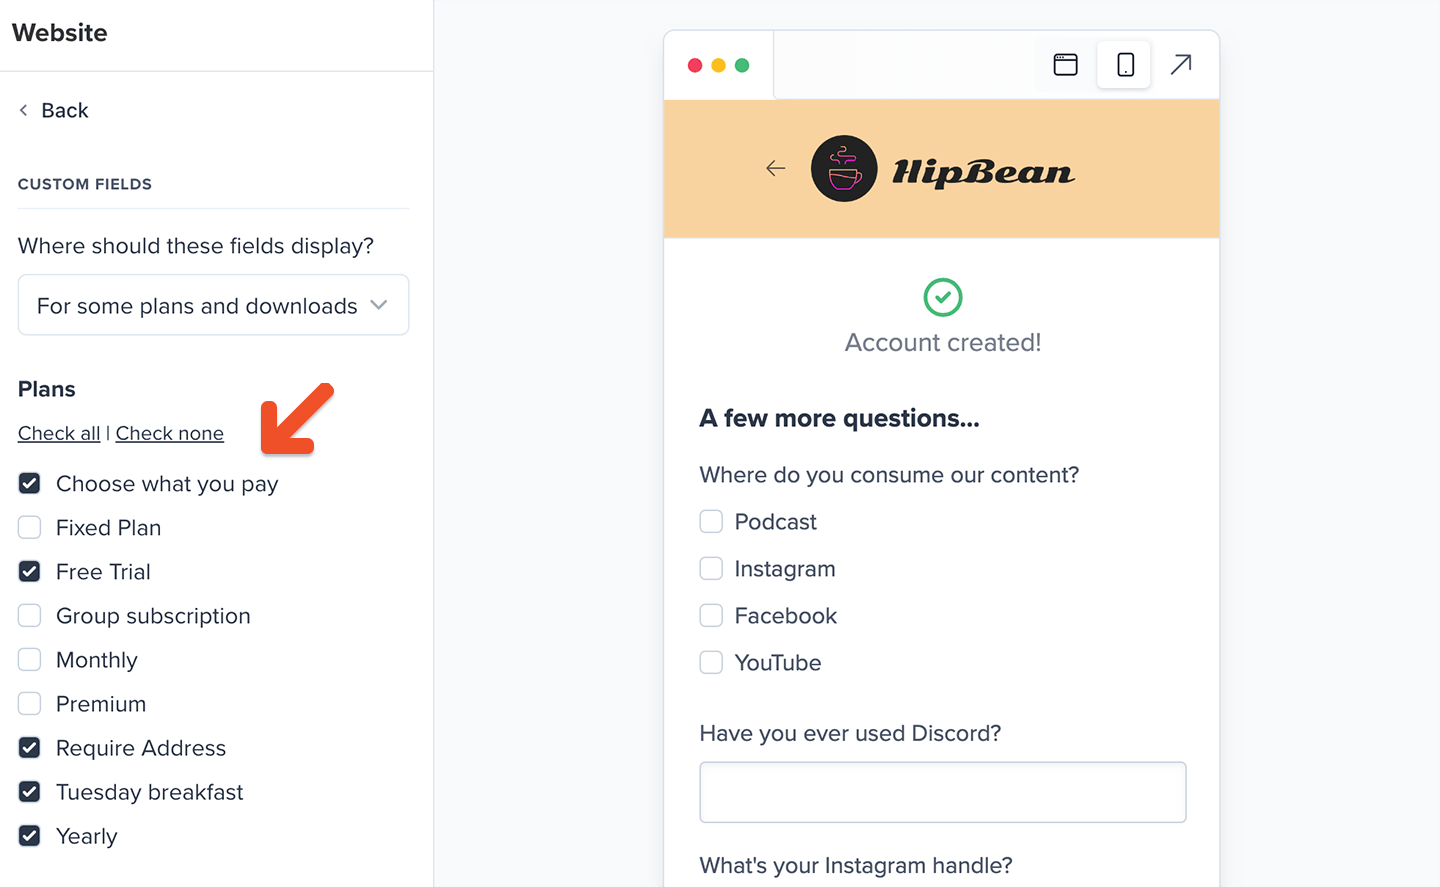
- Show for all plans and downloads
- Show for some plans and downloads
- Don’t show after checkout
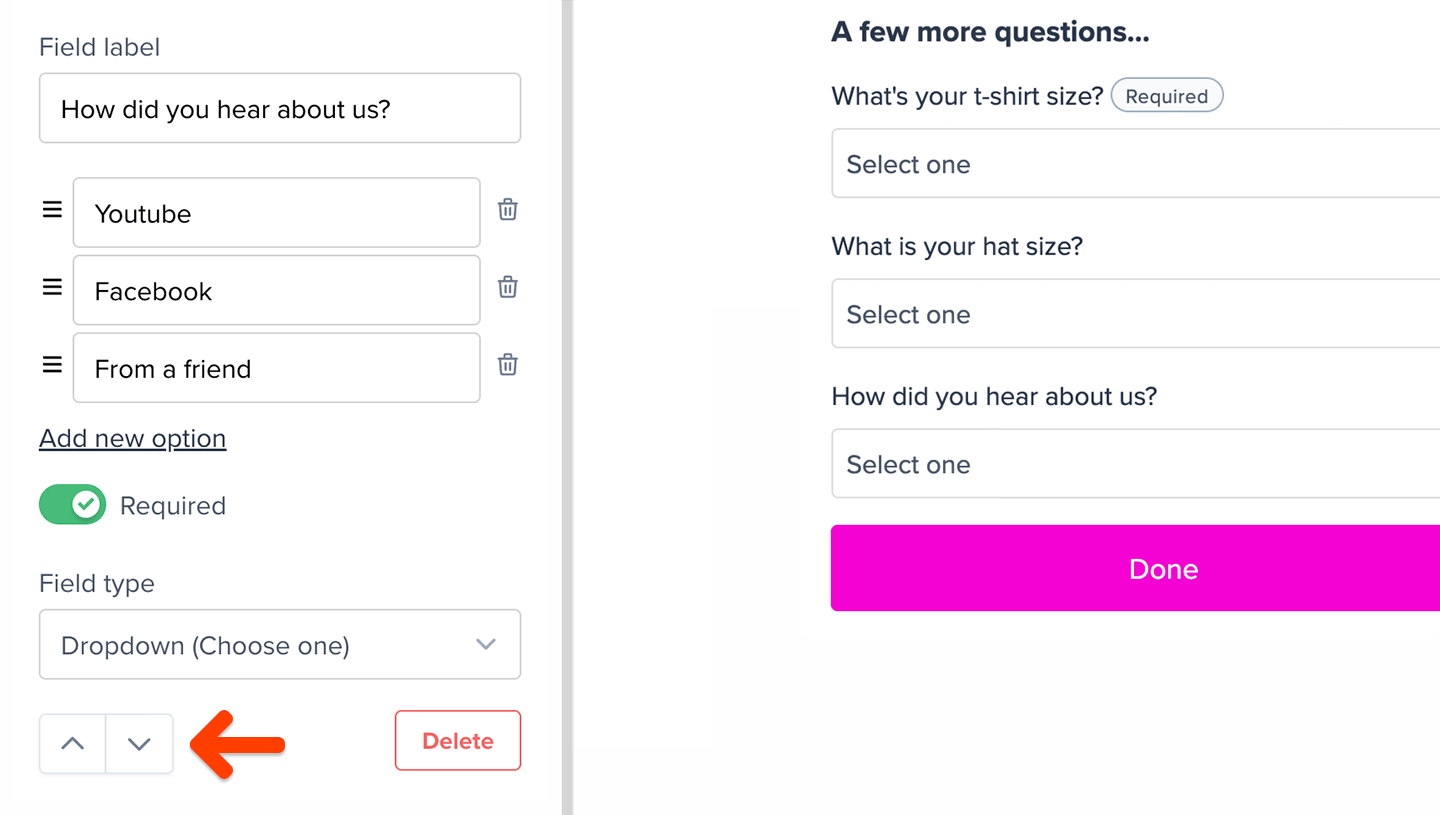
Create a custom field
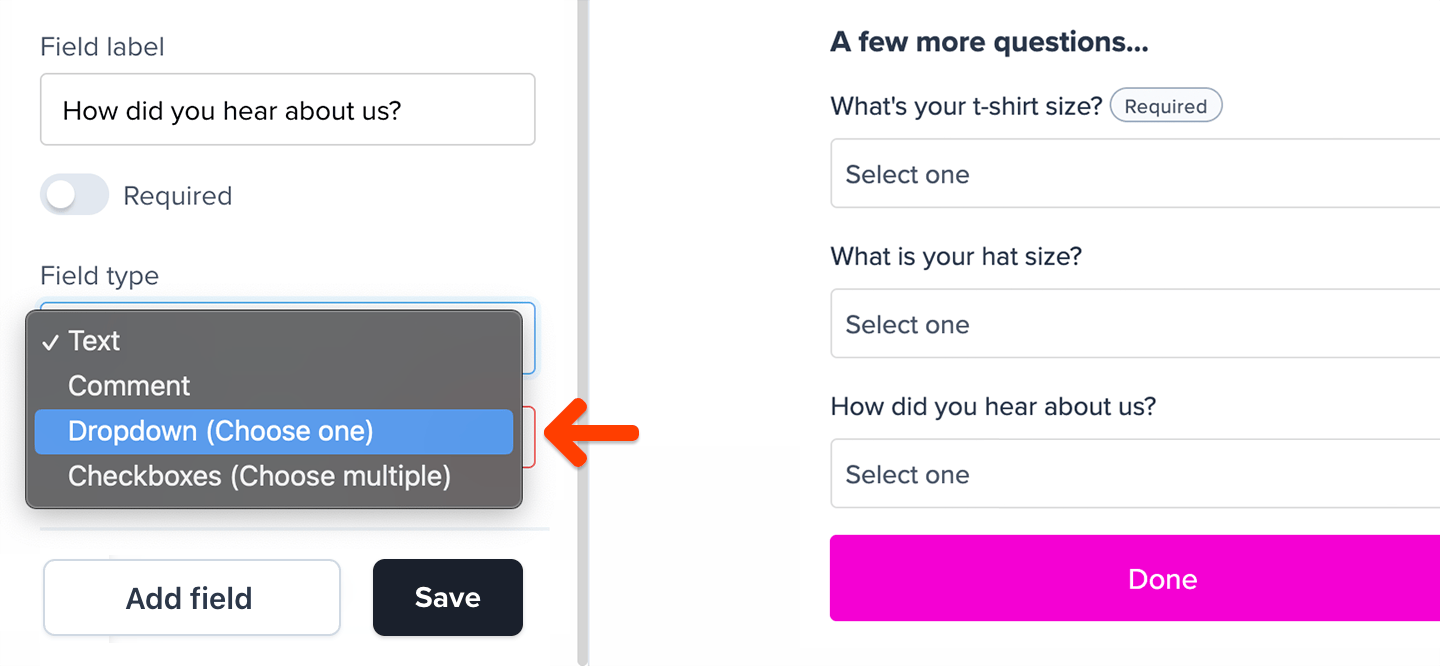
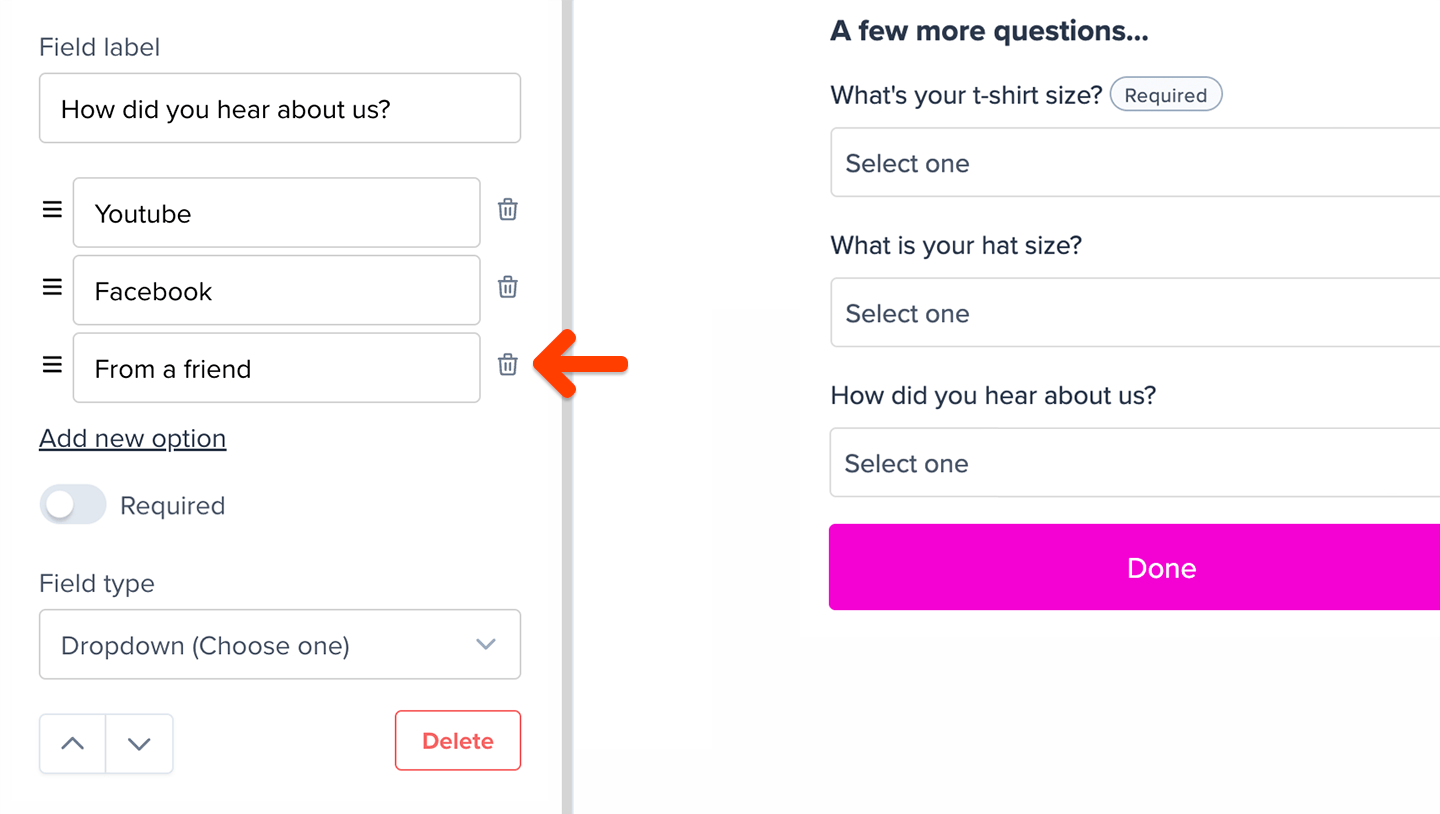
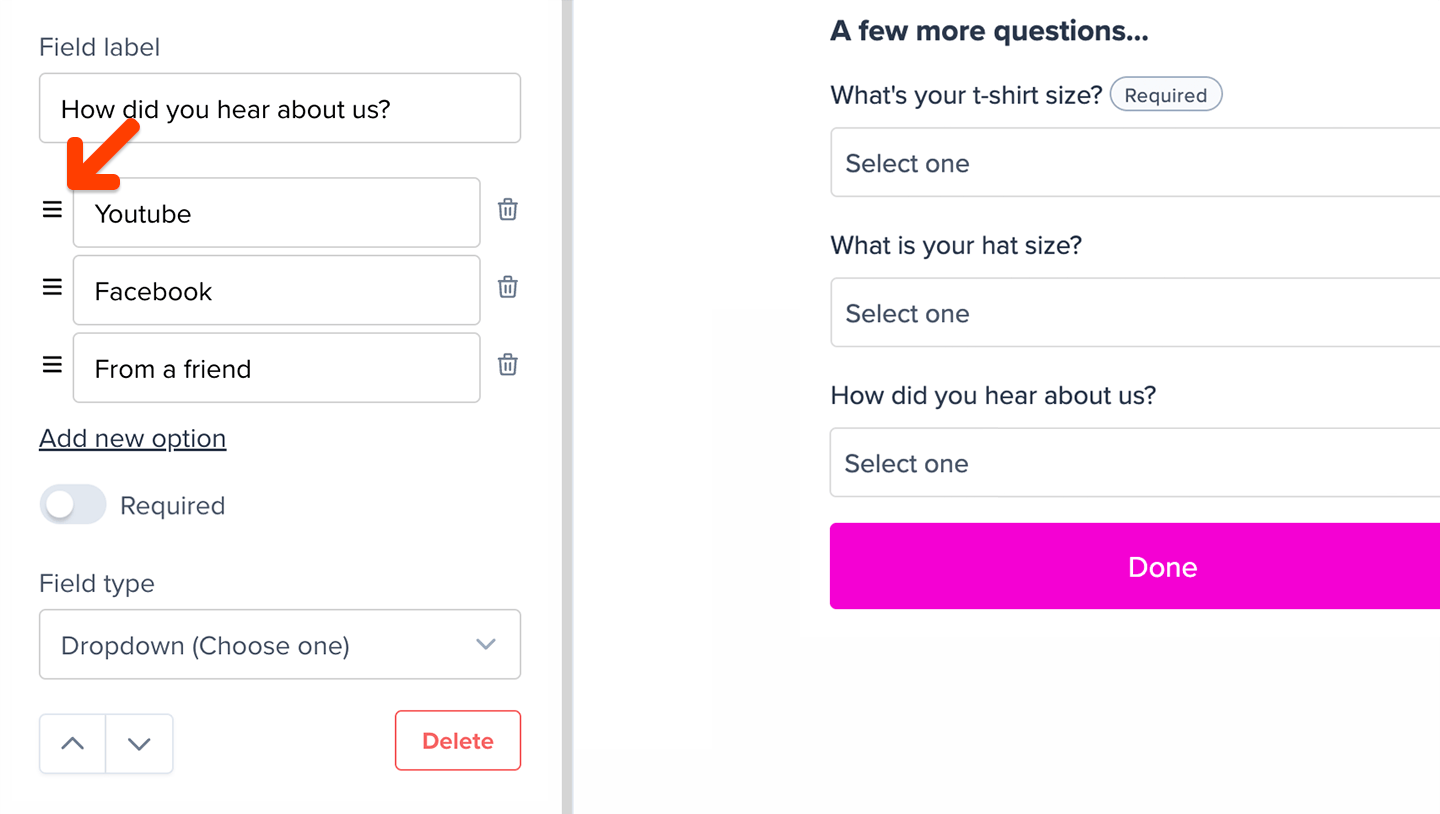
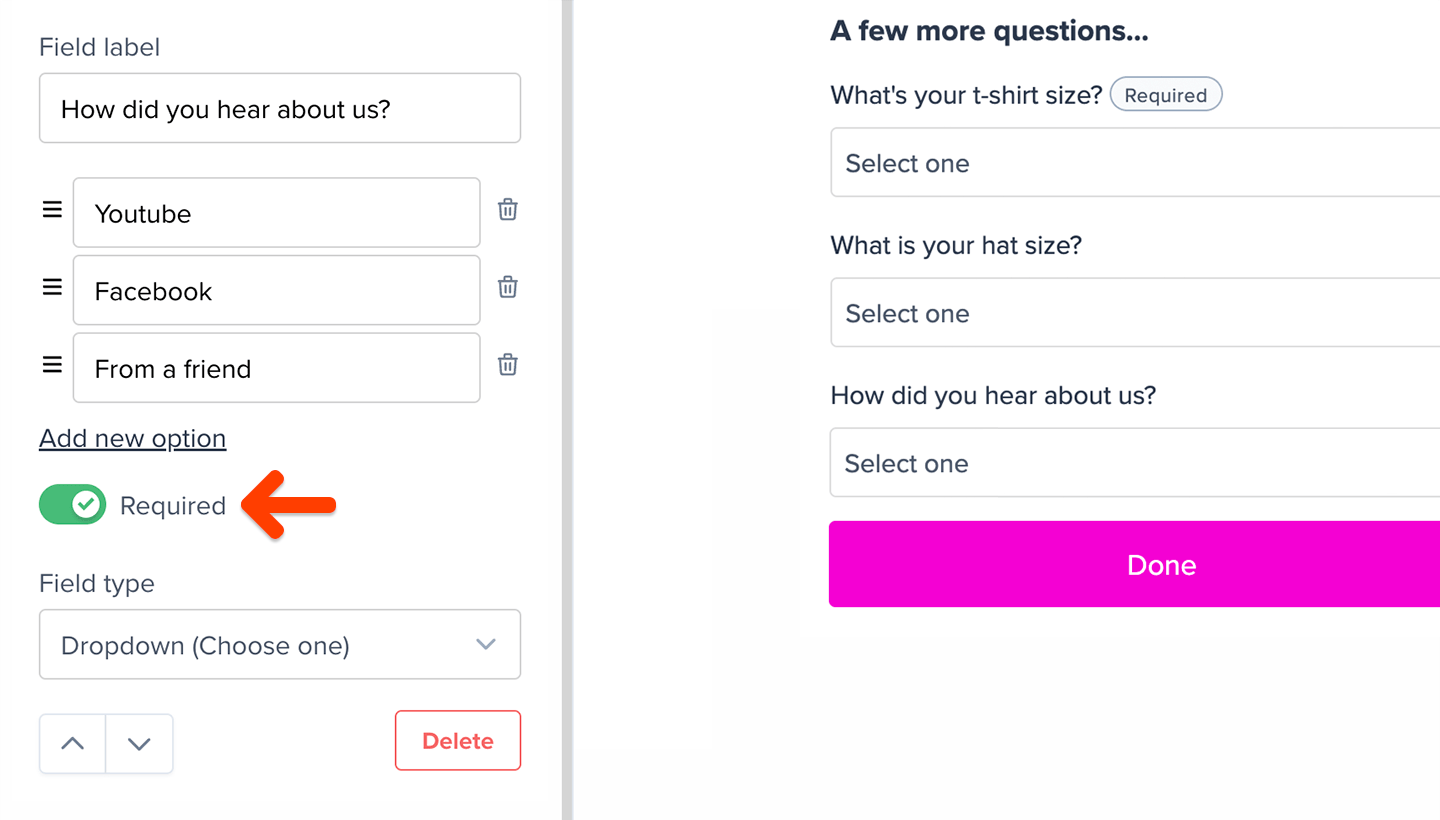
Enter a field label. Here are some examples:- How did you hear about us?
- Which newsletters do you want to receive?
- What is your t-shirt size?

- Text — basic text field, 250 character limit
- Comment — text field for long-form content, 1000 character limit
- Dropdown (Choose one) — select one answer
- Checkboxes (Choose multiple) — select all that apply
- Account password — text field for members to create a password after signing up
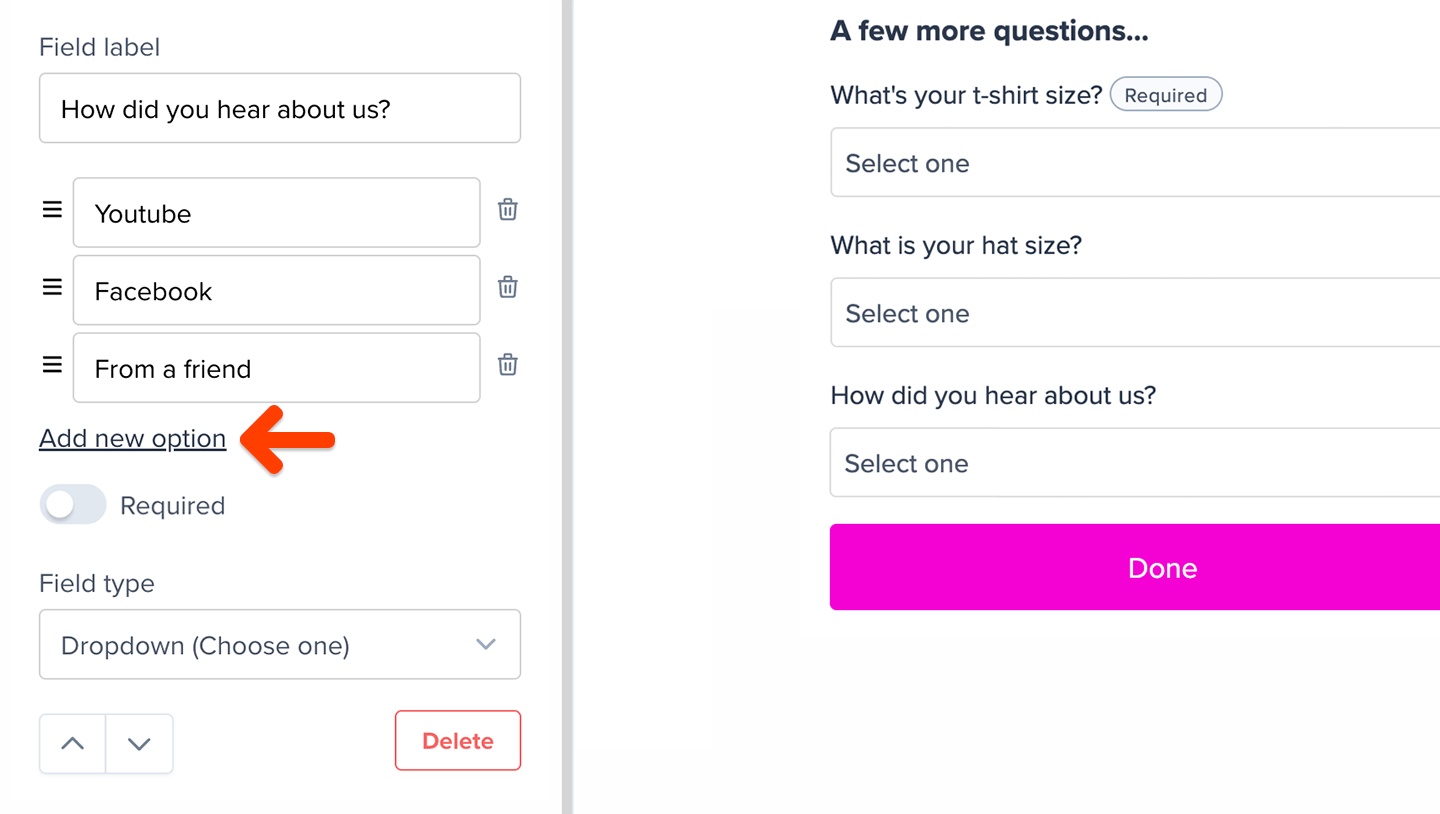
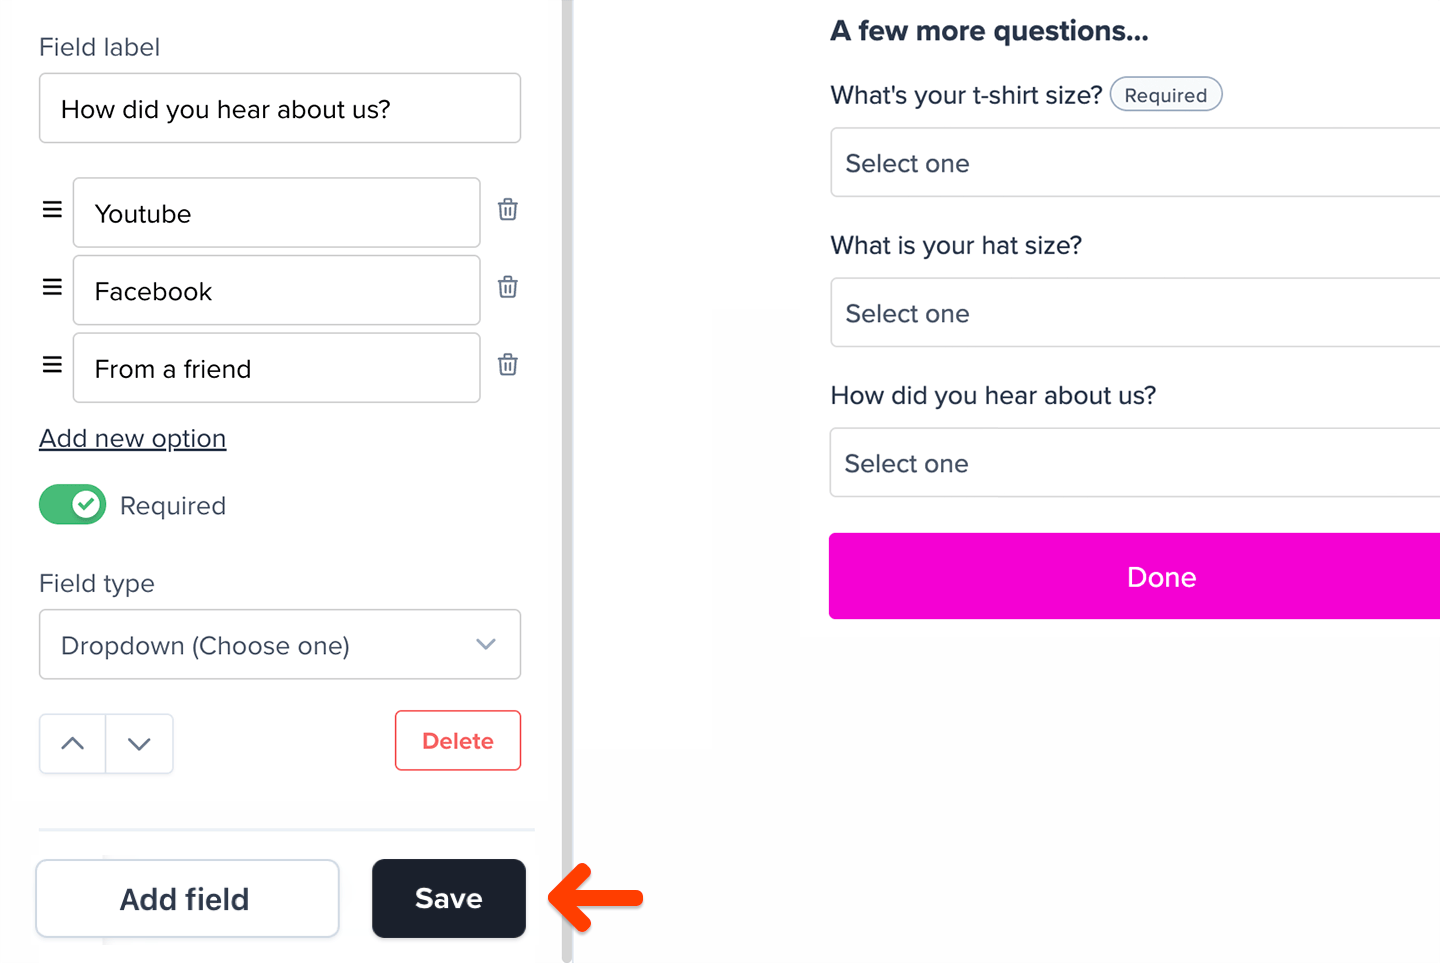
Preview the member-facing form post checkout
The form will be displayed after a member completes a payment, redeems a gift, joins a new group subscription, or completes free registration — provided that the new member is joining a subscription to a plan specified by the selections (all plans vs. some plans).
How members can update their custom fields
Members can update their custom fields from within their account. The Account password field is a special kind of field that allows members to create a password after signing up. This field is only available during the checkout process, so it won’t show up among other custom fields in the member’s account. There is a separate section in the member’s account where they can create or update their password. We’ll keep showing fields in the member’s account even if the label is updated or the options are changed. If an admin deletes an option from a field and a member had previously selected that option, we’ll continue to show the deleted option in their member profile. However, if that member decides to modify their choice, they won’t be able to select the deleted option as the new value, and it will no longer be available if they save the changes. However, once an admin deletes a field, it will no longer show up in the member’s account or in member exports.Access the custom field data in the Memberful dashboard
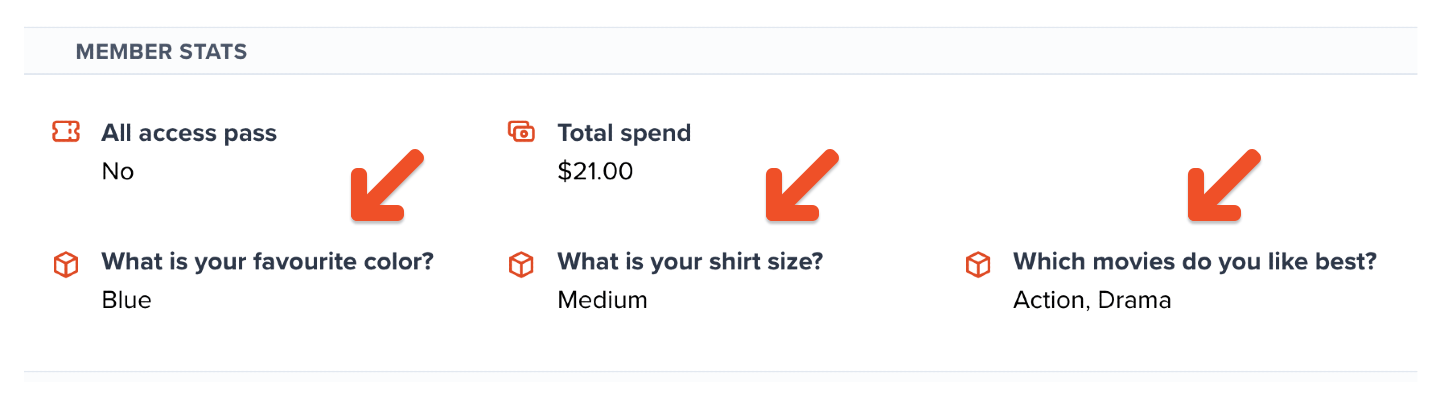
This new data can be accessed in bulk by exporting CSV from the Members tab. Admins can also look at each member’s profile in the Member Stats section to review their custom field data.