Demo
Create a plan
Go to Revenue → Plans from your Memberful dashboard, and click Create plan.
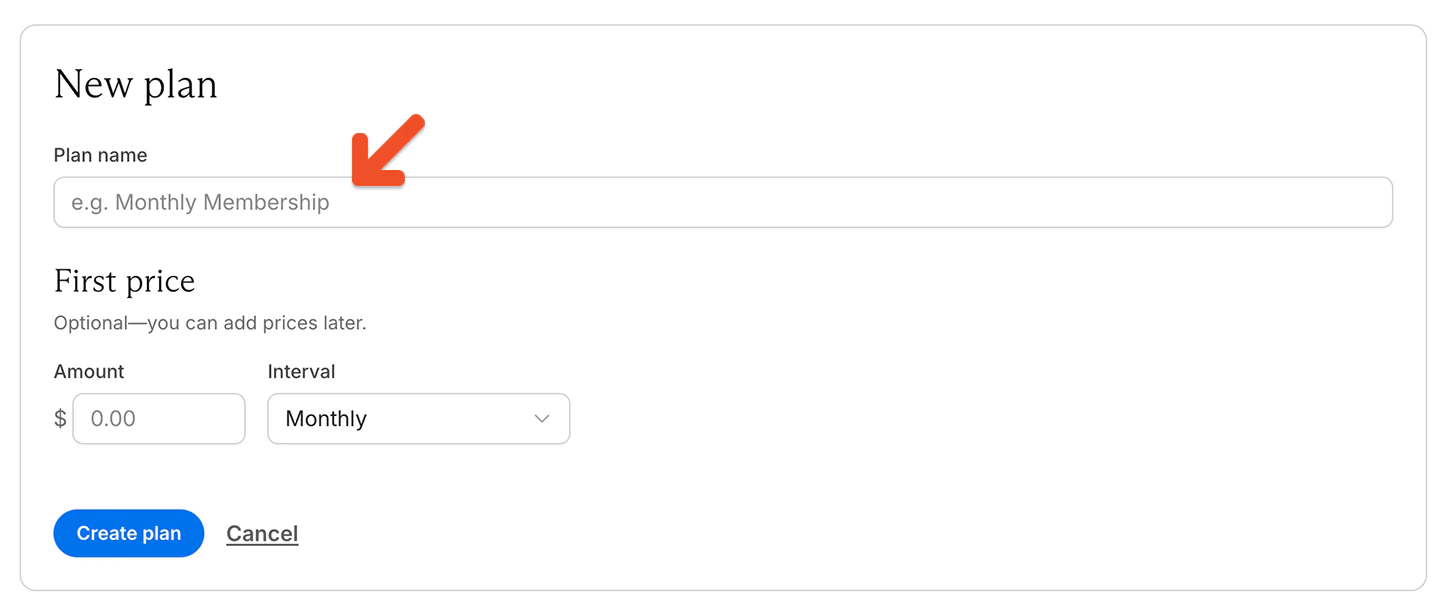
If you’re creating different tiers of benefits (e.g., Bronze, Silver, or Gold) or renewal schedules (e.g., monthly or annual), you should set up separate plans and prices for each level and consider enabling upgrades and downgrades between them.
Accept custom payments
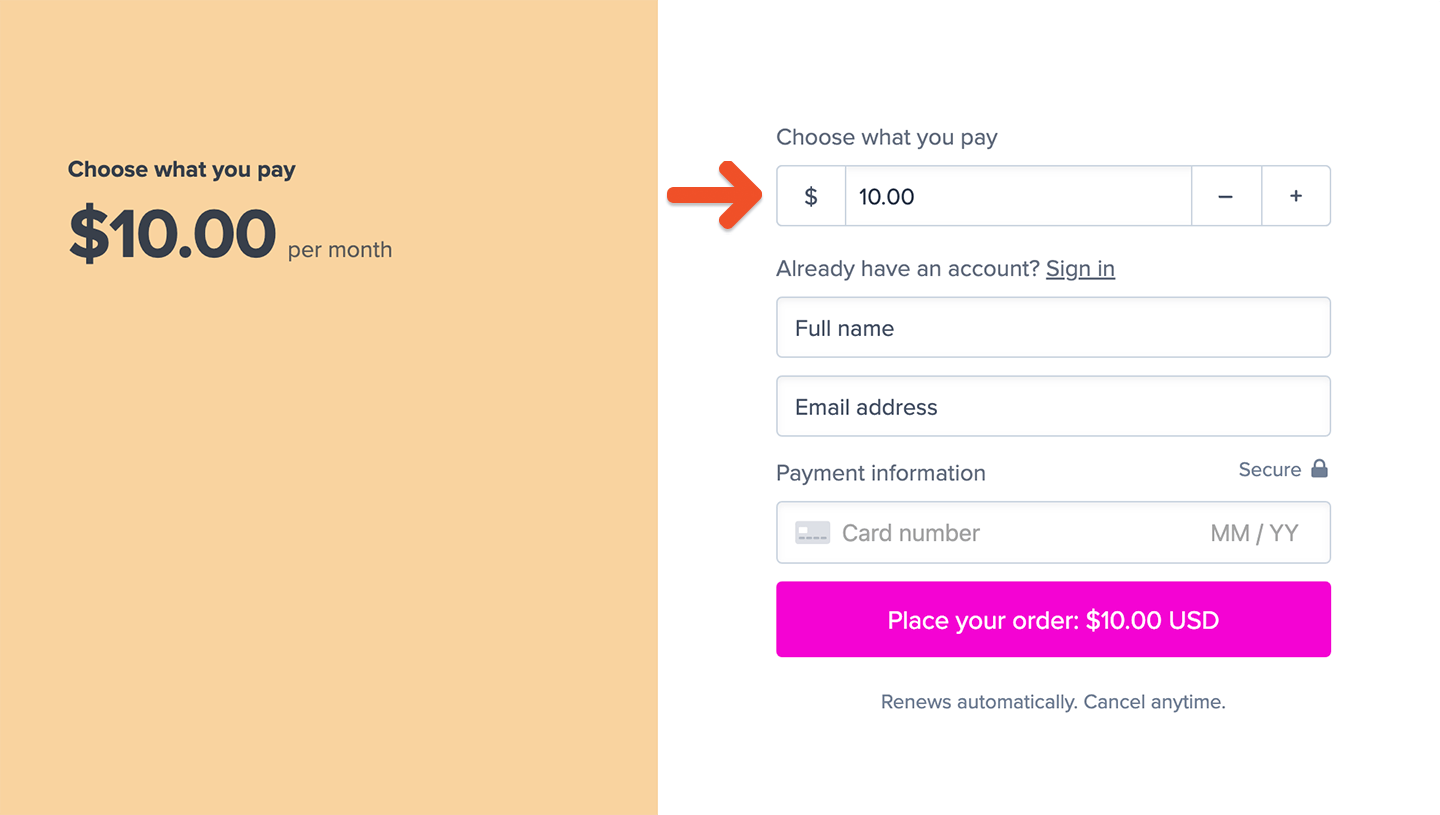
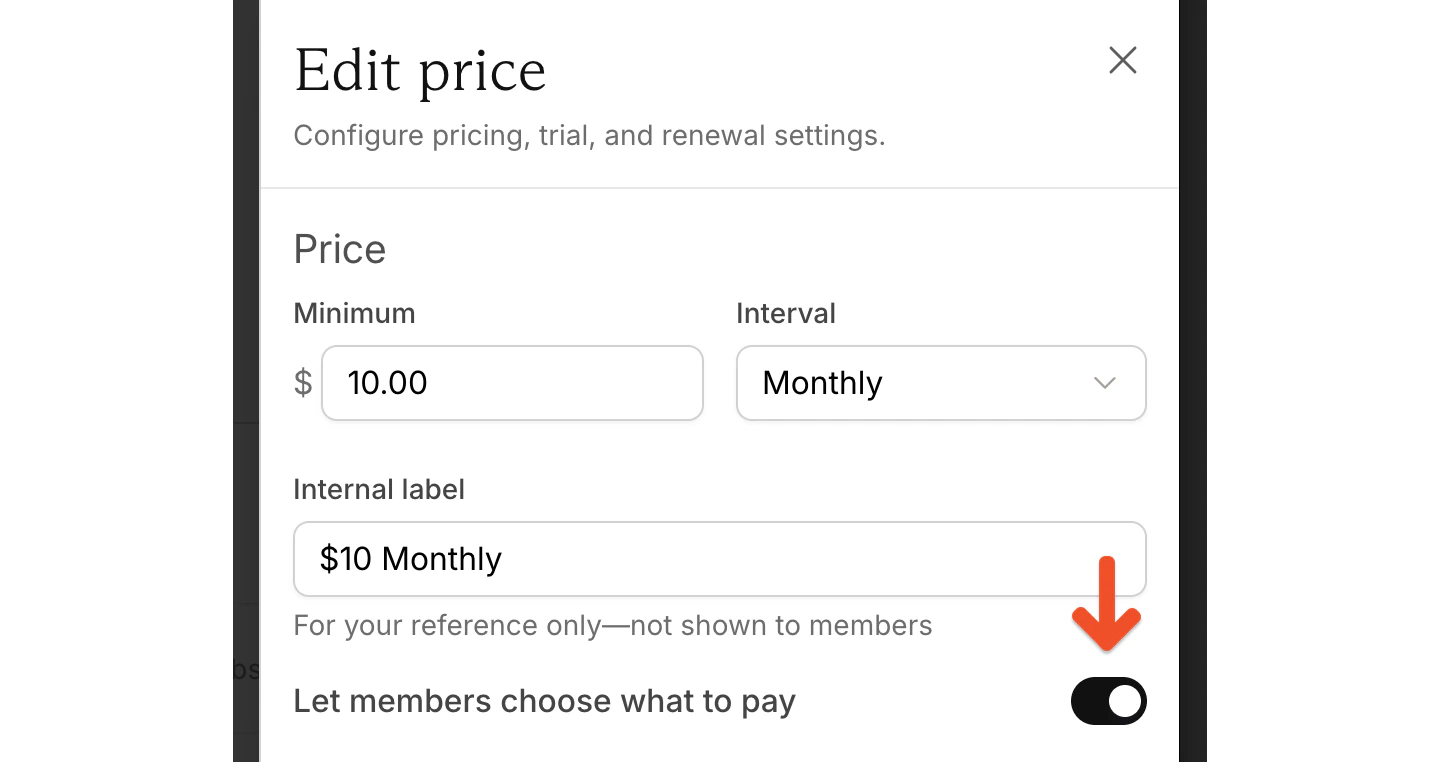
When purchasing the plan, members will see a field where they can enter their own price. Any amount they enter must meet or exceed the minimum price. No matter how much a member pays, they receive the same access and benefits tied to the plan.ACCOUNT-URL with your actual Account URL subdomain, which can be found in your Memberful dashboard via Website → Settings. Also replace the number 2 with your own plan ID, which you can find in your plan’s purchase link.
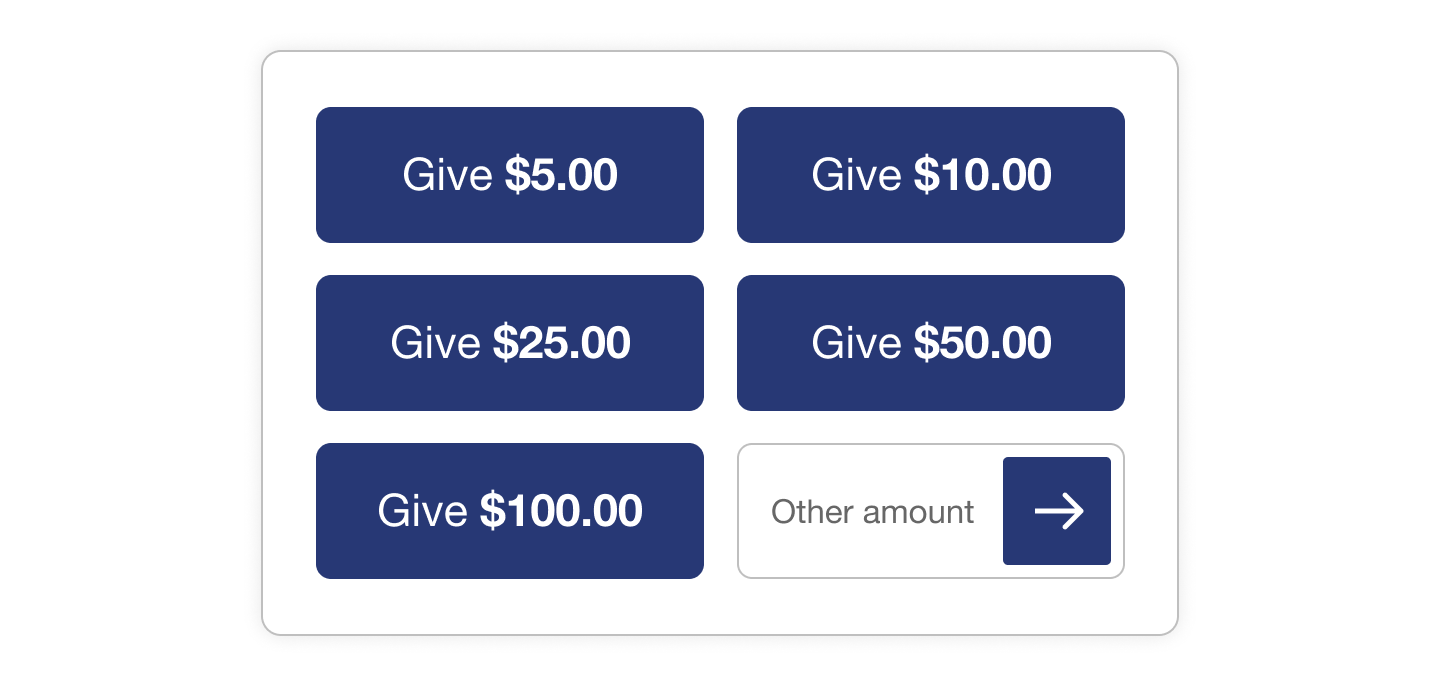
When you build the membership sales page on your website, create buttons for each of the amounts you’d like to collect with the proper amount in the URL.
You can also create an open text field for members to enter a fully custom amount of their own choosing. You can get example HTML at any time from the Plan Settings page, and then customize it using your own CSS and HTML.
Edit a member’s custom amount
You can edit the custom amount a member is paying through their subscription page in the dashboard. Search for the member by name or email. Under Custom price, click Change and enter a new amount that’s equal to or greater than the plan’s minimum price. The member will be charged this amount at their next renewal, and all renewals going forward.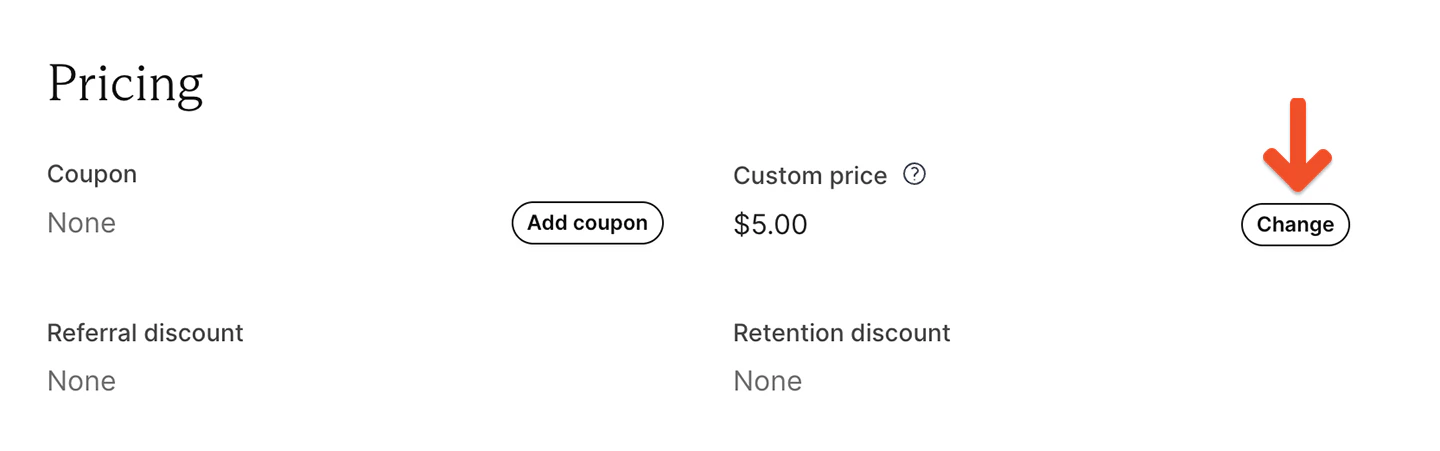
Move members with custom prices
When members are moved from one price to another, Memberful checks whether the destination price also allows members to choose what they pay.- If the destination price allows members to choose what they pay, members keep their custom price as long as it is at or above the destination price.
- If the destination price does not allow members to choose what they pay, the custom price is replaced with the destination price on the next renewal.