Integrate Klaviyo
To start syncing, you will need to provide a private API key. You can create a new one in your Klaviyo dashboard:- Go to Klaviyo → Account → Settings → API Keys → Create Private API Key.
- Name your API key.
- Select Custom Key and enable Full Access for the List, Profiles, and Subscriptions scopes.
- Click Create.

- Copy your private key.

- In your Memberful dashboard, go to Content → Email marketing, then click Connect under Klaviyo. Paste your API key and click Connect to Klaviyo.
Create or select a Klaviyo list
After connecting, you can sync to an existing list or create a new one.
Select an existing list
Select an existing list and click Finish. You will return to Memberful, where a link to your Klaviyo list will appear for easy access. Klaviyo uses double opt-in by default. Unless you change your list to single opt-in, members will receive a confirmation email they must click before being added to your list.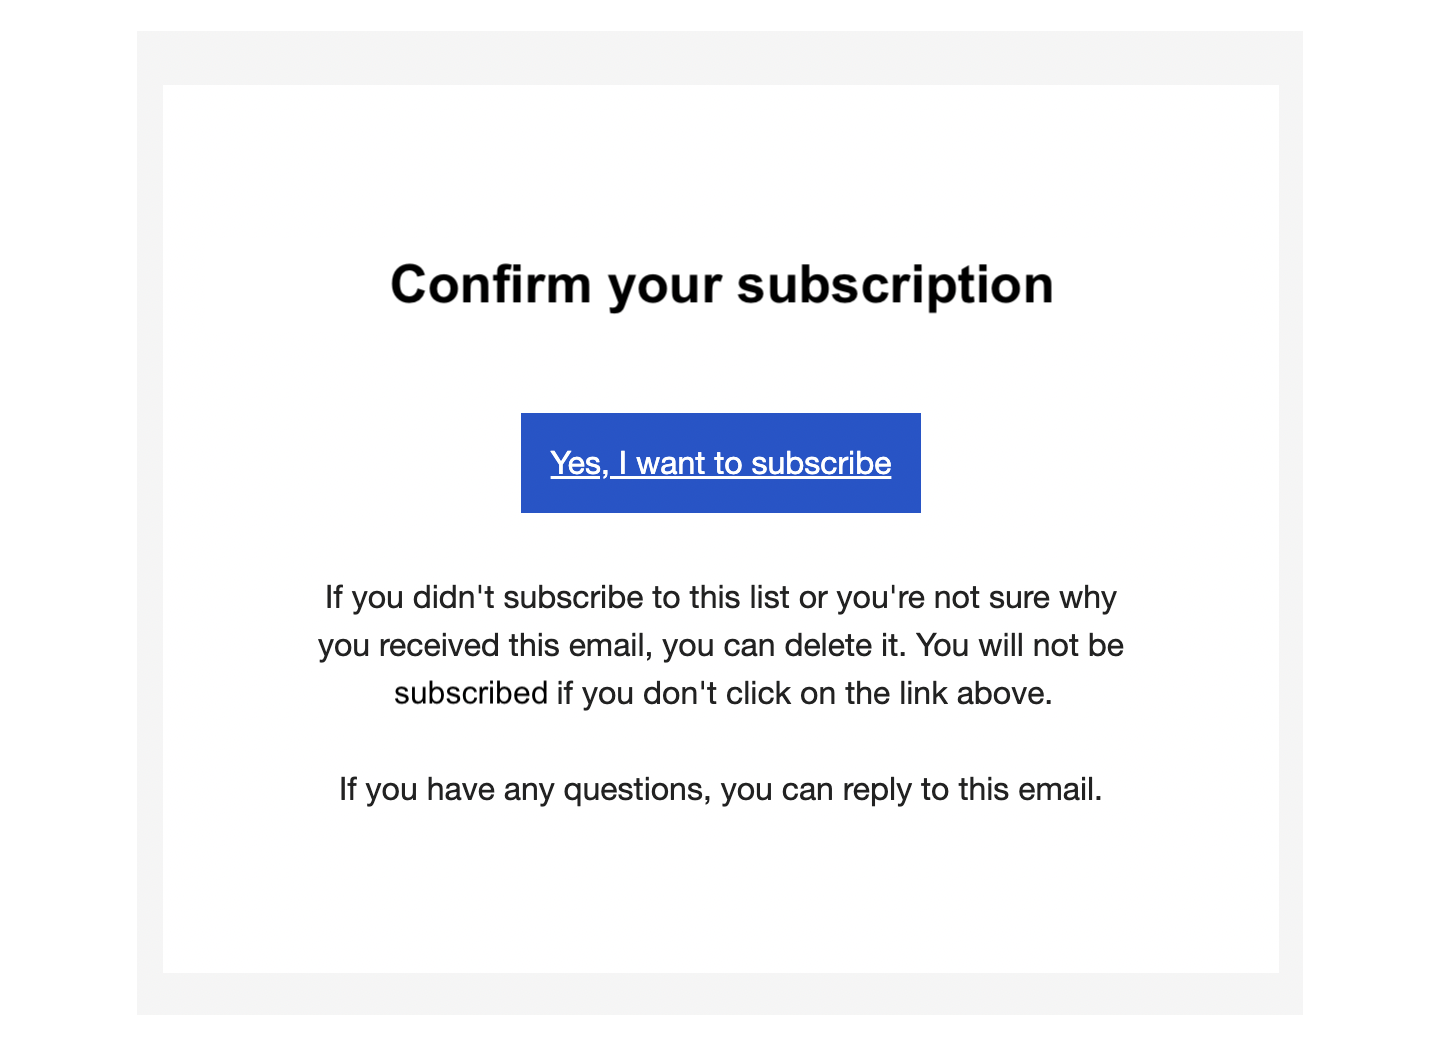
Sync to a dedicated Memberful list
Create a new list through Memberful and click Finish. You will then be sent back to Memberful where we include a link for you to easily access your list. Your new list will be called Memberful + your account name.Members are subscribed to your list automatically, but they will appear as “unsubscribed” in Klaviyo. This does not affect their ability to receive emails.
How we keep your list up to date and synced
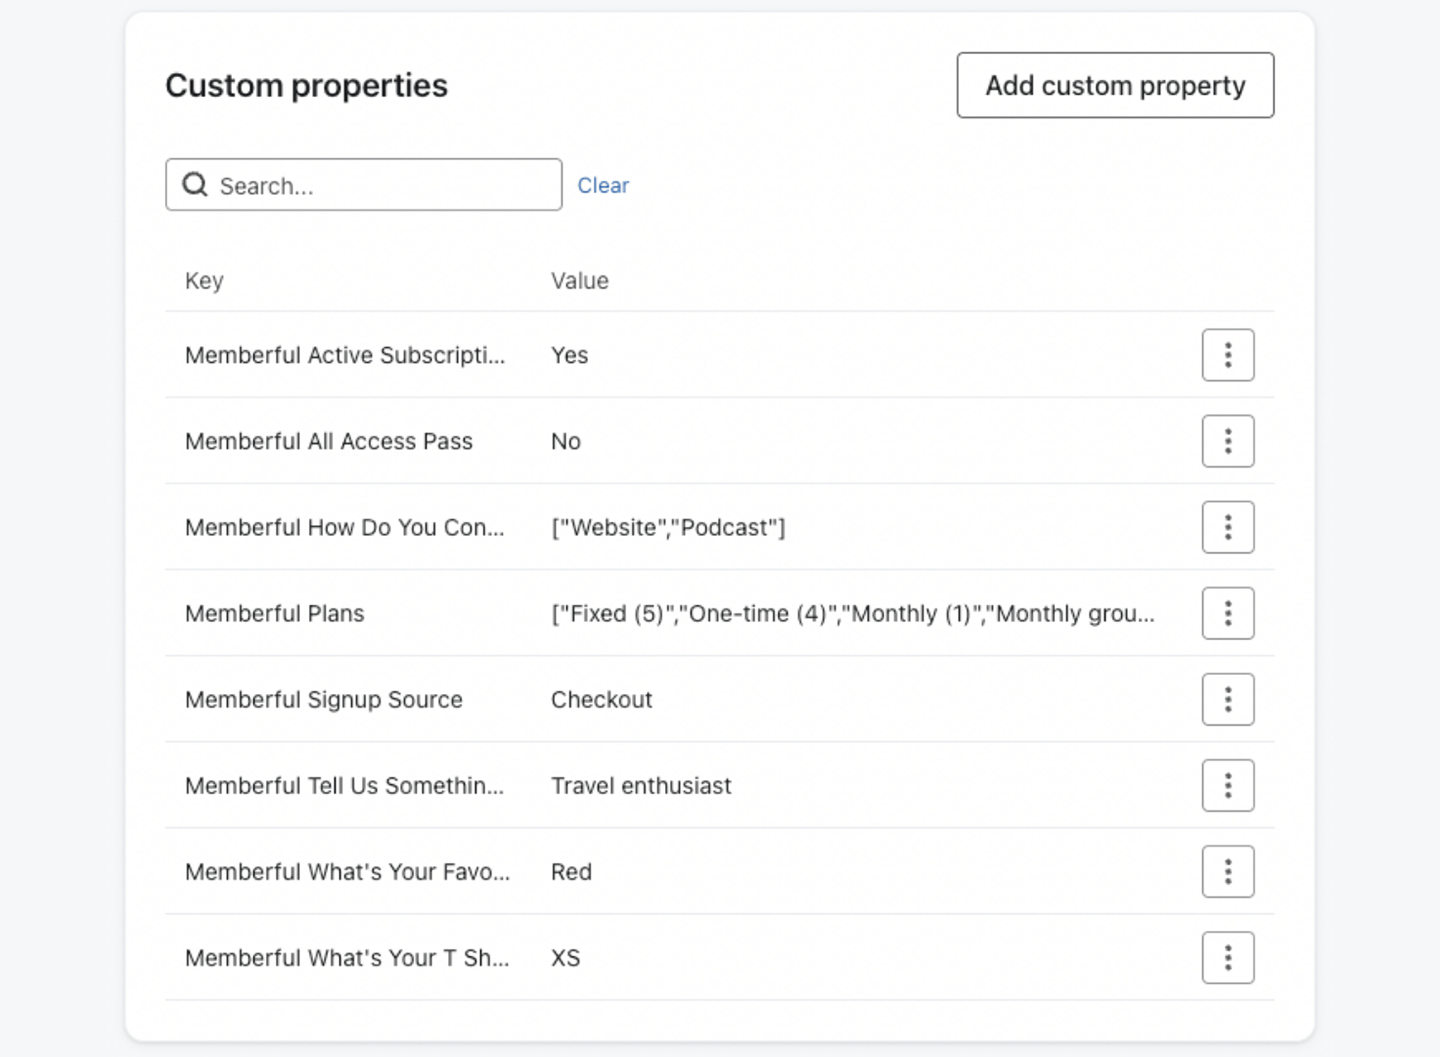
When you first connect, Memberful either syncs with your existing list or creates a new list called Memberful + your account name in Klaviyo. Memberful imports all your existing members into that list as Klaviyo profiles. Your list stays automatically synced — new members are added, existing members are updated, and key details are synced as custom profile properties. To view these details, click a subscriber in Klaviyo to see the Memberful properties in their profile.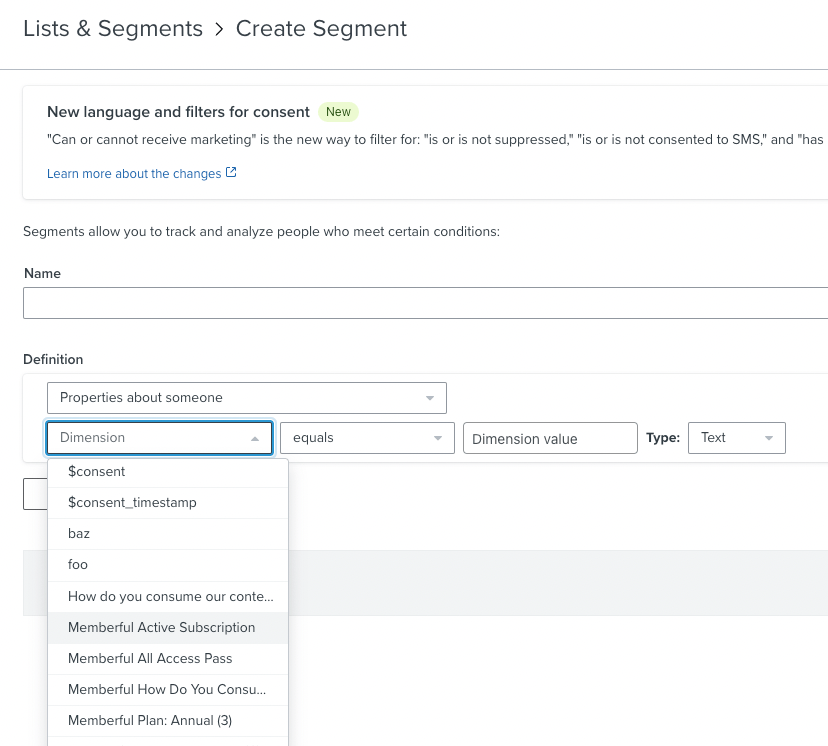
Don’t manually edit Memberful-managed custom profile properties in Klaviyo. Memberful uses these properties to keep members synced. Manual changes can cause some members to stop syncing correctly, make integration issues harder to troubleshoot, or require reconnecting the integration to refresh member data.
- Memberful Plans: Lists the plans that the member is currently subscribed to. This property is not synced if the member is not subscribed to any plan.
- Memberful Products: Lists the downloads that the member has purchased. This property is not synced if the member has not purchased any product.
- Memberful Referral Link: The member’s unique referral link.
- Memberful Signup Source: The member’s signup source (for example, checkout, free registration, created by admin, team subscription).
- Memberful Active Subscription: “Yes” for members with at least one active subscription, “No” otherwise.
- Memberful All Access Pass: “Yes” for members with an All Access Pass, “No” otherwise.
- Memberful CUSTOM_FIELD: Contains responses from Memberful custom fields. Multiple answers are shown as an array. This property is not synced if there are no answers.
Members are not removed from your Klaviyo list when their subscription expires. If a member’s subscription ends, Memberful updates or removes the related properties. If a member changes their email address, Memberful adds the new address as a new subscriber and removes Memberful data from the old one.
Send a targeted campaign
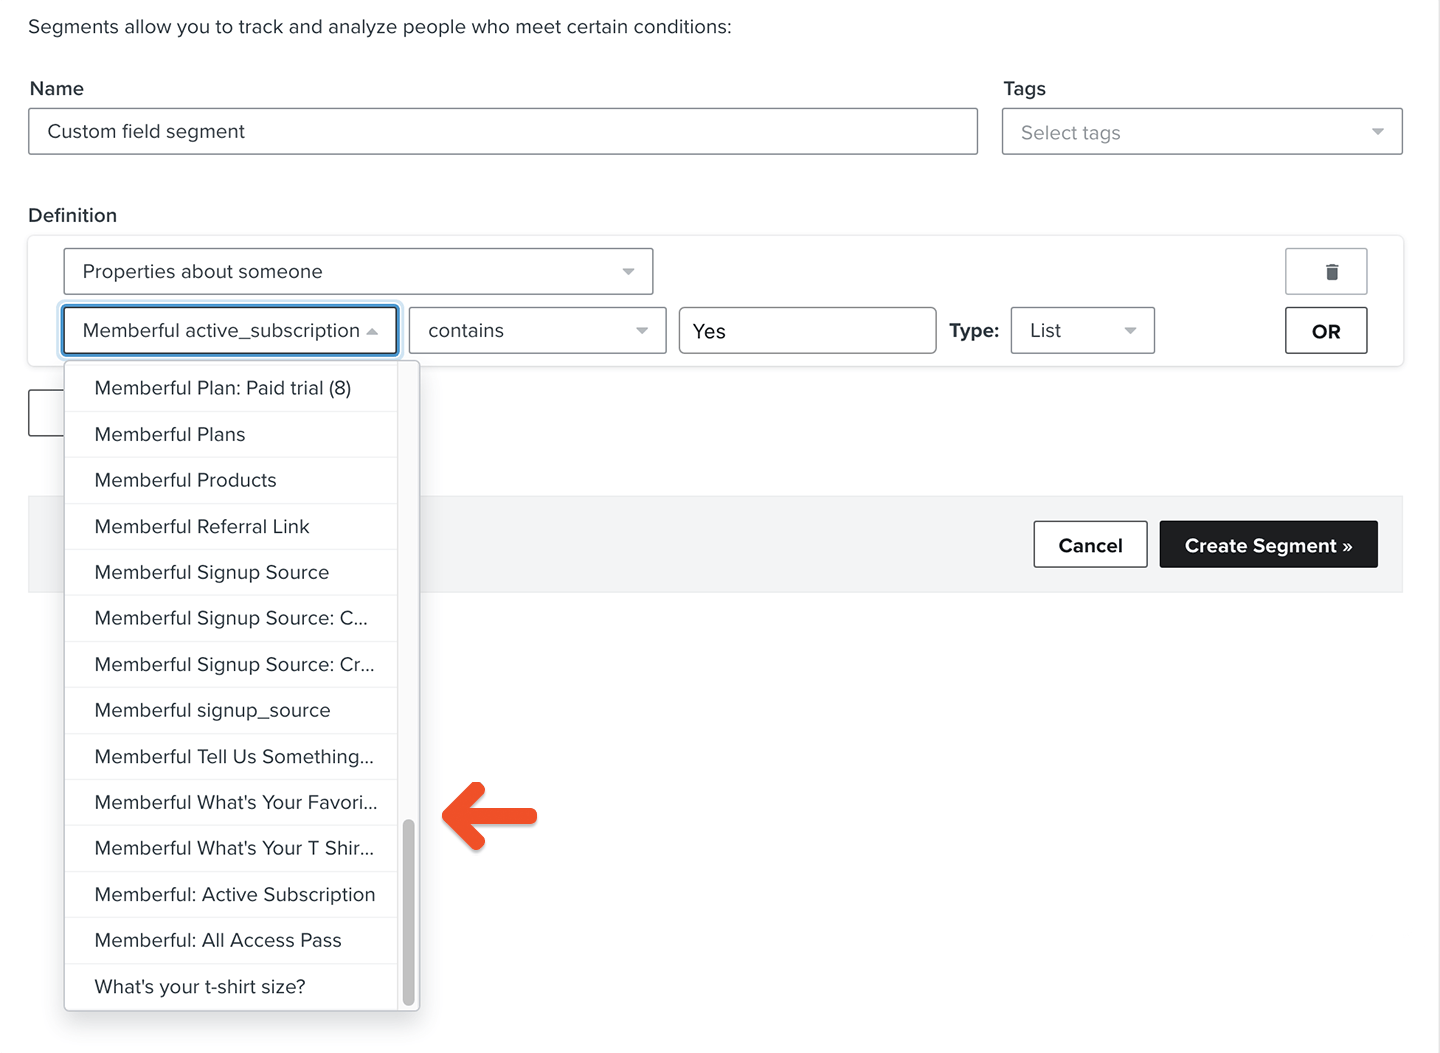
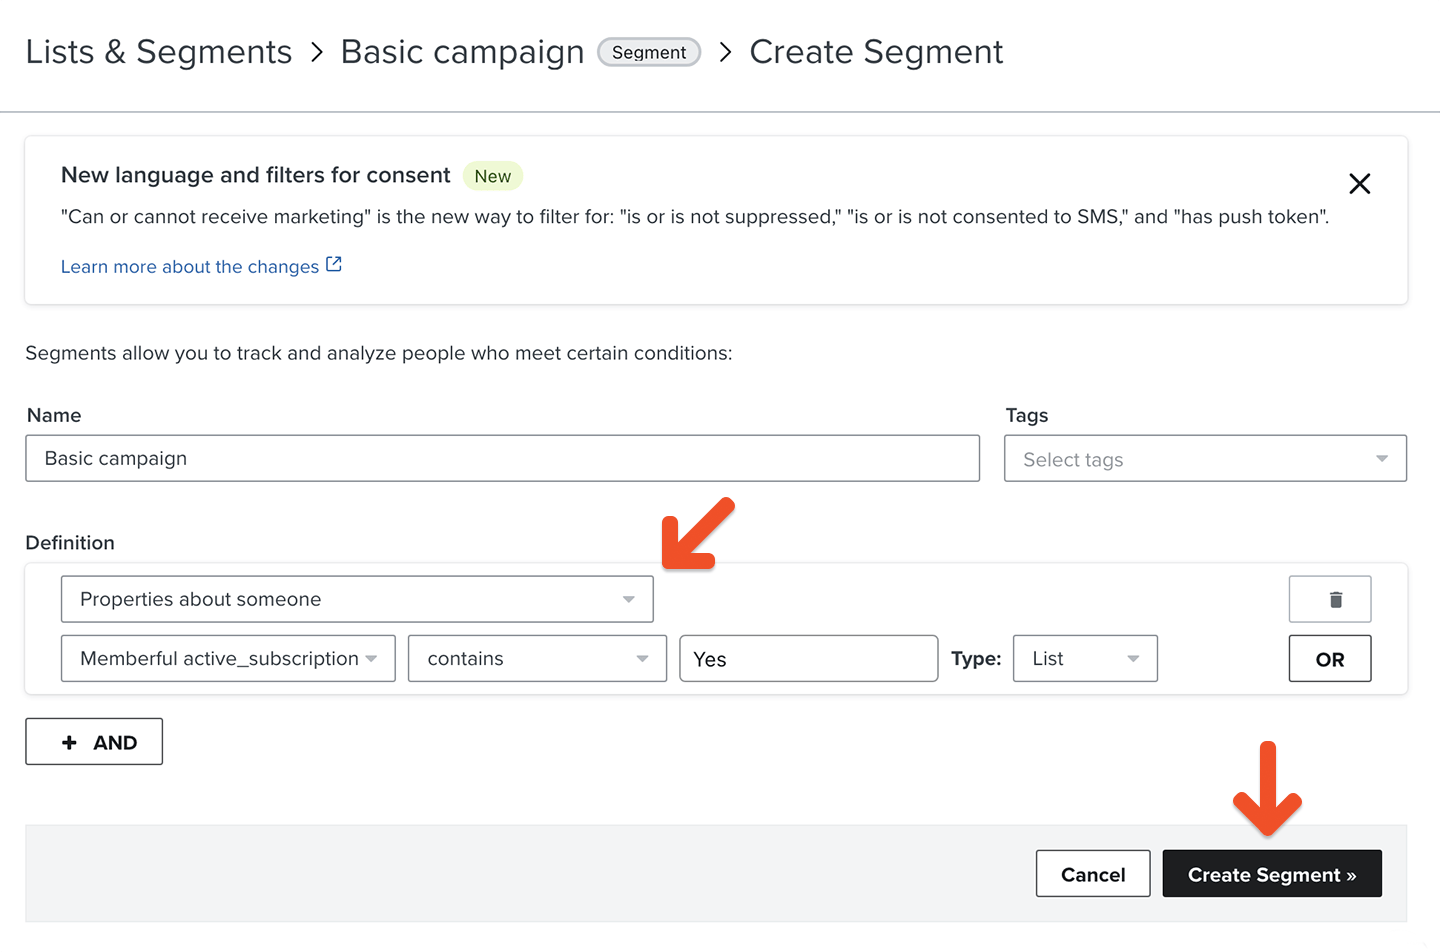
To send newsletters or targeted campaigns, create segments using the Memberful properties synced to Klaviyo. You can target:- All active members: Create a segment where Memberful Active Subscription contains “Yes.”
- Specific plans: Create a segment based on the Memberful Plans property.
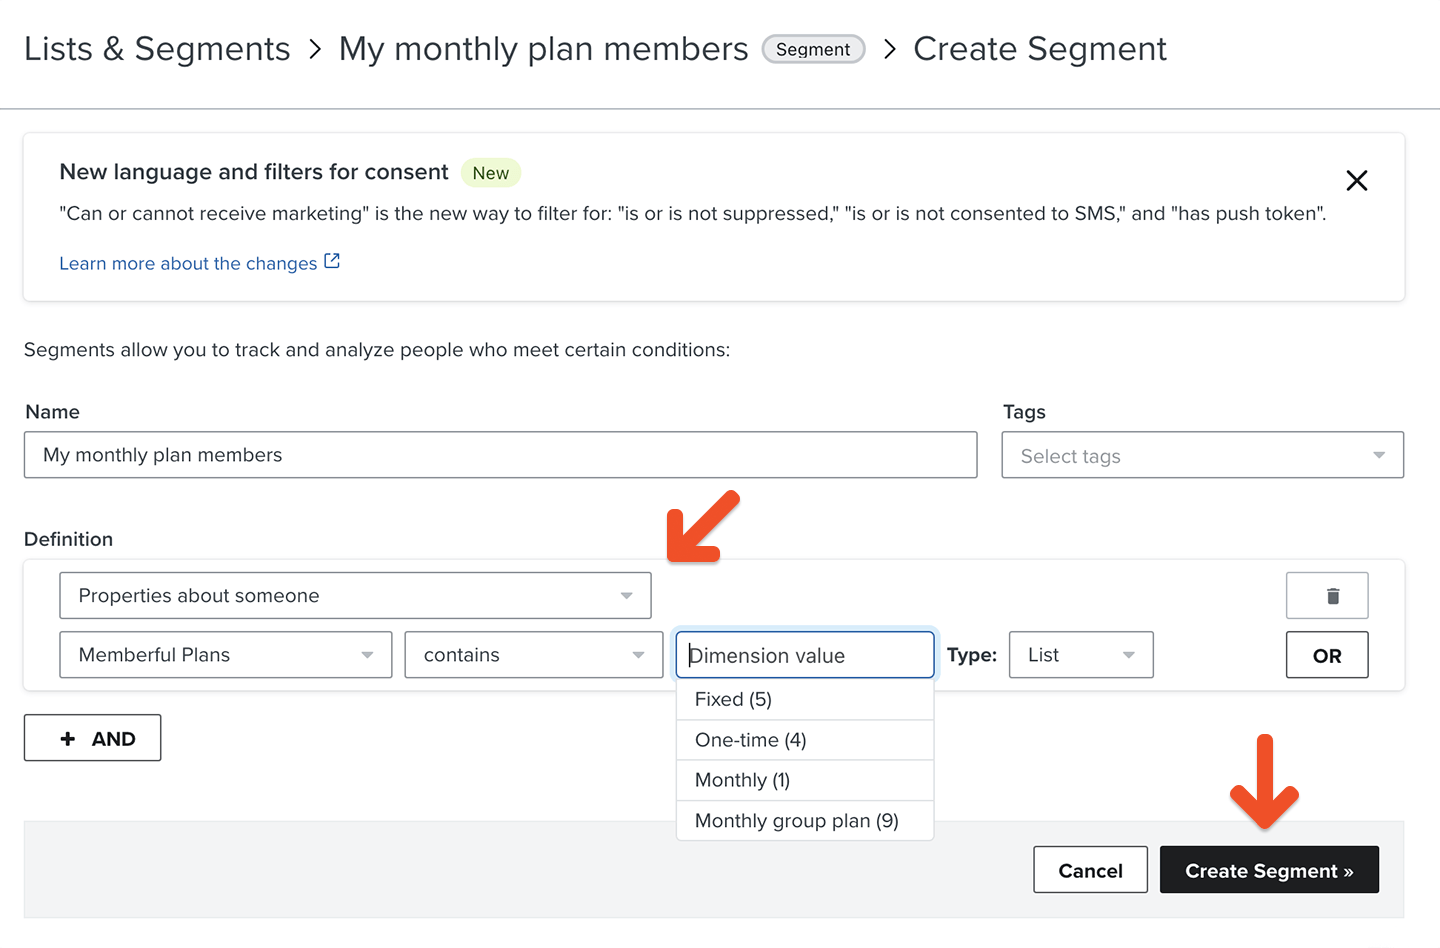
- Go to Audience → Lists & segments → Create List / Segment → Segment.
- From the Definition dropdown, choose Properties about someone, then select the Memberful property and condition you want to use.
Send automated flows
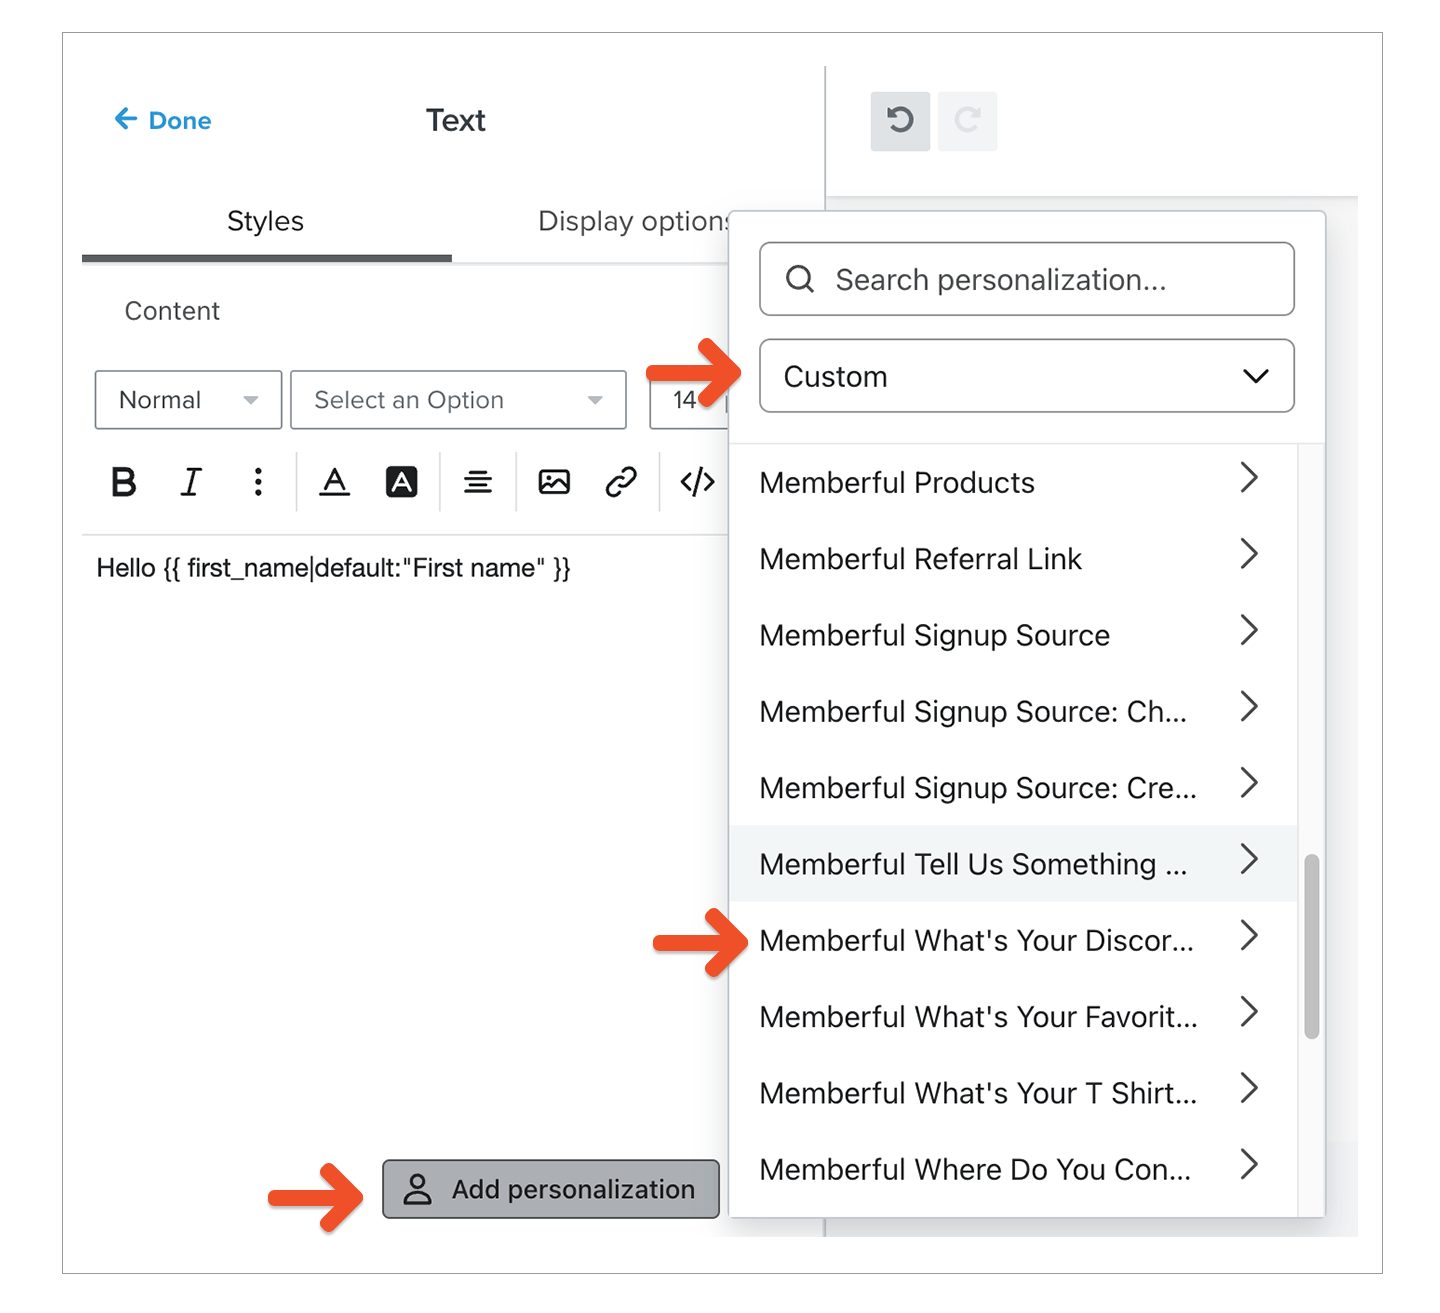
Combine segments with Klaviyo flows to send event-triggered emails.Add a referral link to your campaign
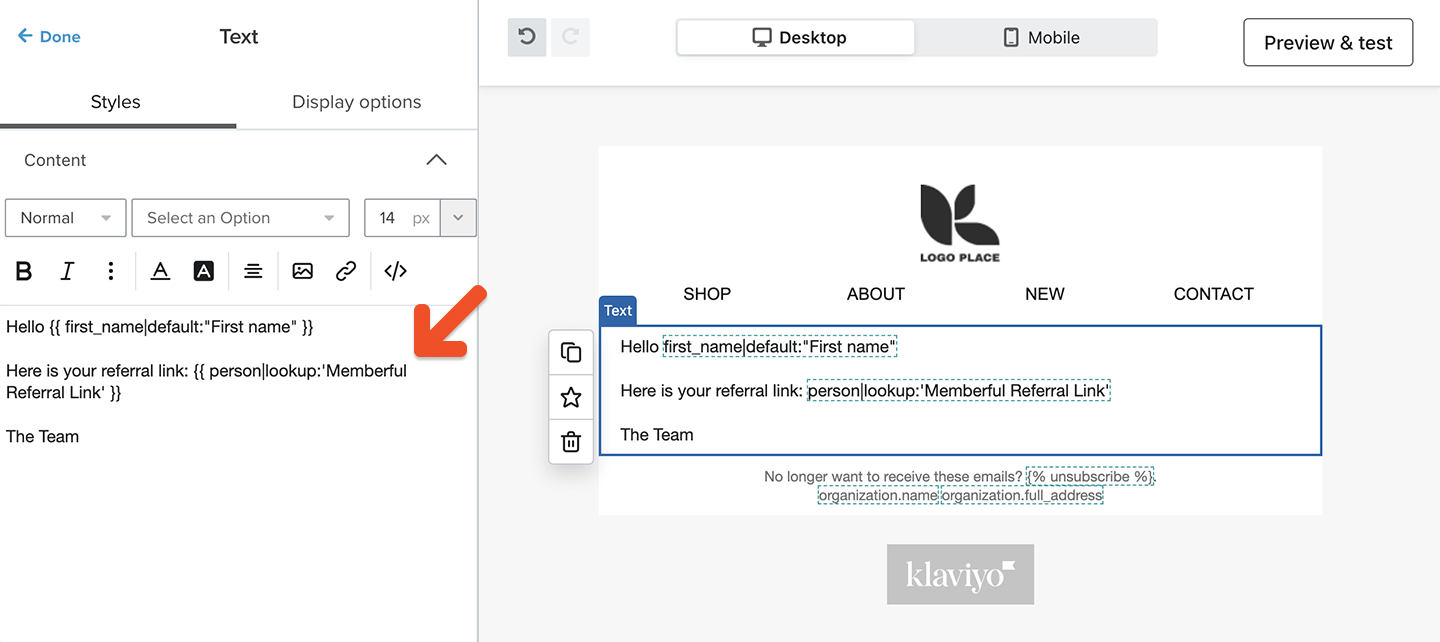
If you have enabled Memberful referrals, you can include referral links in your campaigns so members can earn rewards for referrals. We store your member’s referral link as a custom property in their profile. Use this code to insert a custom property in your campaign:{{ person|lookup:'<CUSTOM_PROPERTY_NAME>' }}
The “person” keyword refers to the member’s profile, while this keyword retrieves the given custom property from the profile:
lookup:'<CUSTOM_PROPERTY_NAME>'
For example, to insert a member’s referral link:
Use custom field answers for segmentation and personalization
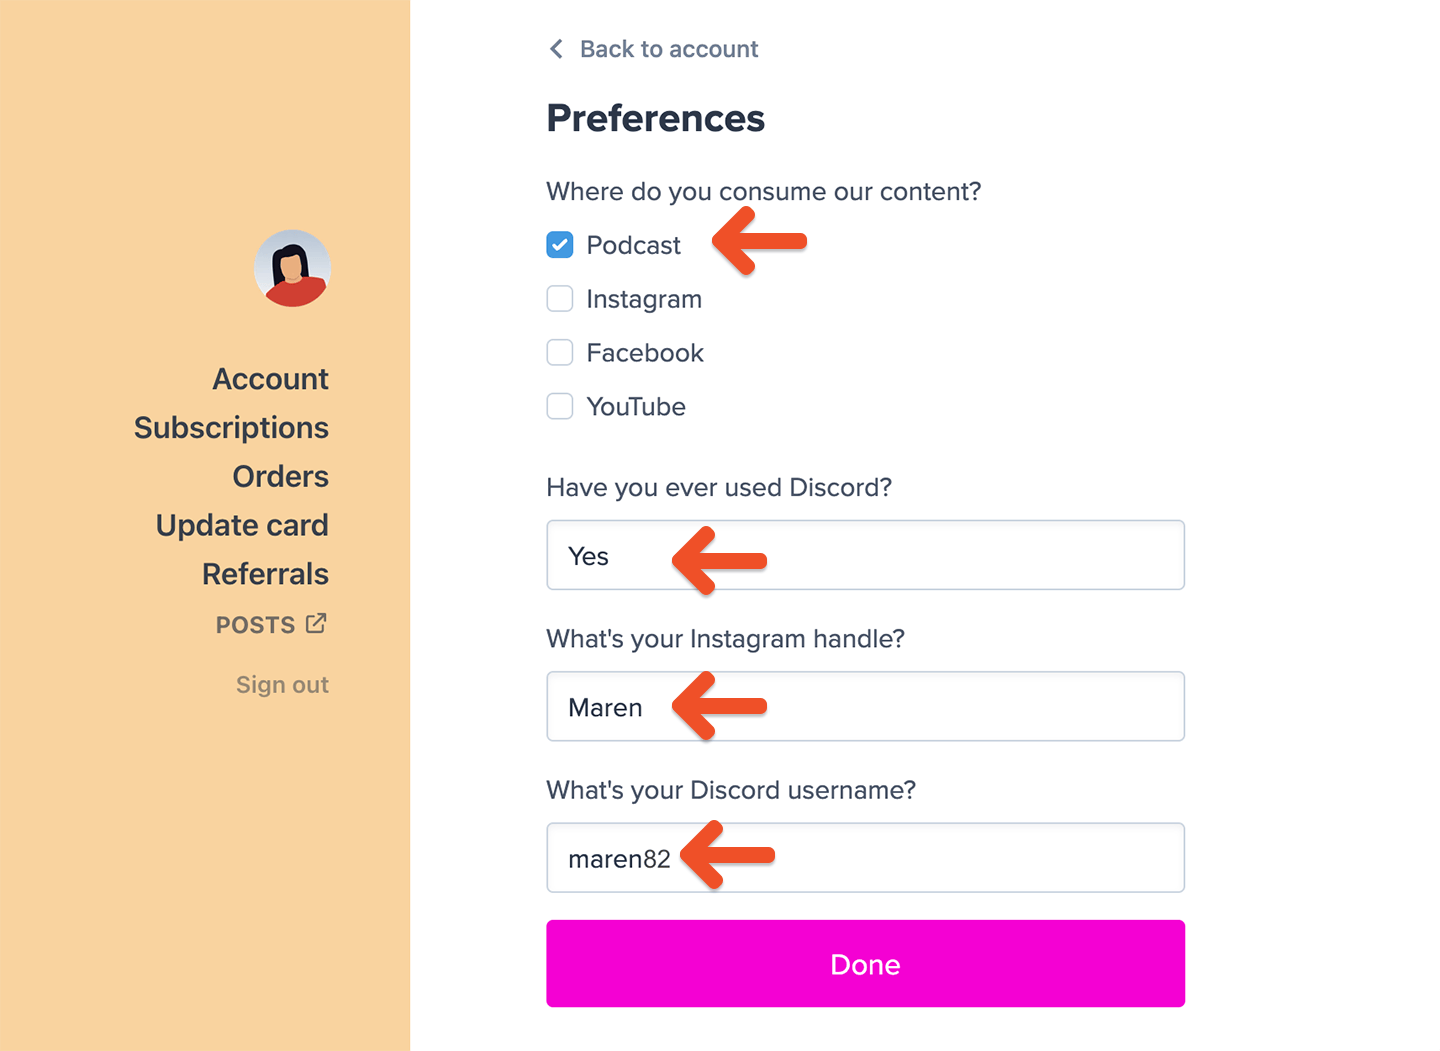
You can collect up to 5 custom fields right after your members complete the checkout form. You can then use those answers to segment your subscribers or personalize email campaigns.