

Set up your digital membership card in PassKit
For more information about designing a pass, see PassKit’s design guides.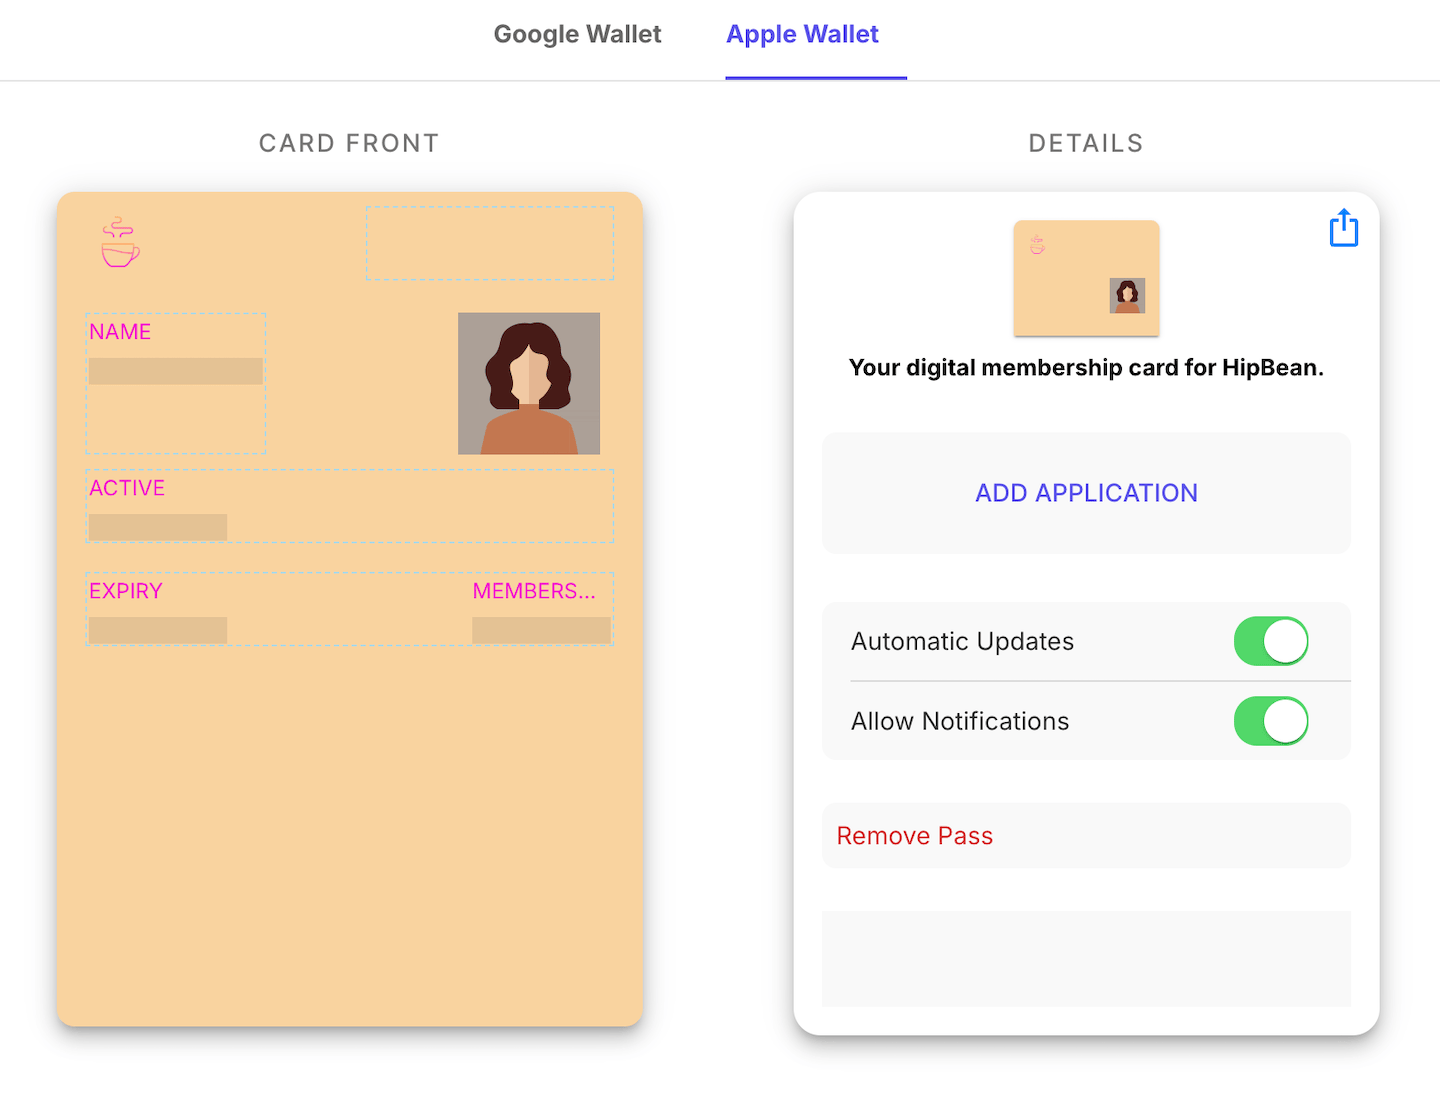
1
Create a new pass
From your PassKit dashboard, click Create New.
2
Choose a membership pass
Select Basic Membership as the pass type, then click Create Pass.
3
Add membership fields
Add fields for the member’s name, membership plan, membership status, and expiration date. Use New Dynamic Field for the membership plan and membership status. Add the same fields to both the Apple Wallet and Google Wallet designs.
4
Add your branding
Add your logo and colors.
5
Set the external ID
Go to the Settings tab inside your membership program. Use the auto-fill feature to set the email address as the external ID. You’ll map this field to the member’s email address in Zapier.
Make sure to add the exact same fields in both the Google Wallet and Apple Wallet designs.
Set up an Apple Wallet pass certificate
Apple requires an Apple Developer Program account to create a certificate for Apple Wallet passes. The program costs US$99 per year, paid to Apple. If you already have an account, there’s no additional fee to create a certificate. Google Wallet doesn’t require an equivalent certificate. For setup instructions, see Adding a certificate to PassKit.Set up Memberful as your Zapier trigger
1
Create a Zap
Log in to Zapier and create a new Zap.
2
Choose Memberful as the trigger app
Select Memberful as the trigger app.
3
Choose the subscription trigger
Select Subscription Created.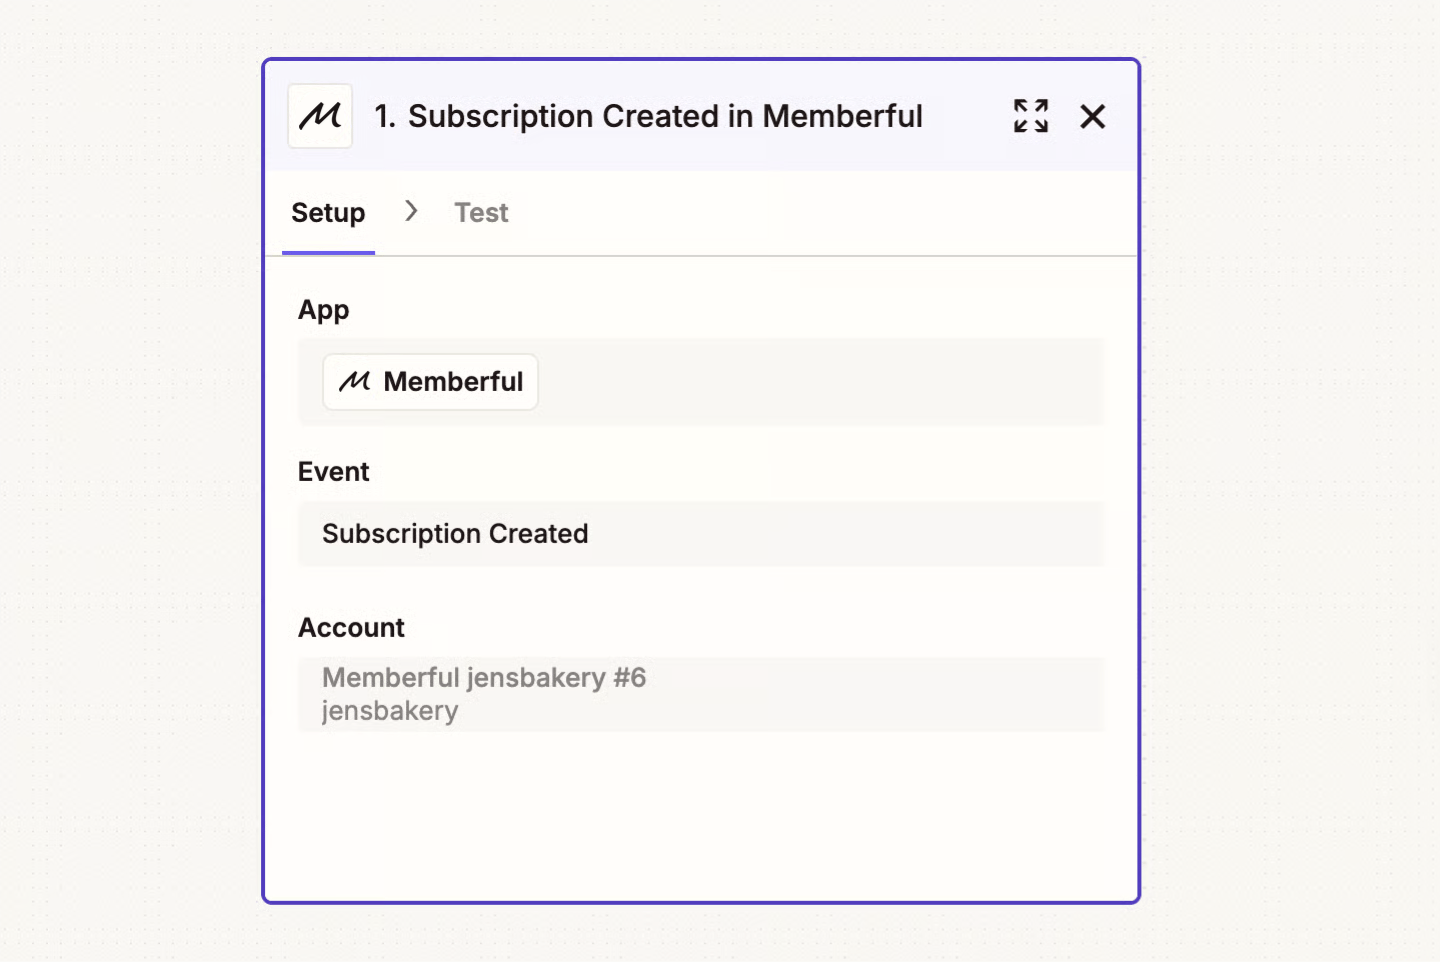
4
Connect your Memberful account
Connect your account to Zapier using your API key. For details, see Create an API key for Zapier.
5
Test the trigger
Test the trigger to confirm Zapier can receive the member data. During the test, Zapier displays test data, not actual data from your Memberful account.
During this step, you’ll see test data, not actual data from your Memberful account.
Set up PassKit as your Zapier action
For more information about mapping fields, see Send data between steps by mapping fields.1
Choose PassKit as the action app
Select PassKit as the action app in your Zap.
2
Choose the Enroll Member action
Select Enroll Member.
3
Connect your PassKit account
Connect your PassKit account to Zapier.
4
Map the card fields
Map the fields on the digital card to the data from the Subscription Created trigger. Map the external ID field to the member’s email address.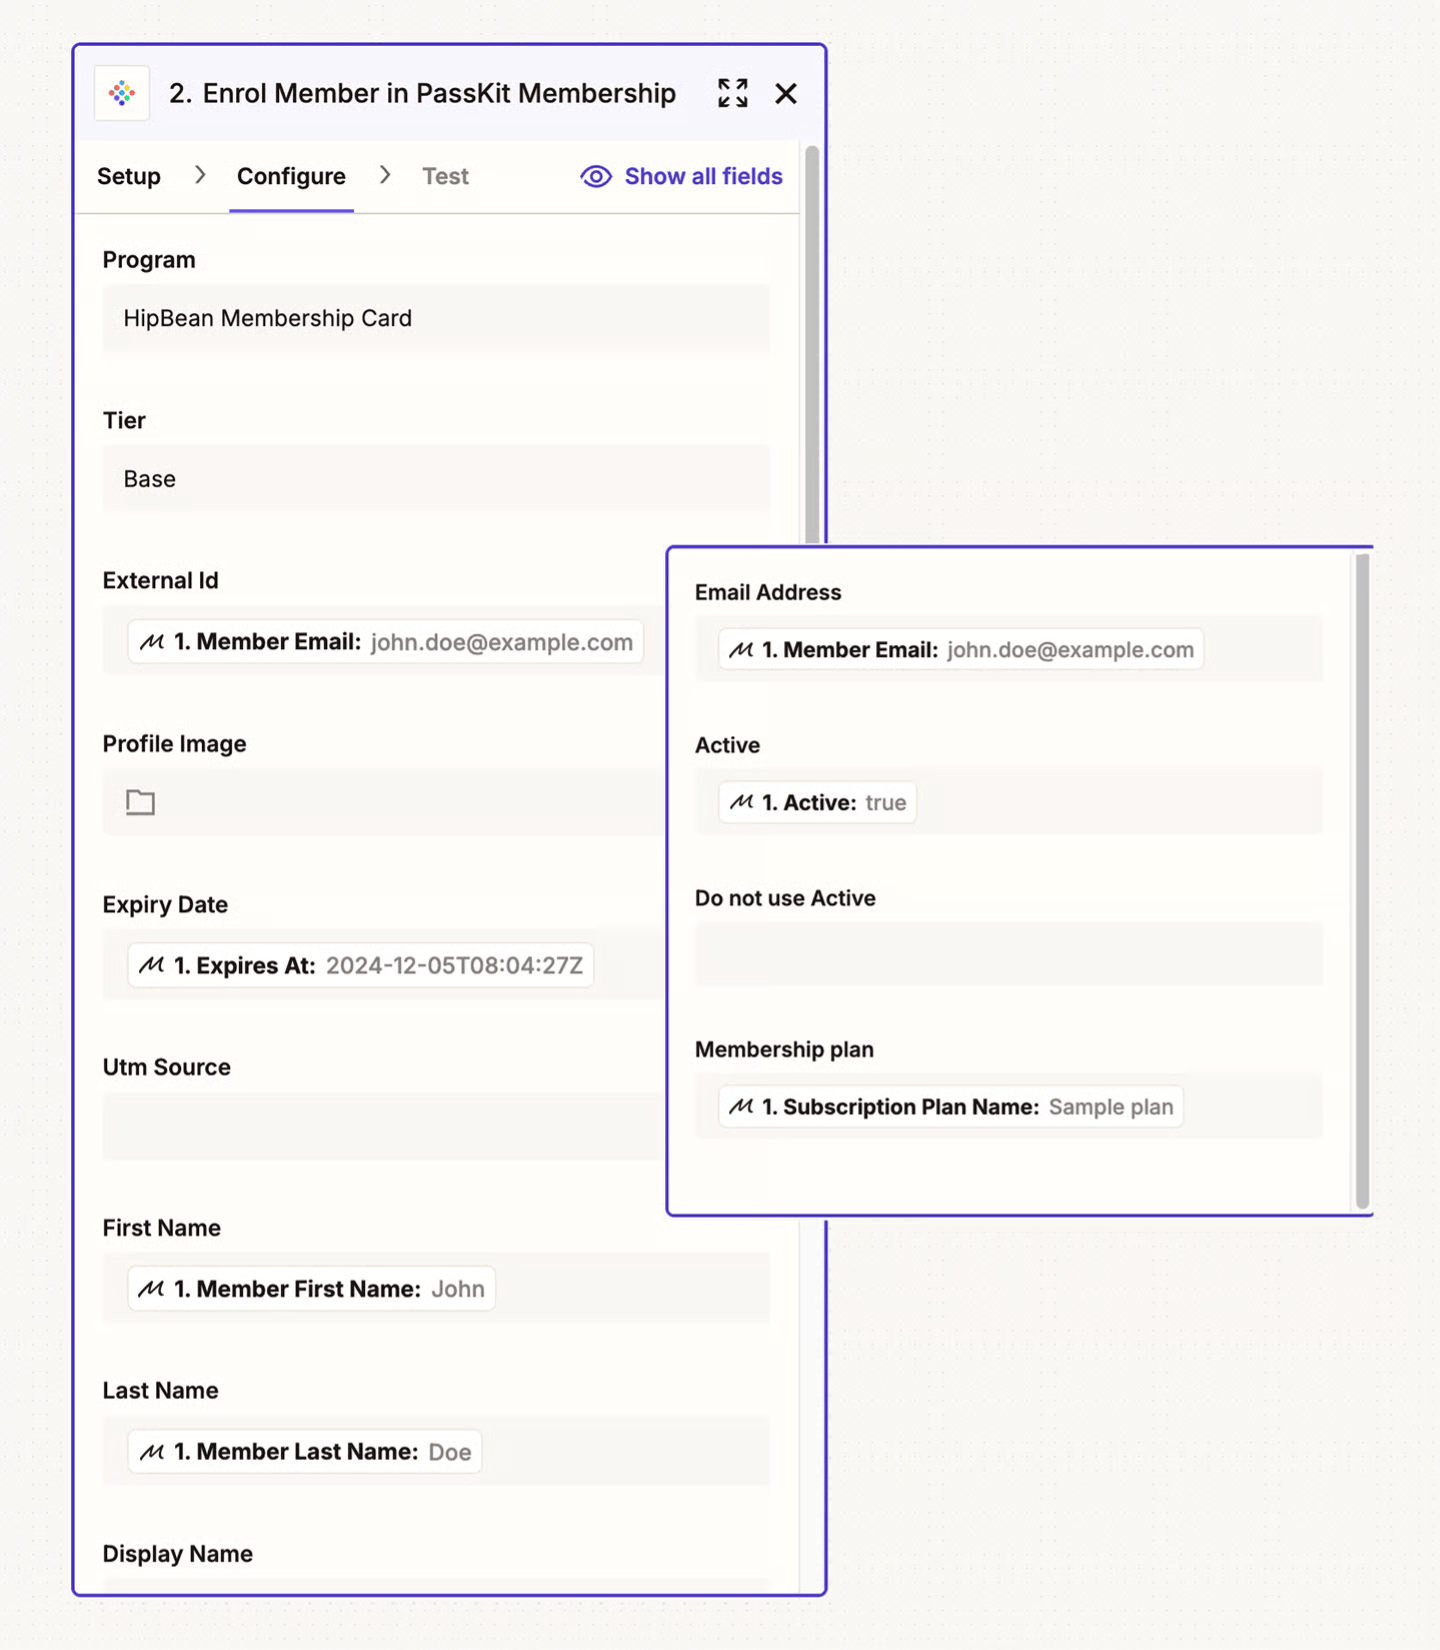
5
Test the action
Test the action to confirm PassKit creates a digital card with the test member information.
Activate your Zap
Launch your PassKit project before you publish the Zap. PassKit keeps Draft and Live projects separate. Passes issued in a Draft project expire after 48 hours and aren’t transferred to the Live project. In your Zap, select the program and tier from the Live project, then test and publish the Zap. Publish your Zap, then enable PassKit’s welcome email to send members a unique pass link. You can use PassKit’s Mailchimp integration to deliver the cards instead. Members can use the link to add the card to Apple Wallet or Google Wallet.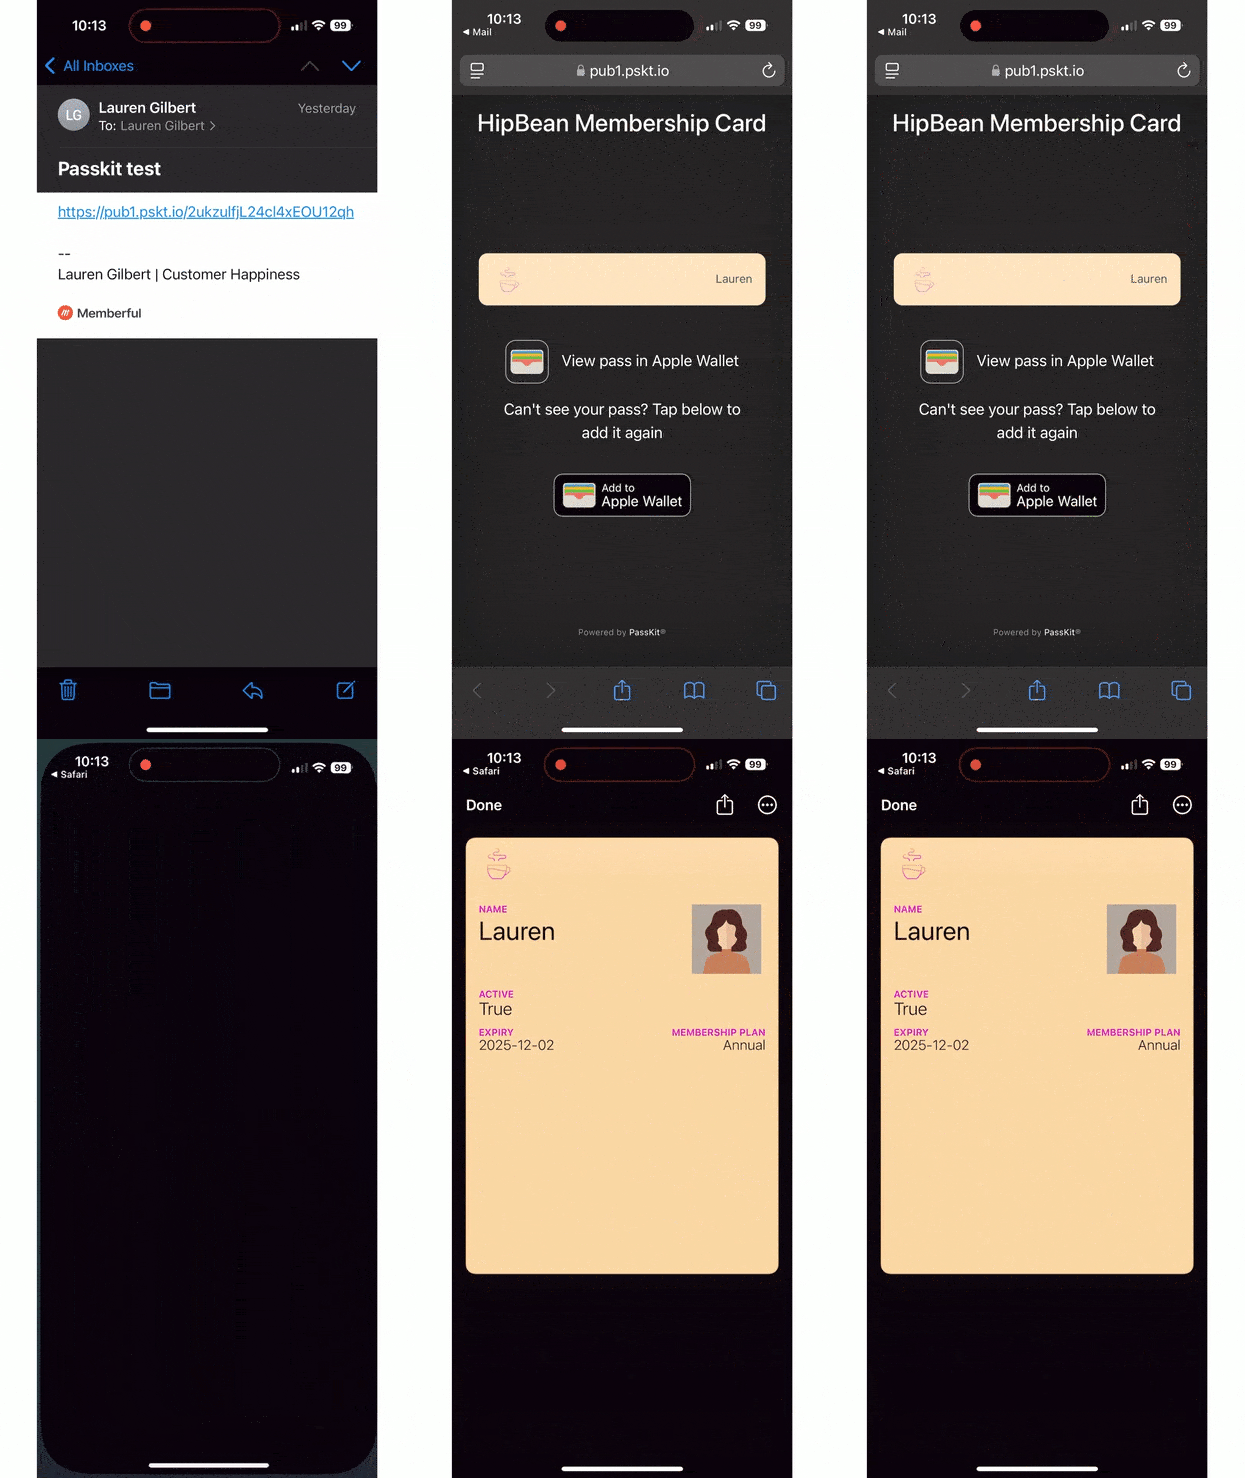
Keep membership cards up to date
Create additional Zaps to update a member’s existing card when their subscription changes. Use the member’s email address as the External ID to find their card in PassKit.- Subscription deactivated: Update the membership status field on the card to show that the membership is inactive. This trigger fires when a subscription is suspended, expires, or becomes inactive.
- Subscription renewed: Use PassKit’s Update Expiry Date action to update the card’s expiration date.
- Subscription reactivated: Update the membership status field to show that the membership is active. Update the expiration date too if it has changed.
- Subscription updated: Update the membership plan field when a member changes plans.