Add the Memberful domain in your GA4 settings
Follow Google’s documentation to set up cross-domain measurement. Under Domain add memberful.com.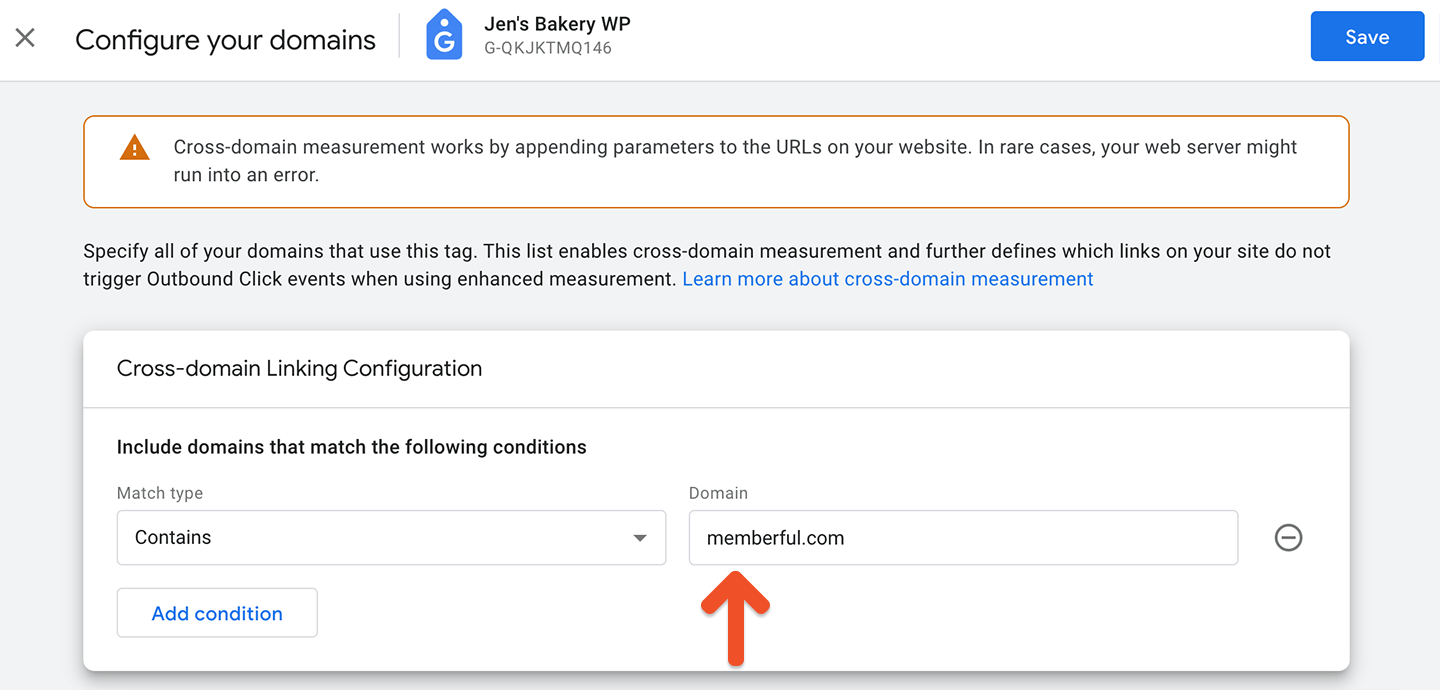
Create a data stream to receive a Measurement ID
From your Google Analytics account, click Admin (the gear icon in the bottom-left corner of the page).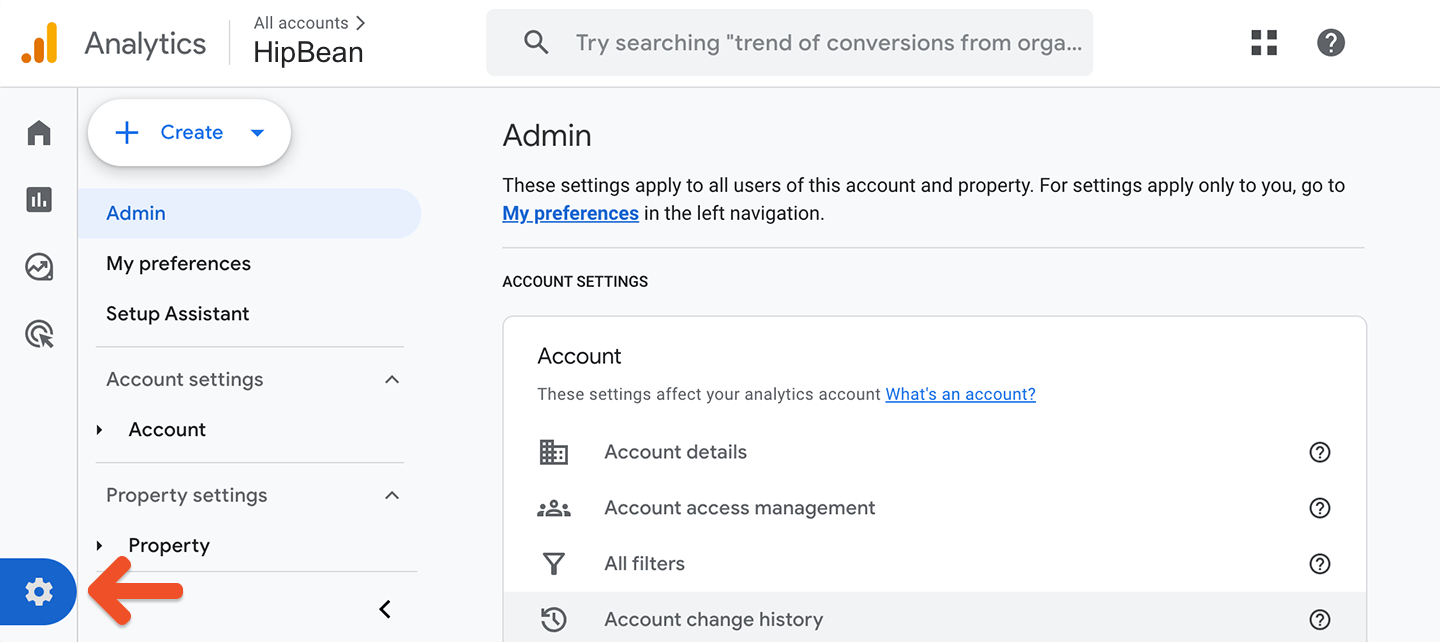
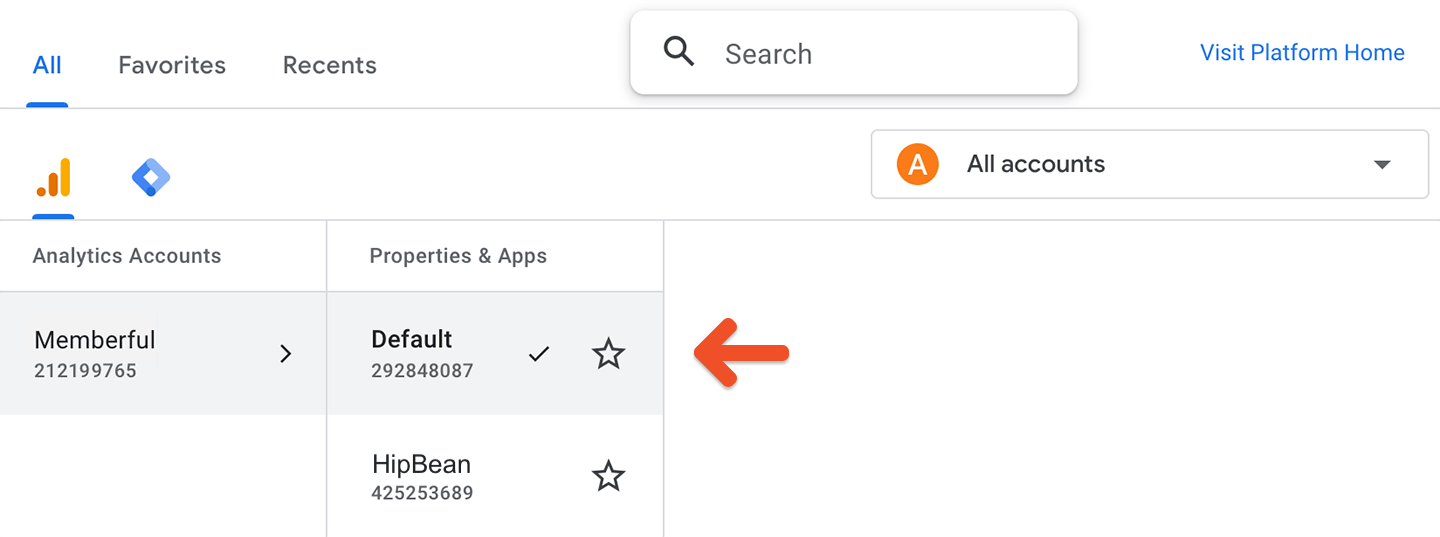
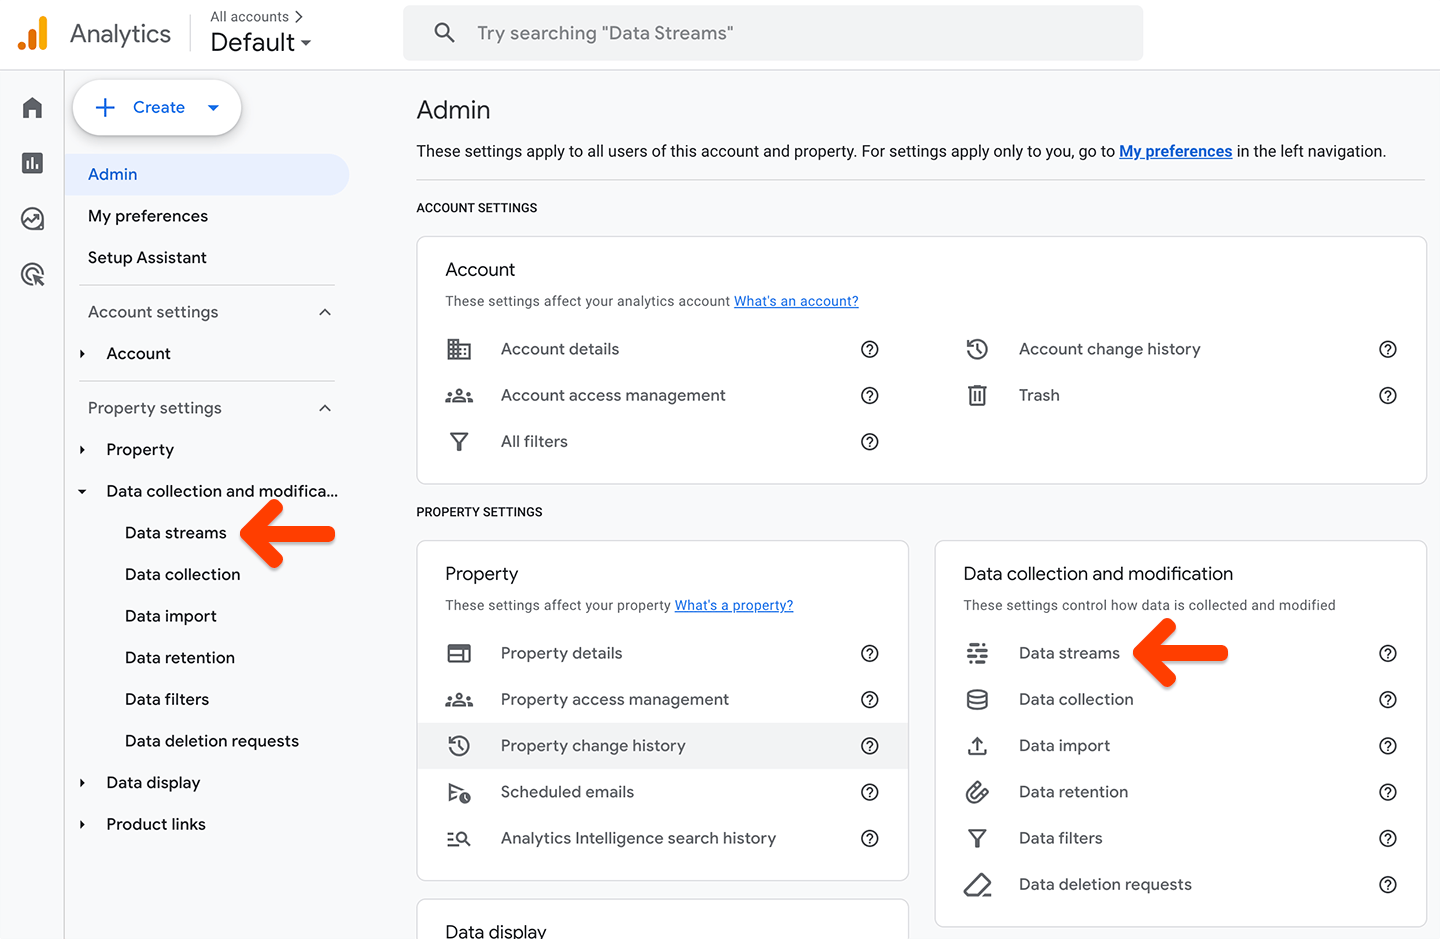
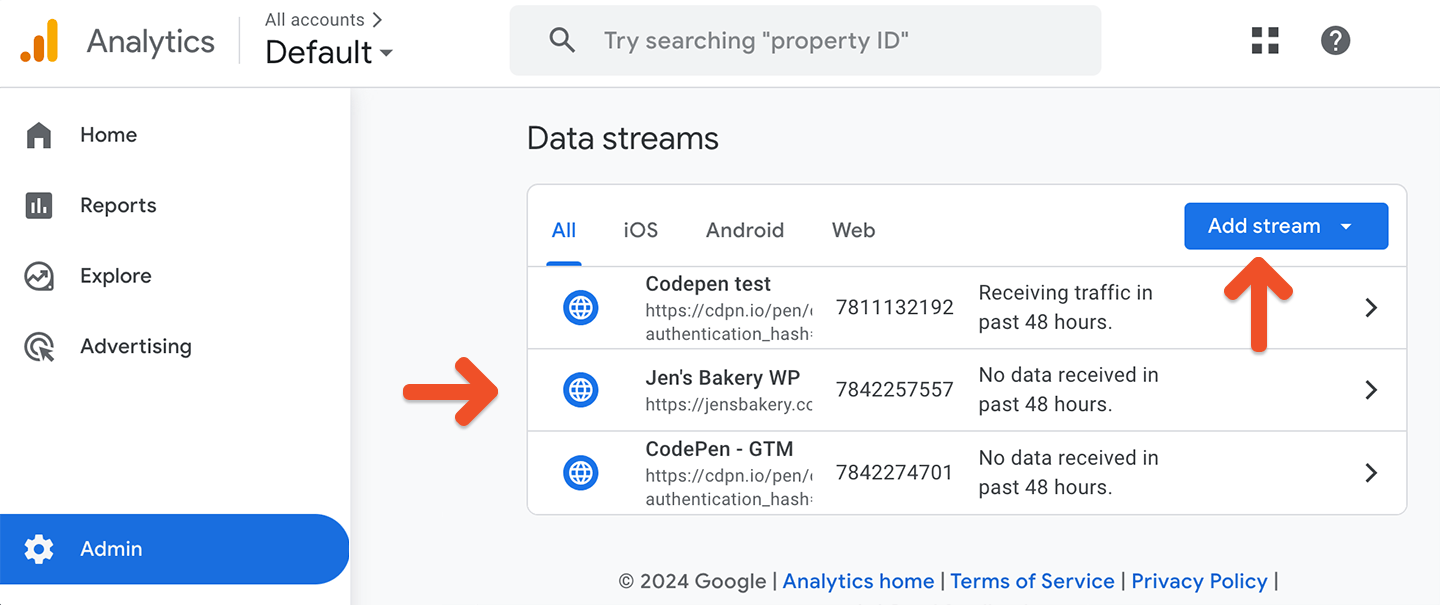
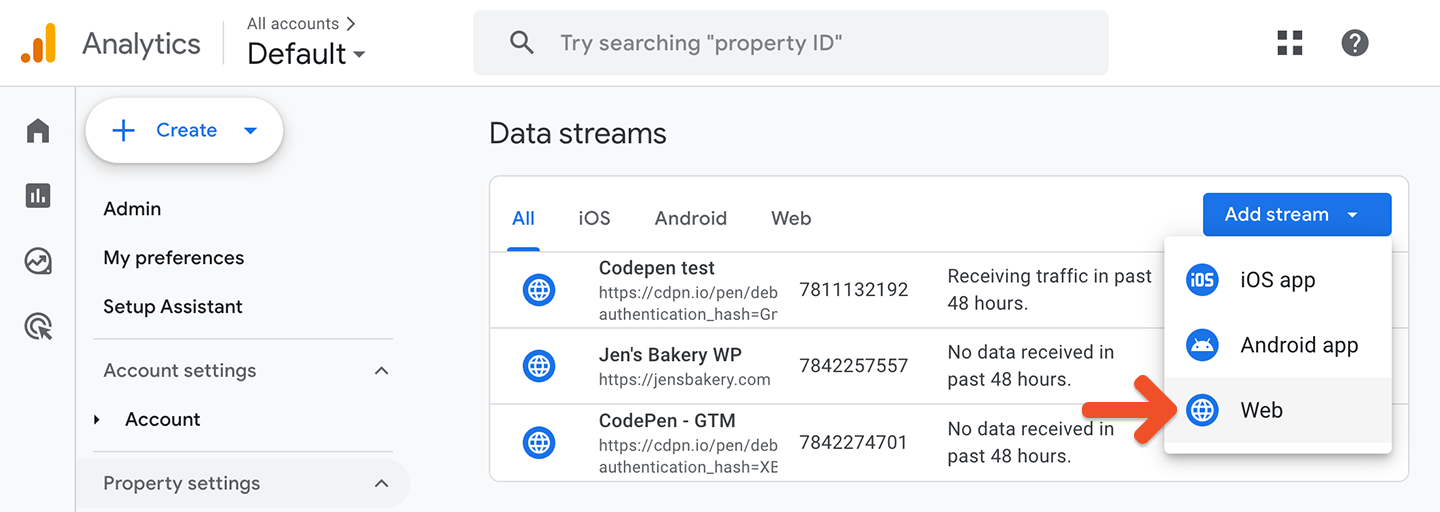
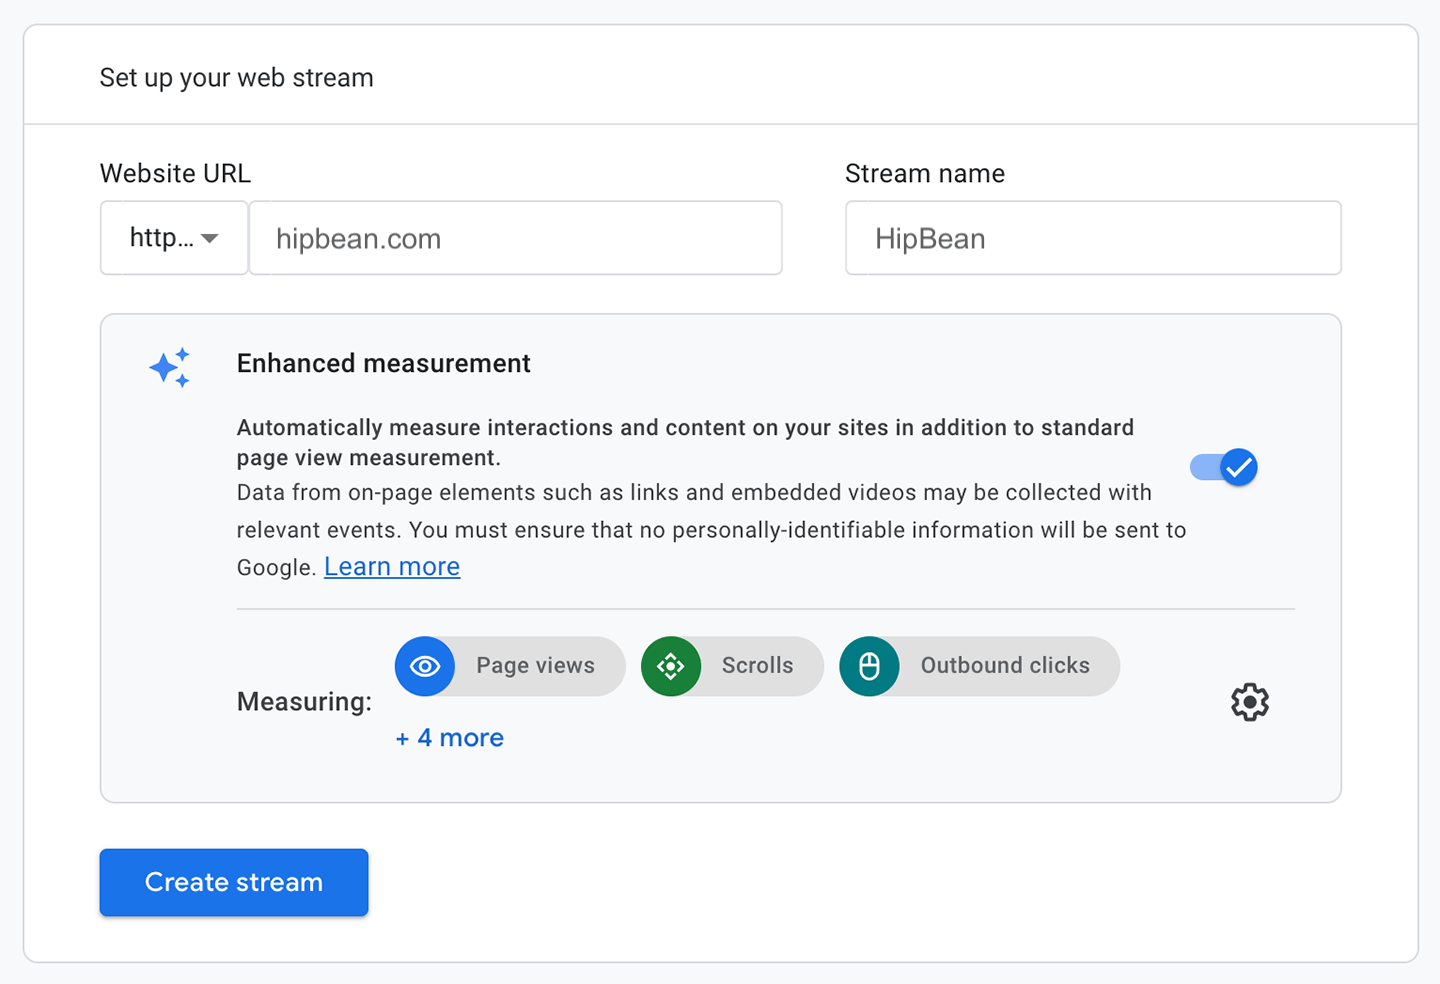
Copy your measurement ID
After creating or opening a data stream, you’ll see your measurement ID, which looks like this:G-XXXXXXXXXX. Keep it handy as you’ll need it for the following steps.
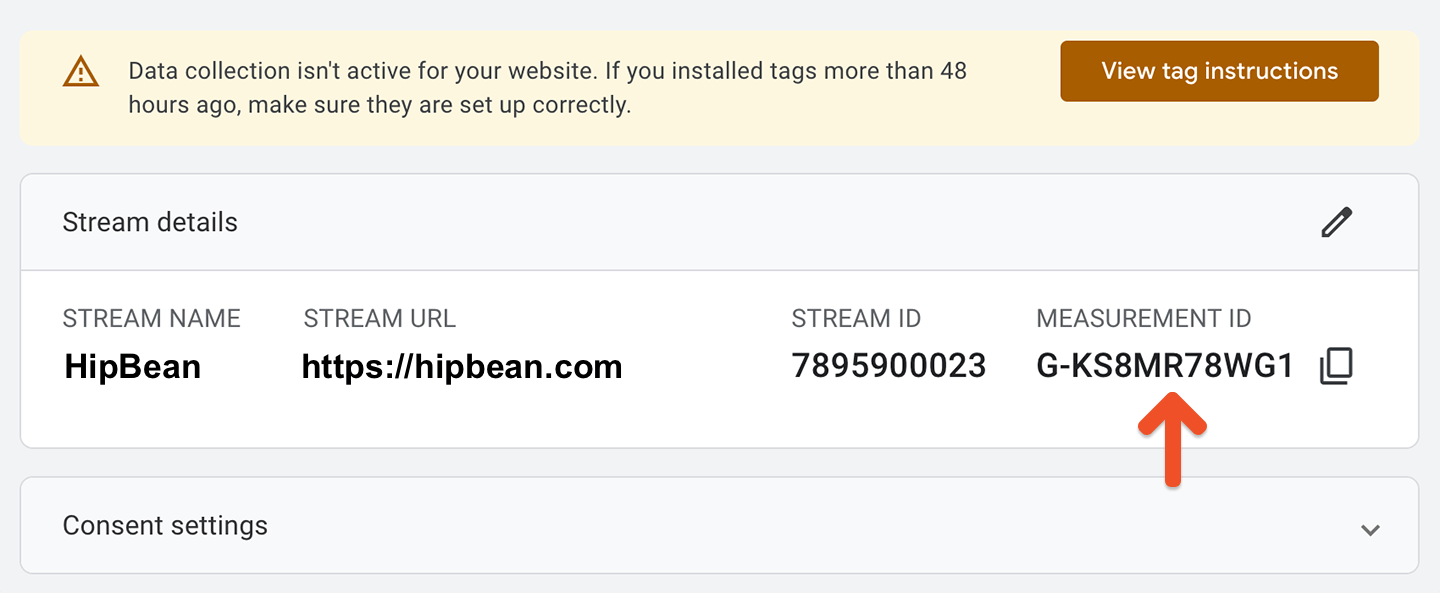
Install Google’s tracking script on your site
You’ll need to install Google’s tracking script on your website to detect when visitors click a Memberful purchase link, which instructs Memberful to track any conversions that result from their checkout process in Google Analytics. There are a few ways to do this. If your site is built on WordPress, the easiest method will be to use Google’s official WordPress plugin. For non-WordPress sites, you’ll have 2 options: Use Google Tag Manager, or insert Google’s gtag script directly into your website’s code.WordPress plugin
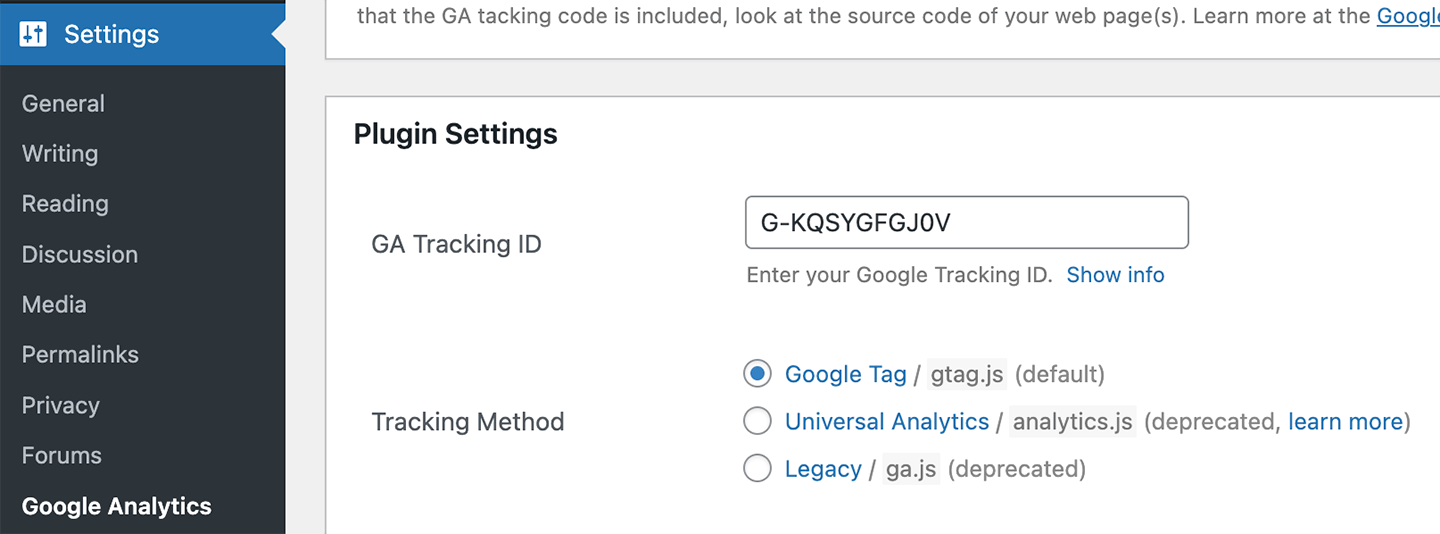
WordPress sites can take advantage of Google’s official WordPress plugin, which simplifies the process of adding Google Analytics to your site.- Install and activate the GA Google Analytics plugin on your WordPress site.
- Visit Settings → Google Analytics → Plugin Settings.
- Enter your GA Tracking ID.
- Choose Google Tag.
- Click Save changes.
Google Tag Manager
For non-WordPress sites, Google Tag Manager (commonly referred to as GTM) is a great way to insert Google’s tracking script, as well as any other tracking scripts you might need. Once installed, it allows you to manage all your tracking scripts without having to edit your site’s code. To get started with Google Tag Manager, visit tagmanager.google.com and create an account and container. You’ll be provided with a couple of code snippets to insert into your site’s code. The advantage of GTM is that this will be the only time you’ll need to edit your site’s code. After that, you can add and manage all your tracking scripts from the GTM dashboard.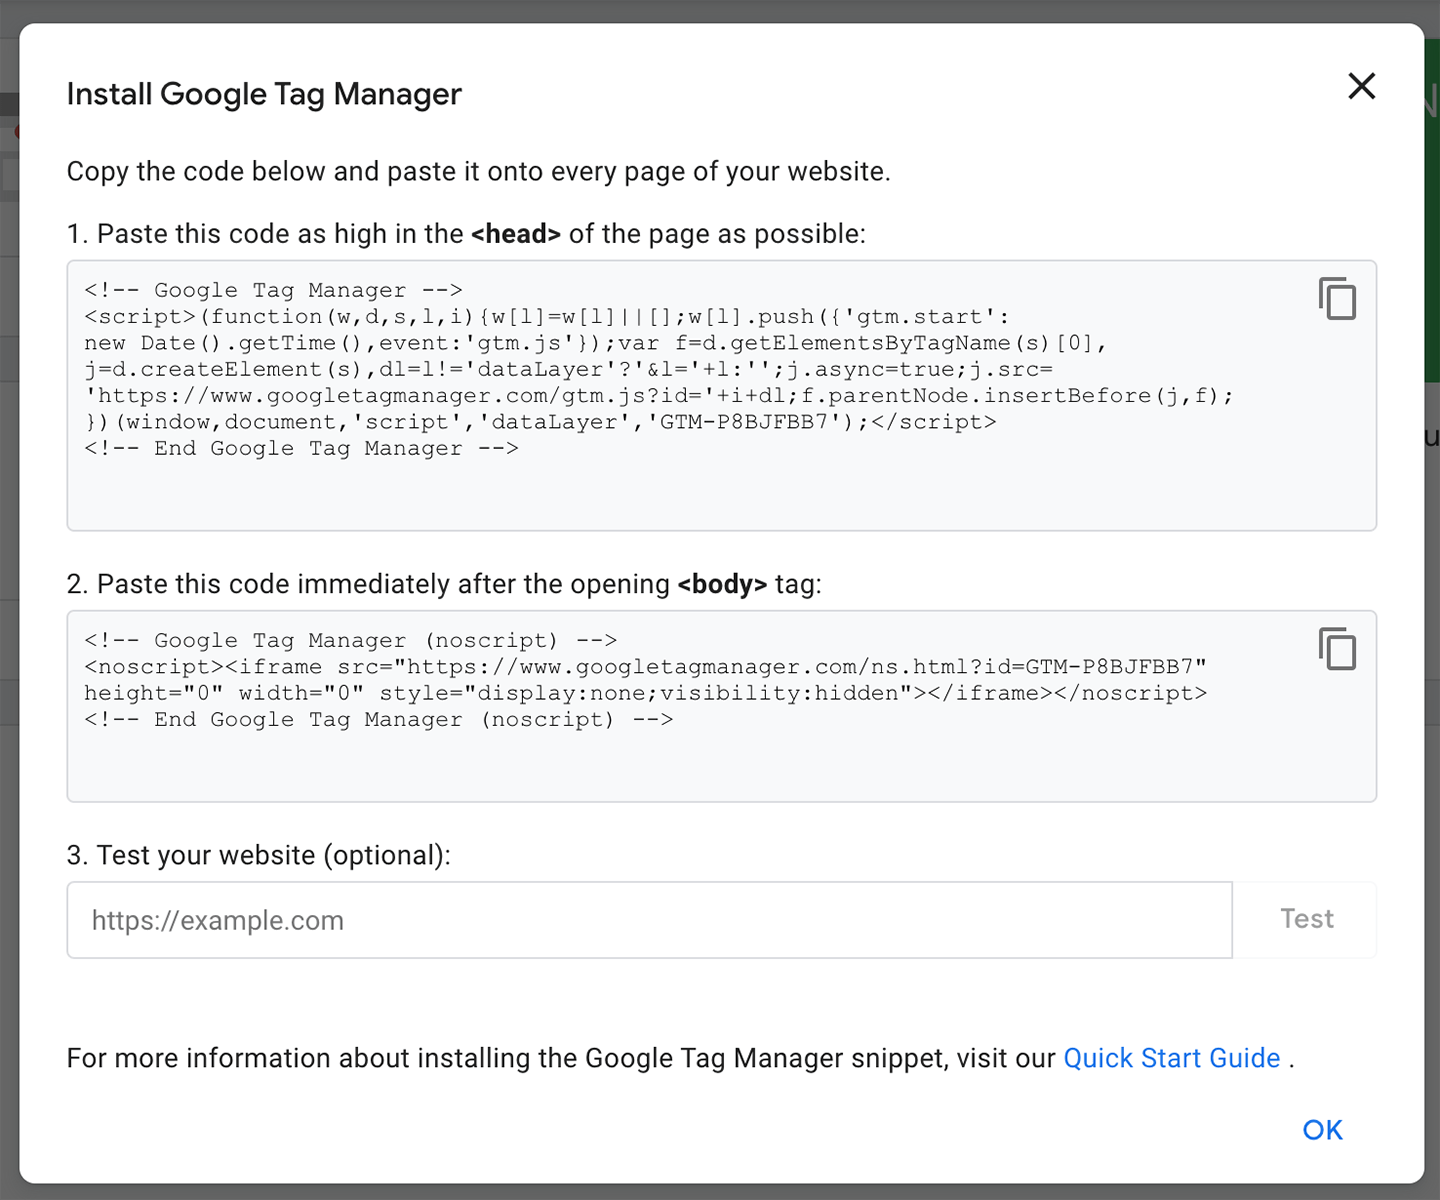
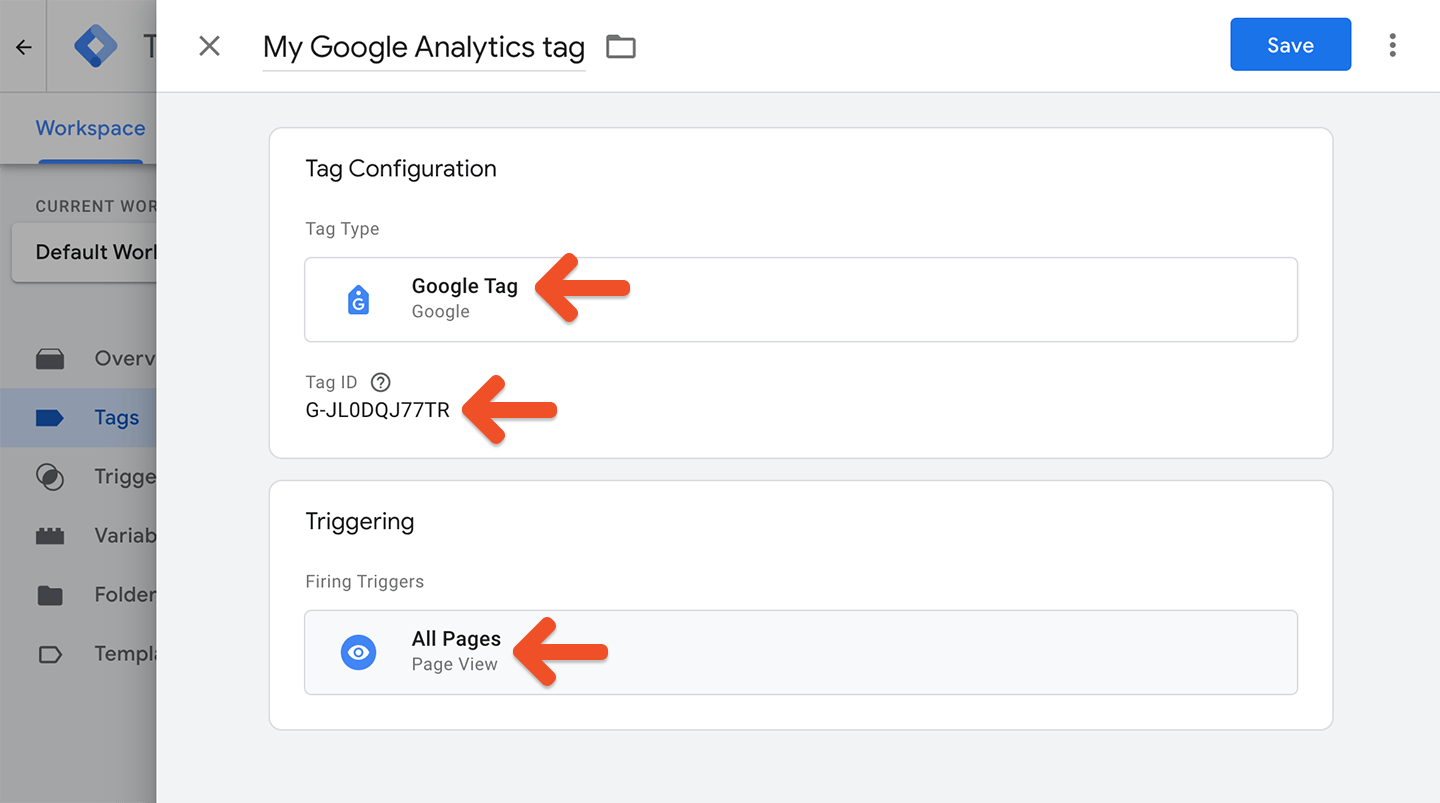
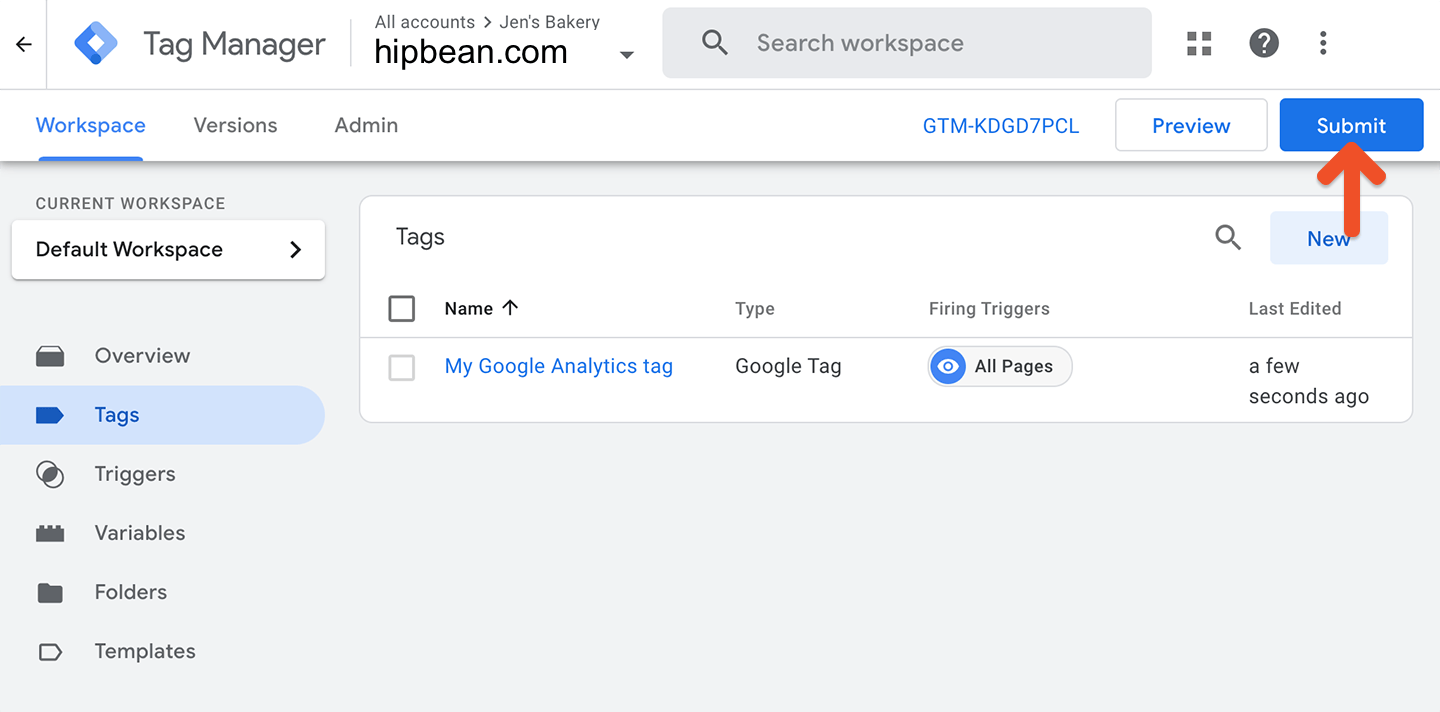
gtag.js
The other option for non-WordPress sites is to insert Google’s gtag script directly into your website’s code. This method is a bit more advanced and requires you to have access to your site’s code. Follow the steps in Google’s documentation to install the gtag.js script on your site. It will look something like this:Test Google Analytics
After you’ve enabled cross-domain measurement using one of the above methods, you’ll be ready to test whether the tracking is working. For this test, we’ll need to open a plan purchase link while ensuring that it won’t appear in an overlay. To do this, visit your site, right-click on a plan purchase link, and choose Open Link in New Tab. (This option might be labeled a bit differently in your browser.)
_gl=..., then the tracking is working:

Configure Memberful’s Google Analytics integration
Navigate to Revenue → Google Analytics from your Memberful dashboard, and activate the Google Analytics integration. You’ll need to input the Measurement ID you found earlier.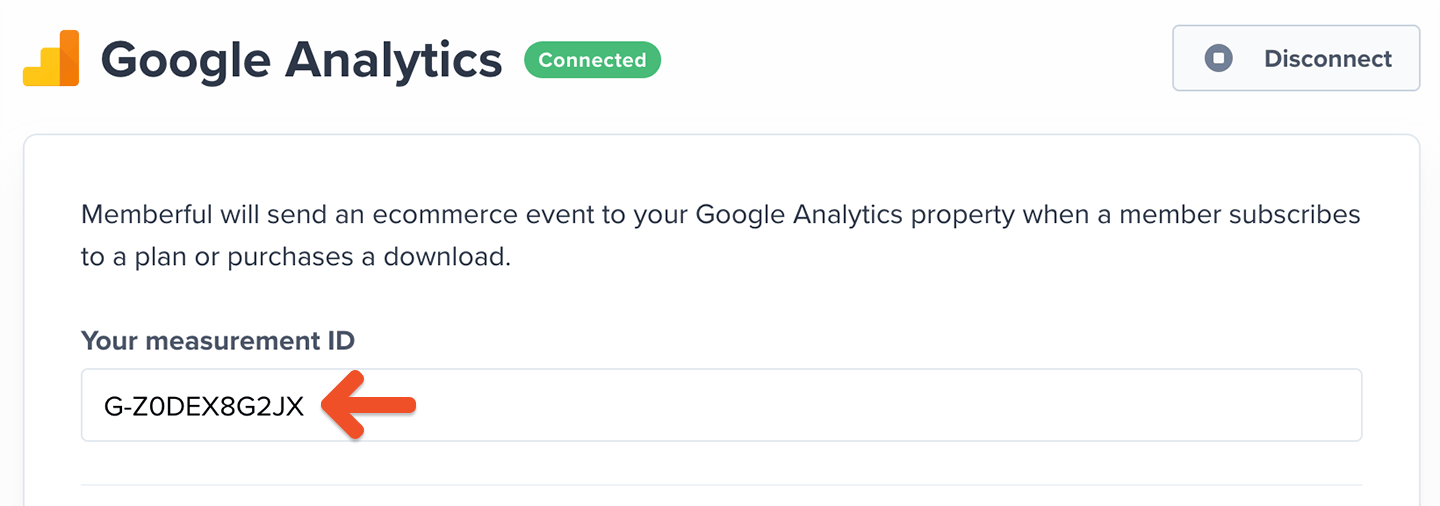
Monitor Memberful conversions in Google Analytics
You’re done! Once you leave test mode by connecting to Stripe, Memberful will track all new purchases in Google Analytics. Conversion events won’t be sent to Google Analytics while in test mode. Memberful conversions will show up in Google Analytics under the Conversions → Ecommerce section after 24-48 hours, so you may need to wait a bit in order to be able to see that data.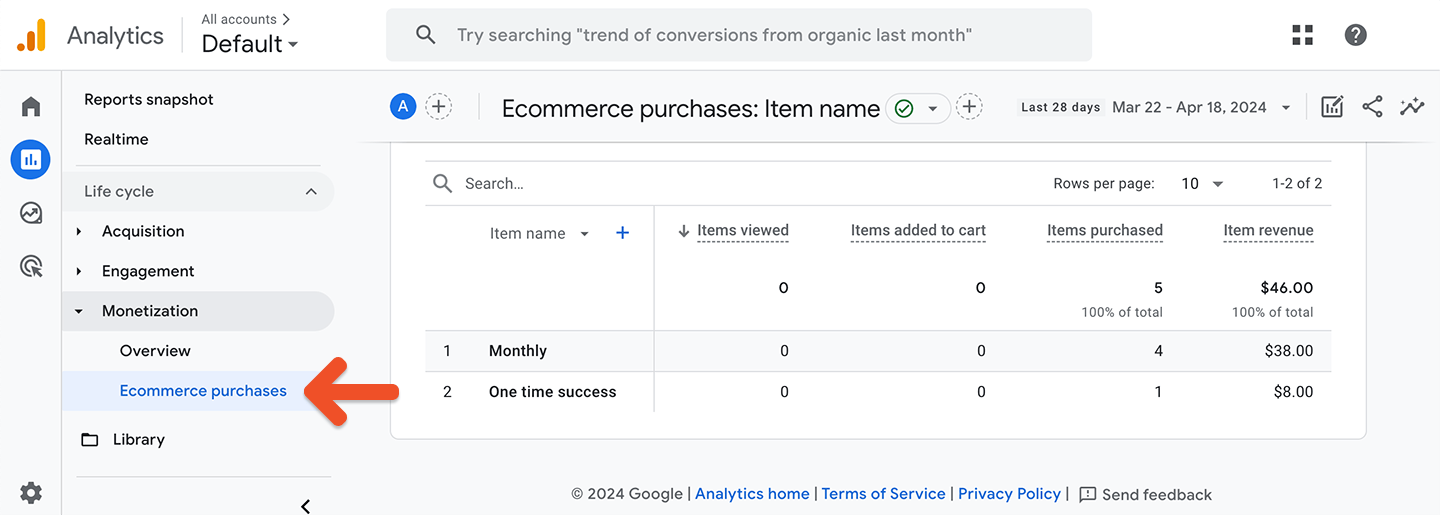
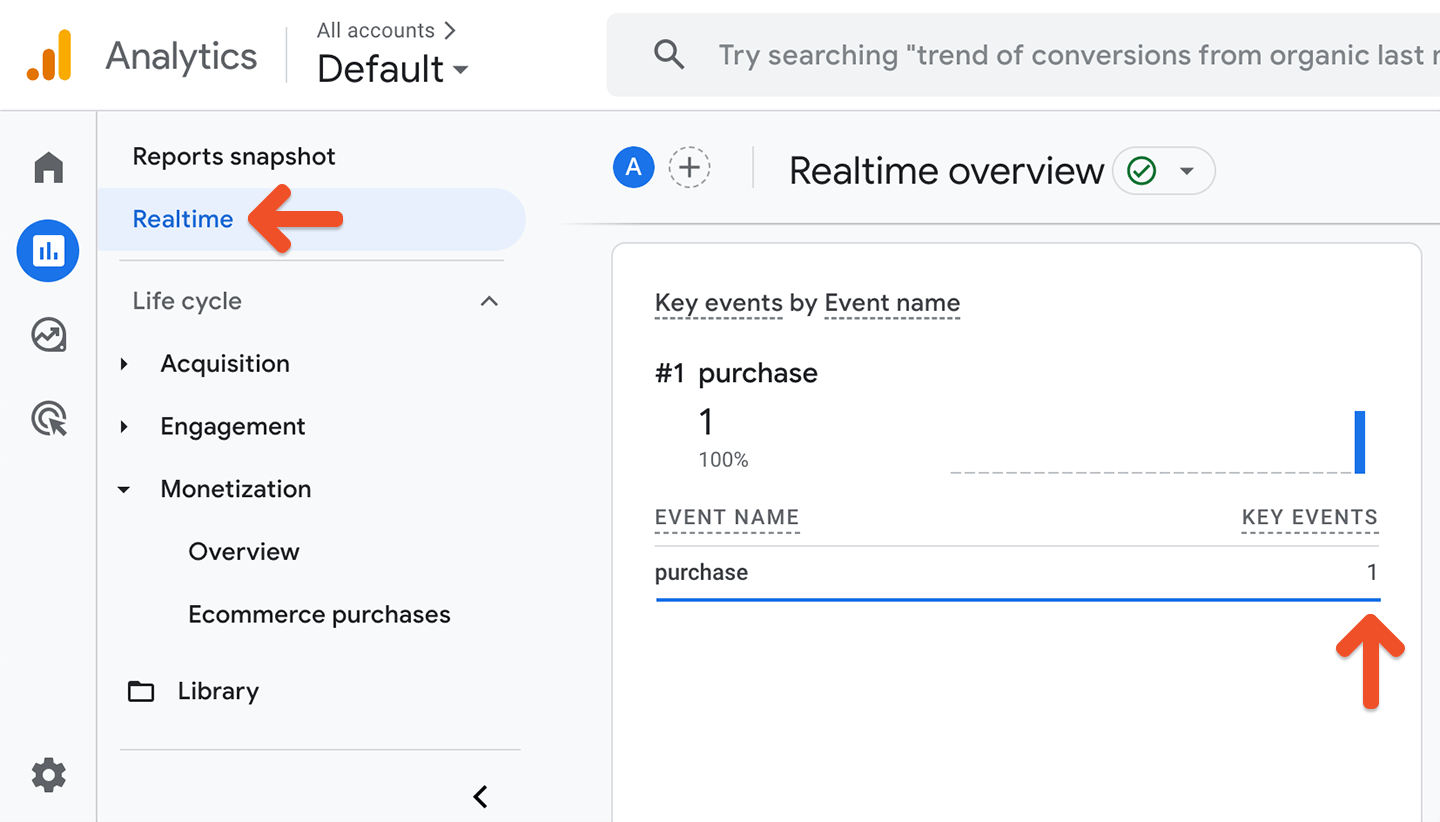
Track Google Ads
Once set up, you can measure which orders are attributable to your Google Ads, as well as the monetary value of those orders. Google Ads is another sales channel that will show up in Google Analytics. After setting up your Google Ad campaign, the Google Ads data is typically pulled right into Google Analytics. If you want to attribute an order amount to those Google Ads, you’ll need to make sure the Google Analytics-Memberful integration is configured and that you create events to assign attribution.Track logged-in members
Memberful does not track log-in activity as we don’t store any login-related data in our database. You could track logged-in members by using a WordPress site with thewp_login action. This would require the following:
- The ability to modify your WordPress code.
- Install and configure the Memberful WP plugin to ensure your members sign in through Memberful.
- Whenever the
wp_loginaction hook is triggered, you fire a function that sends any required data to Google Analytics.
(Optional) Implement server-side tagging
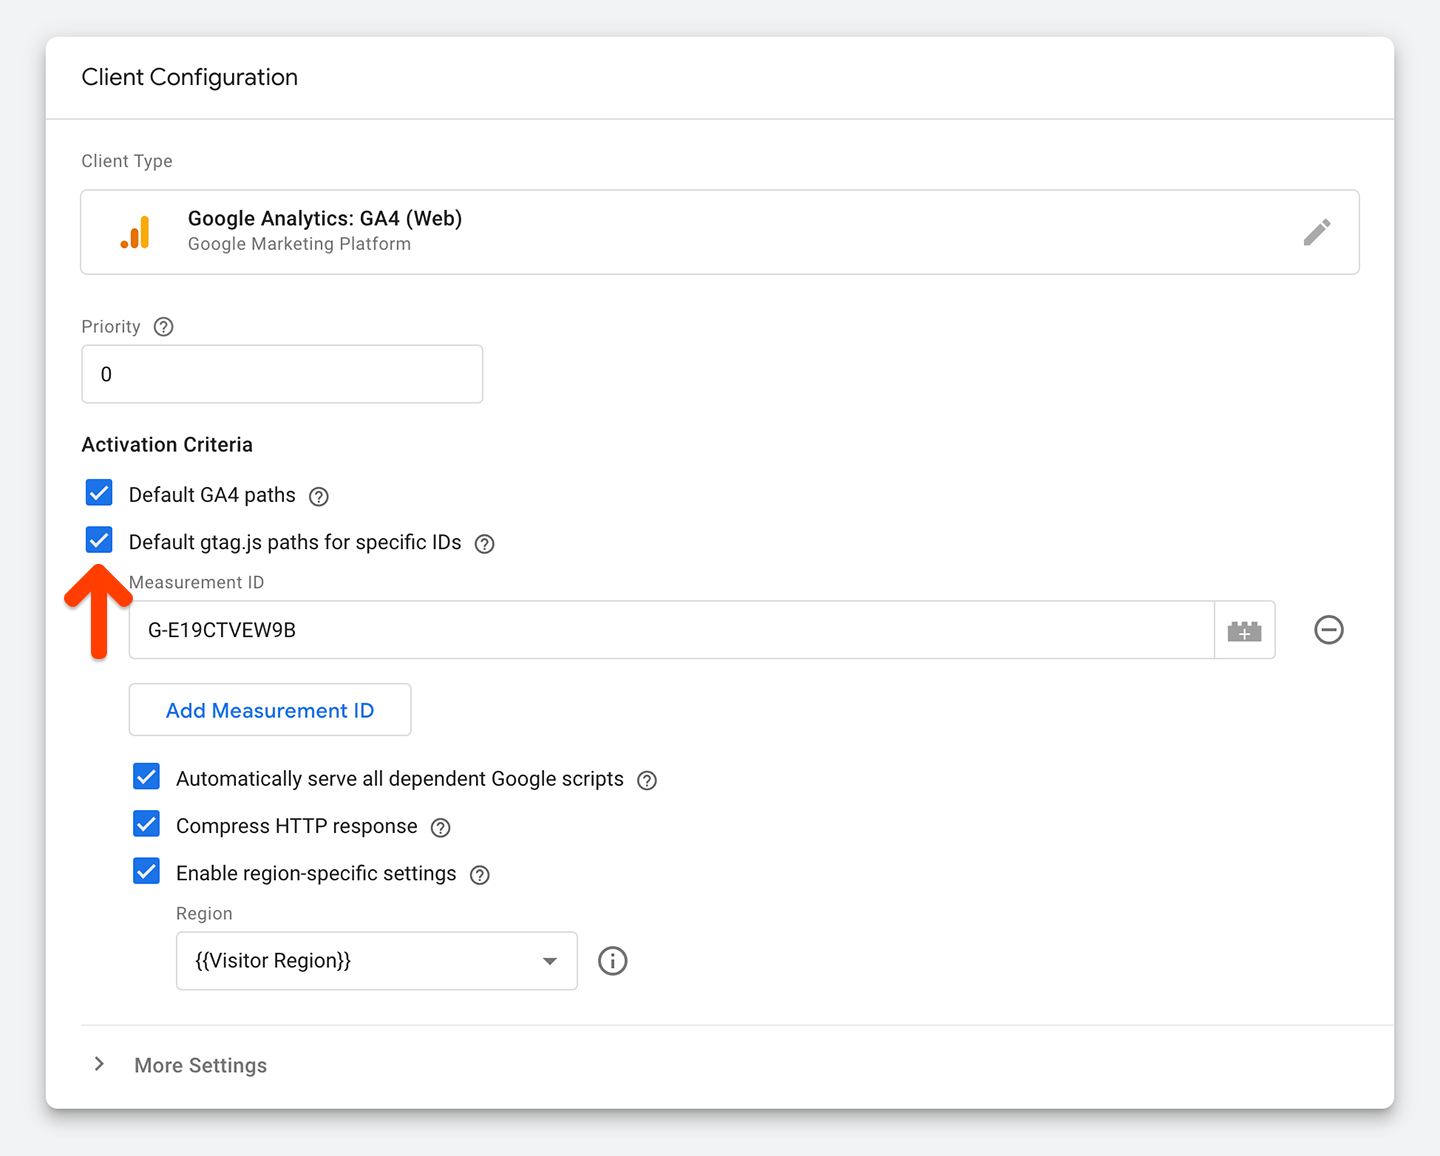
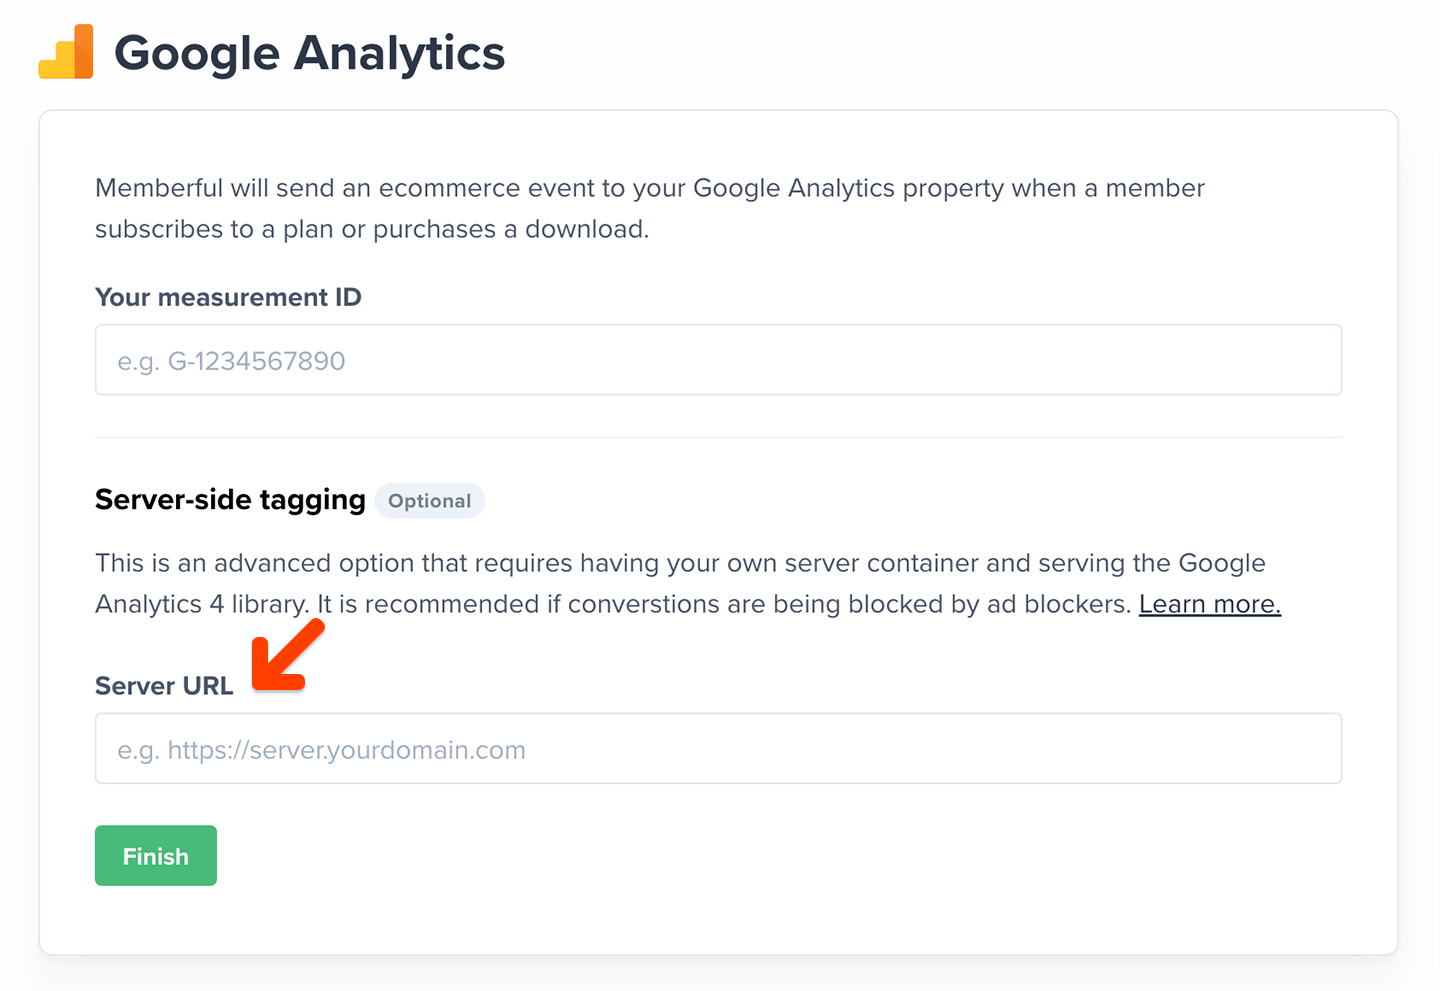
If you’d like to reduce the likelihood of conversions being blocked by privacy-focused browsers or ad-blocker plugins, you can use server-side tagging. This method sends data directly from your server to Google Analytics, bypassing the user’s browser. Memberful does not host the tagging servers, so you’ll need to set up your own tagging server container. As you set up the client configuration in Google Tag Manager, you’ll need to enable Default gtag.js paths for specific IDs.