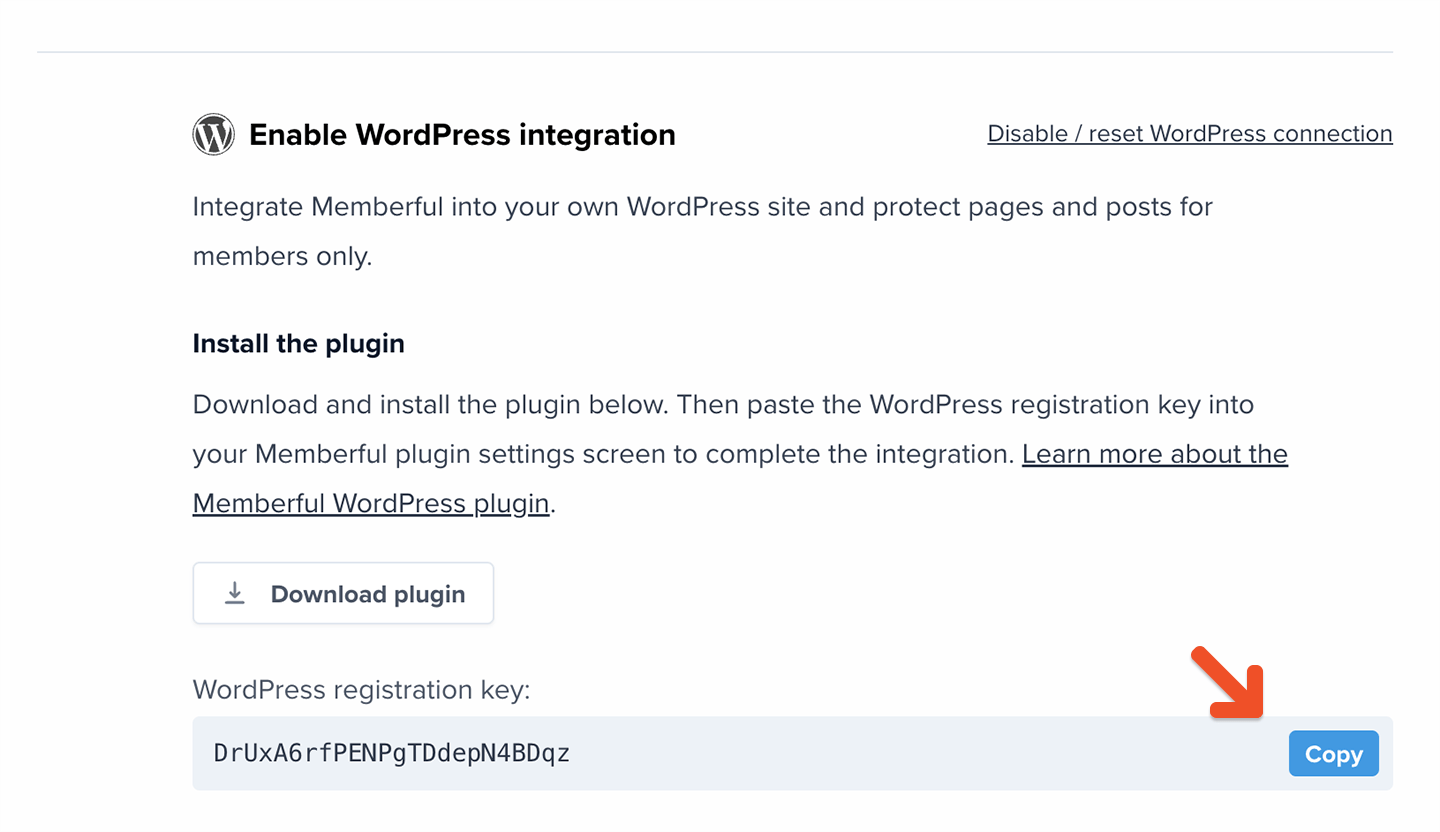
Install the Memberful WordPress plugin
Activate the WordPress service
From your Memberful dashboard, go to Website → External website, then click Connect my WordPress site.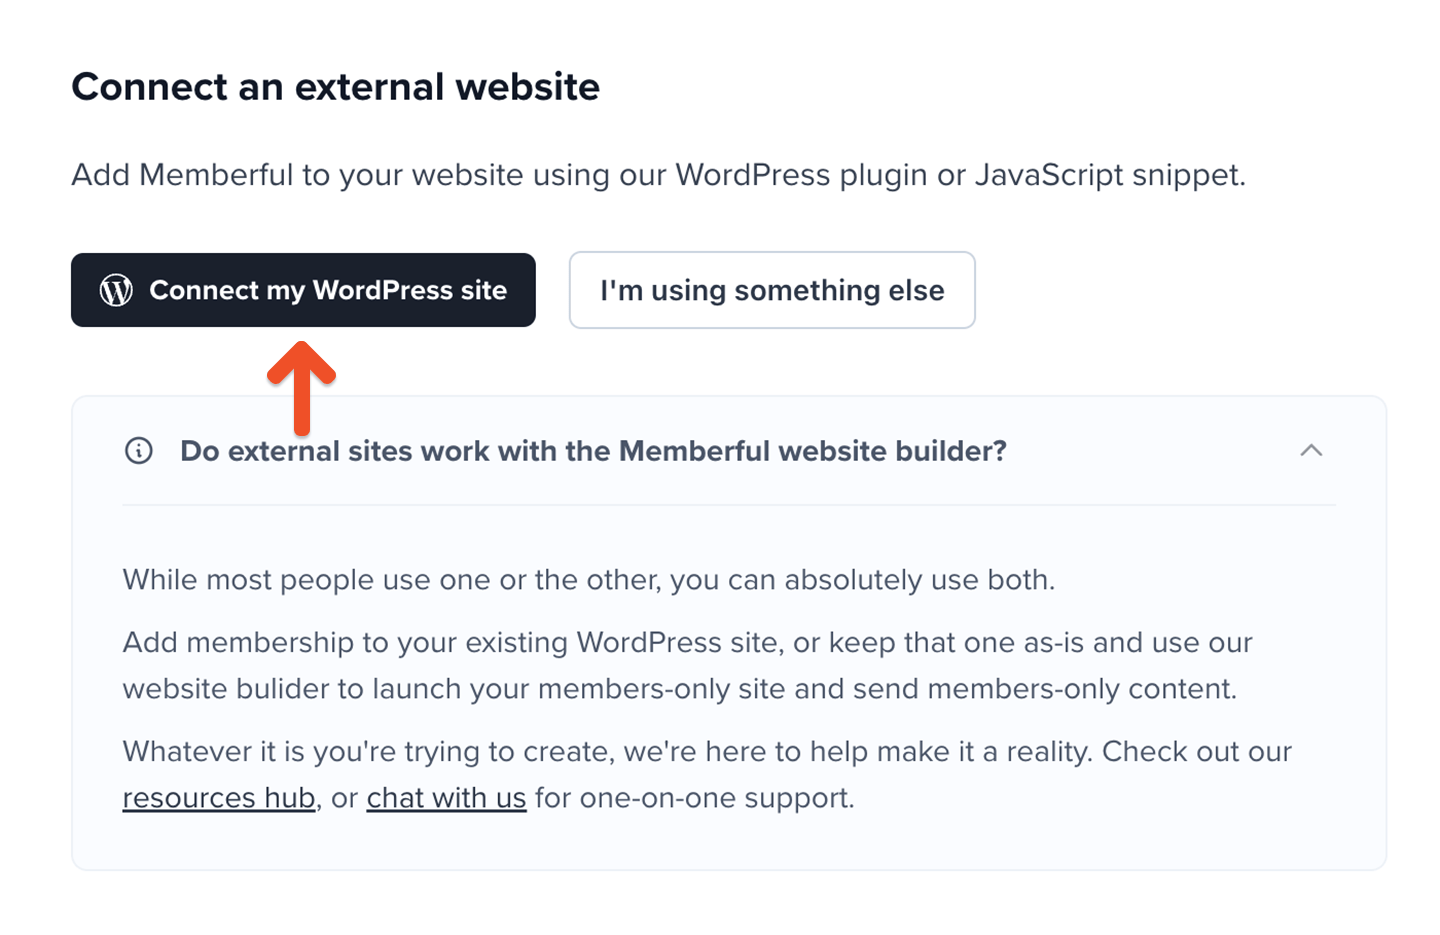
- members are signed in to WordPress when they sign in to Memberful
- members’ plans sync automatically so you can protect WordPress content.
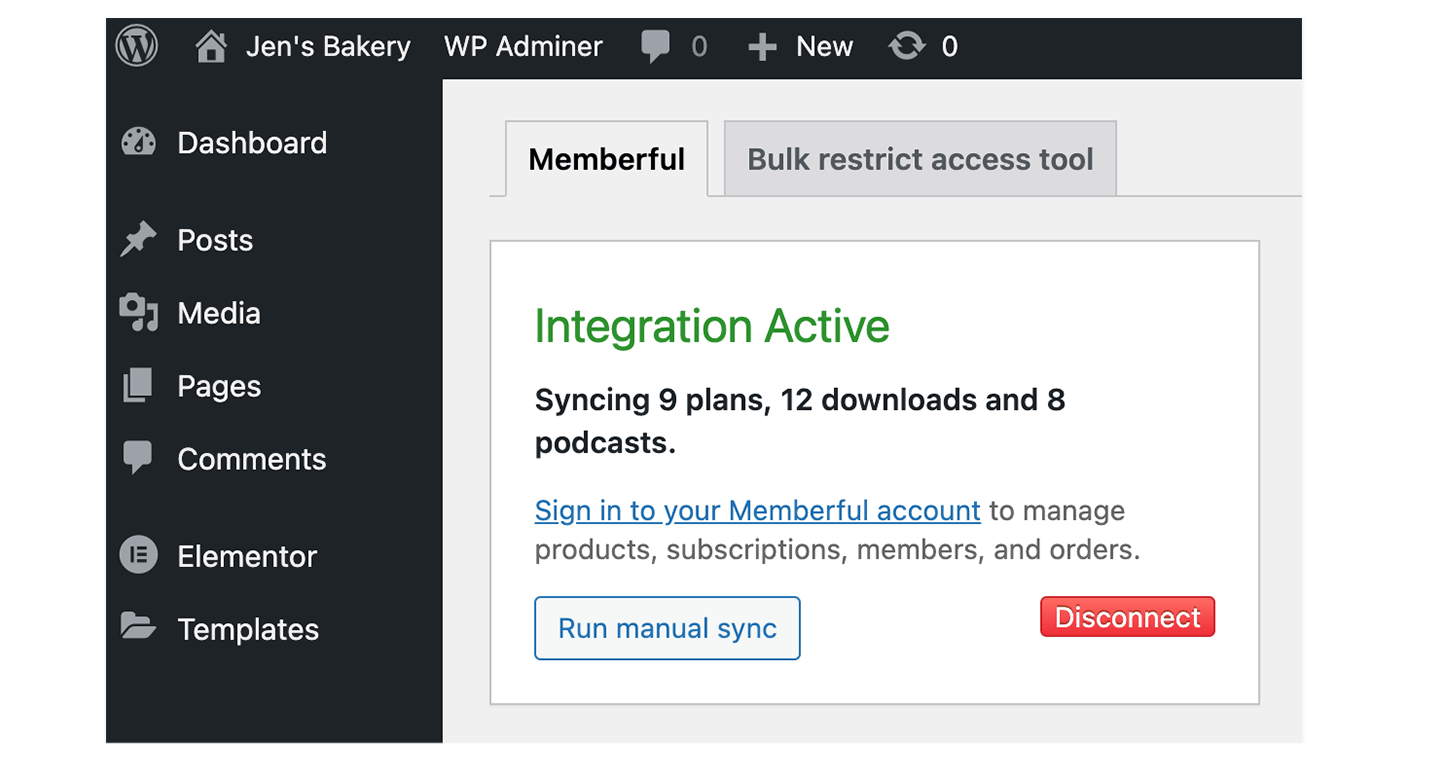
Review the plugin settings
Go to Settings → Memberful in your WordPress dashboard to customize how the plugin works. Options include:- Keep all WordPress users logged in for 1 year
- Hide the WordPress admin toolbar from members
- Block WordPress dashboard access from members
- Conditionally show Sign in, Sign out, and Account menu items based on members’ signed-in status
- Update display names in WordPress when members change their full name in Memberful
- Show protected content in site search
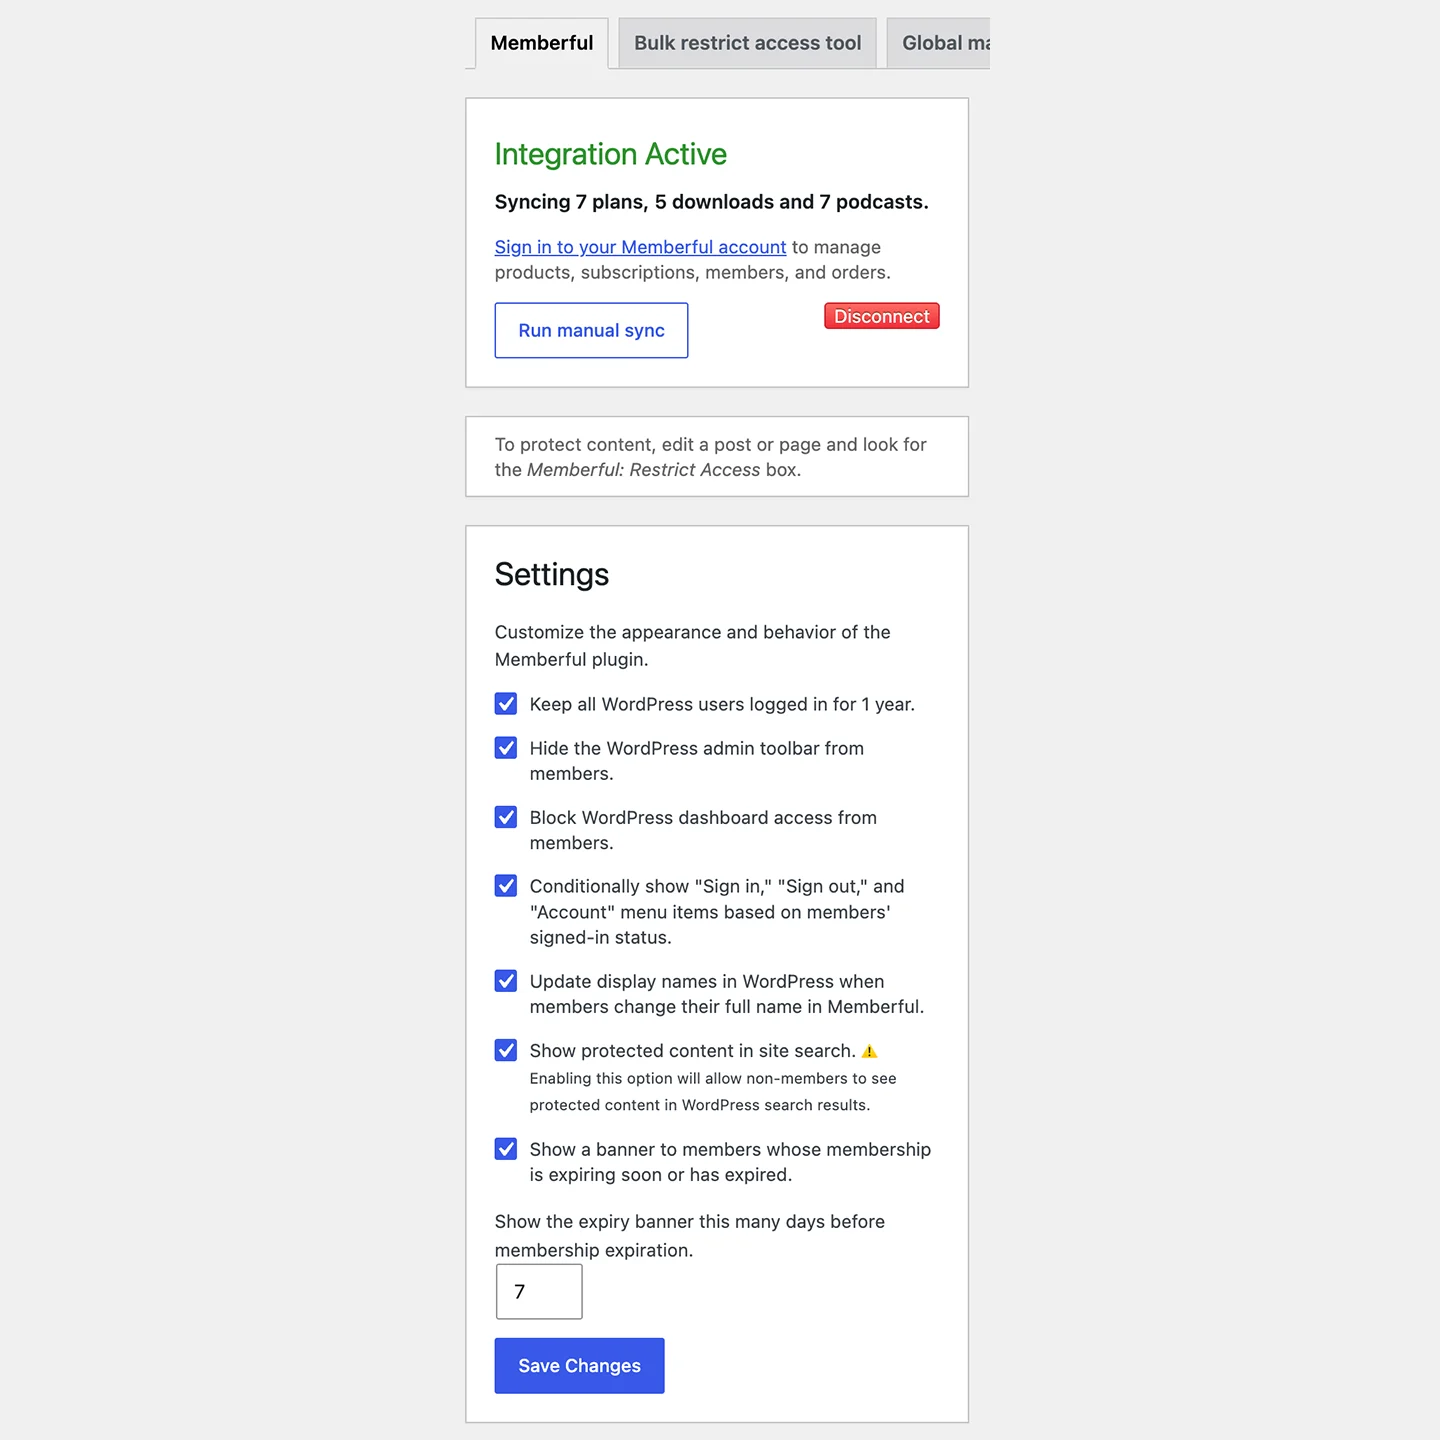
- Show a banner to members whose membership is expiring soon or has expired
Conditional menu items only work with classic WordPress menus. They are not supported in block-based WordPress since that system uses a different menu editor.
Expiring membership banner
When enabled, members will see a banner at the top of your site notifying them that their subscription is expiring soon or has expired, with a Renew now link. You can set how many days before expiration the banner appears.
Set the timing
In the Show the expiry banner this many days before membership expiration field, enter the number of days before expiration when the banner should appear.
Configure role mapping
The Memberful WordPress plugin assigns WordPress roles to members based on their subscription status. It keeps those roles in sync as subscriptions start, change, or end. Role mapping works best when you use custom WordPress roles provided by other plugins.How role mapping works by default
By default, the Memberful WordPress plugin can assign roles using a status-based rule:- members with any active subscription plan receive one WordPress role
- members with no active subscription plans receive a different WordPress role
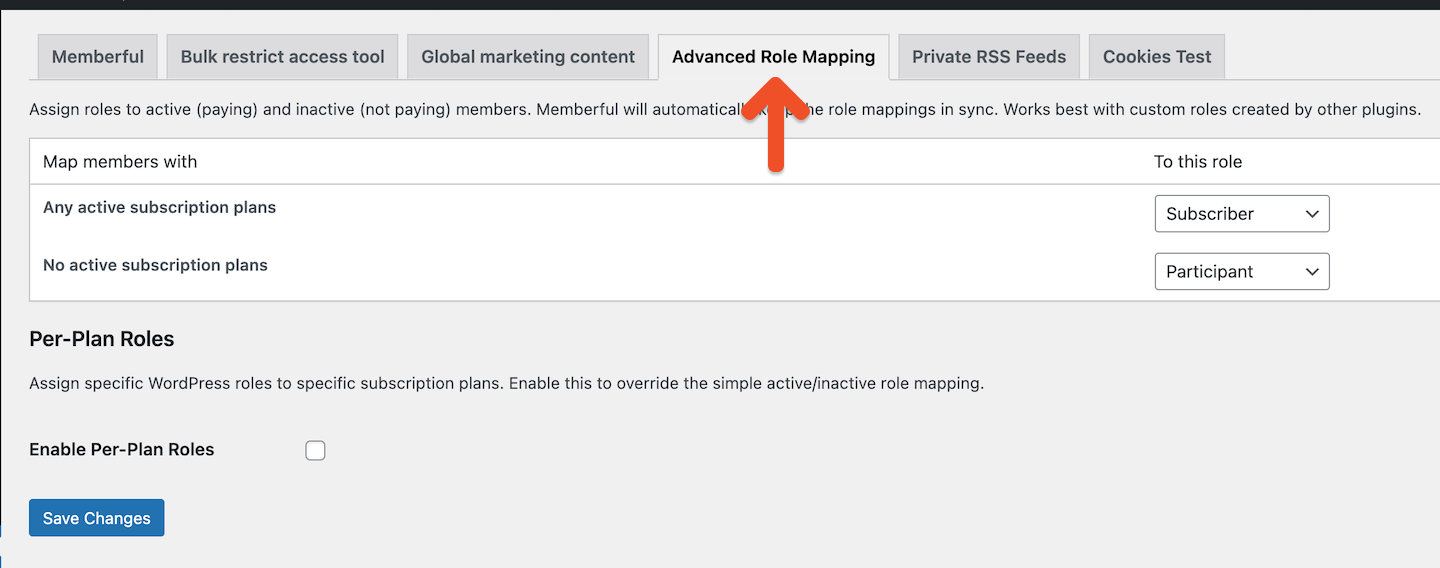
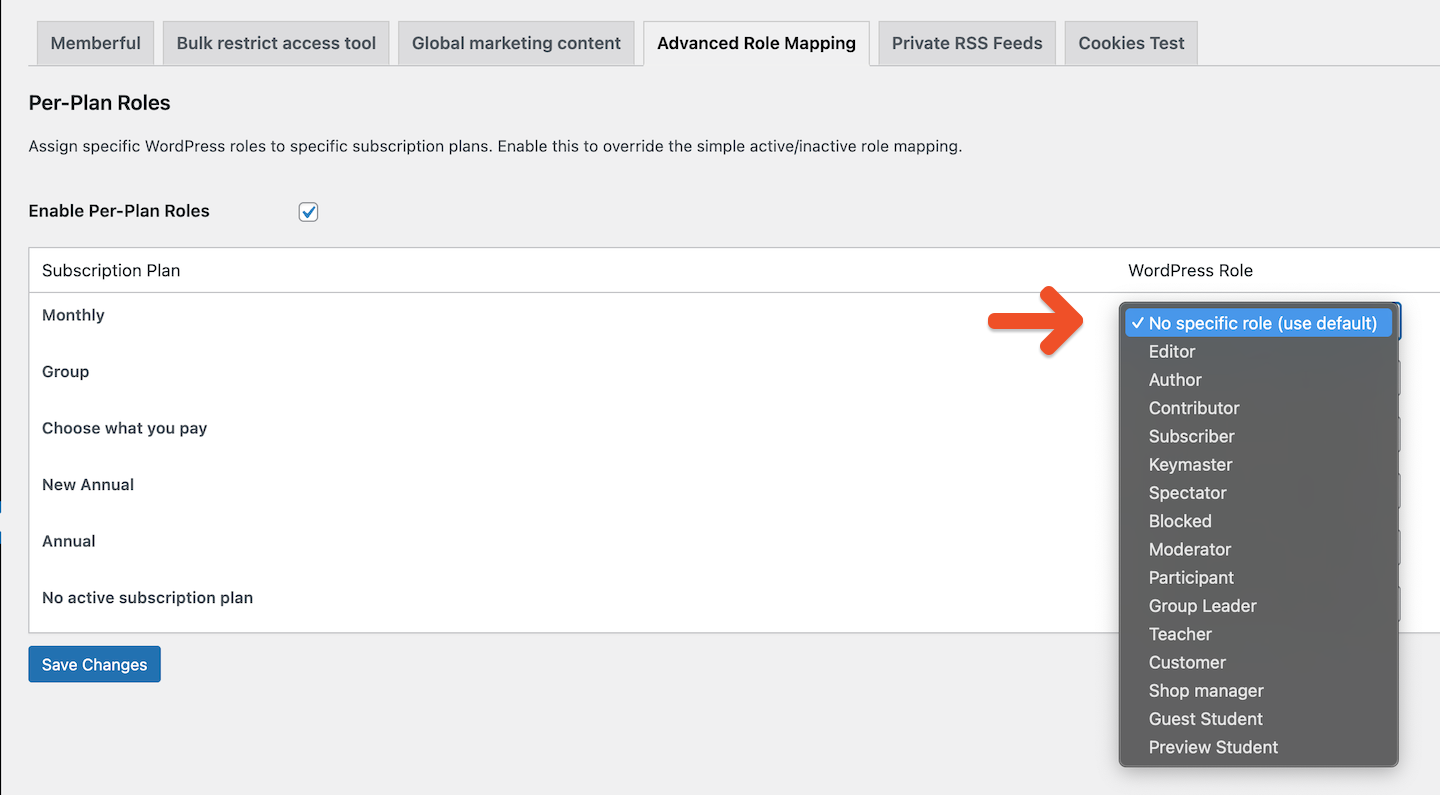
Enable per-plan roles
Per-plan roles let you override the default active or inactive role mapping and assign roles at the individual plan level. Disabling this setting returns your site to the default role mapping behavior. To enable per-plan roles, go to Settings → Memberful → Advanced Role Mapping in your WordPress dashboard, then check Enable Per-Plan Roles. Once enabled, additional role options appear for each subscription plan.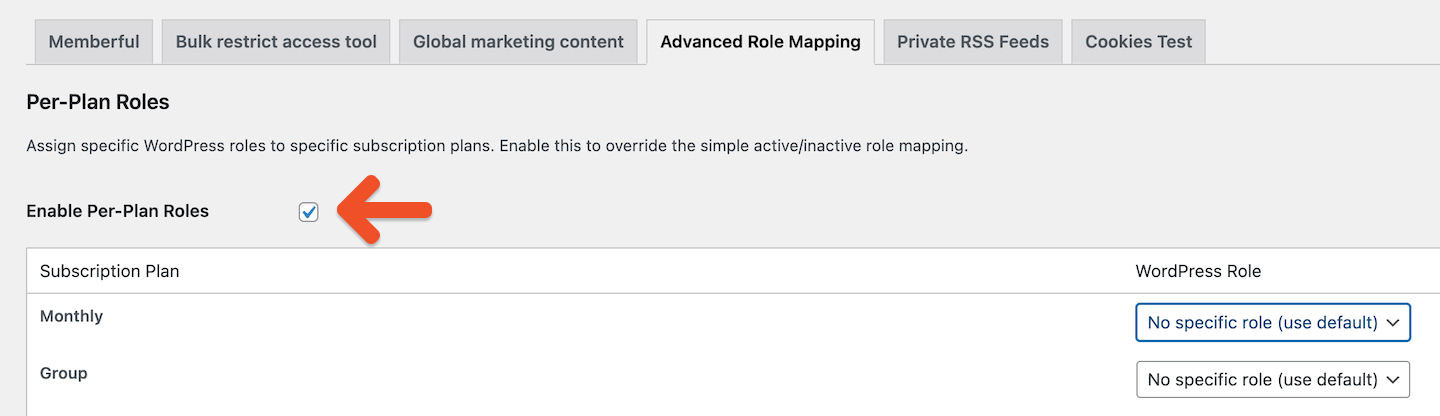
Adding new prices to existing plans does not require updating your role mapping.
Assign roles to individual plans
After enabling per-plan roles, you’ll see a list of your Memberful plans with a WordPress role selector for each one. For each subscription plan:- choose the WordPress role members should receive while they have an active subscription to that plan
- optionally select No specific role (use default) to fall back to the default active role mapping