Related help docs:
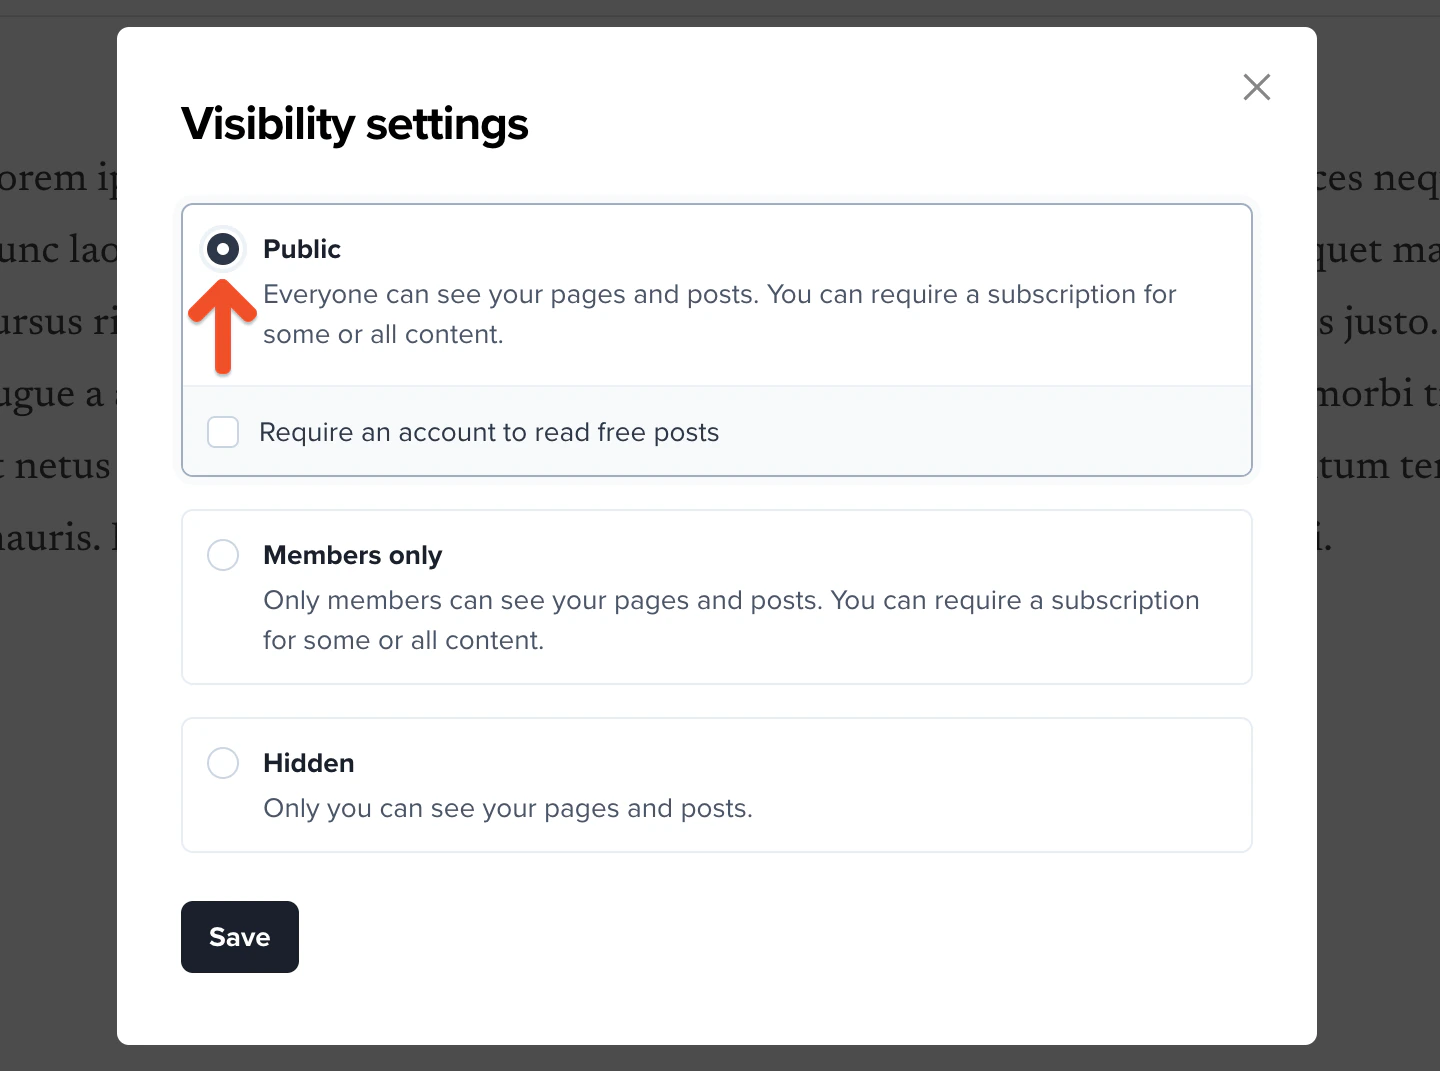
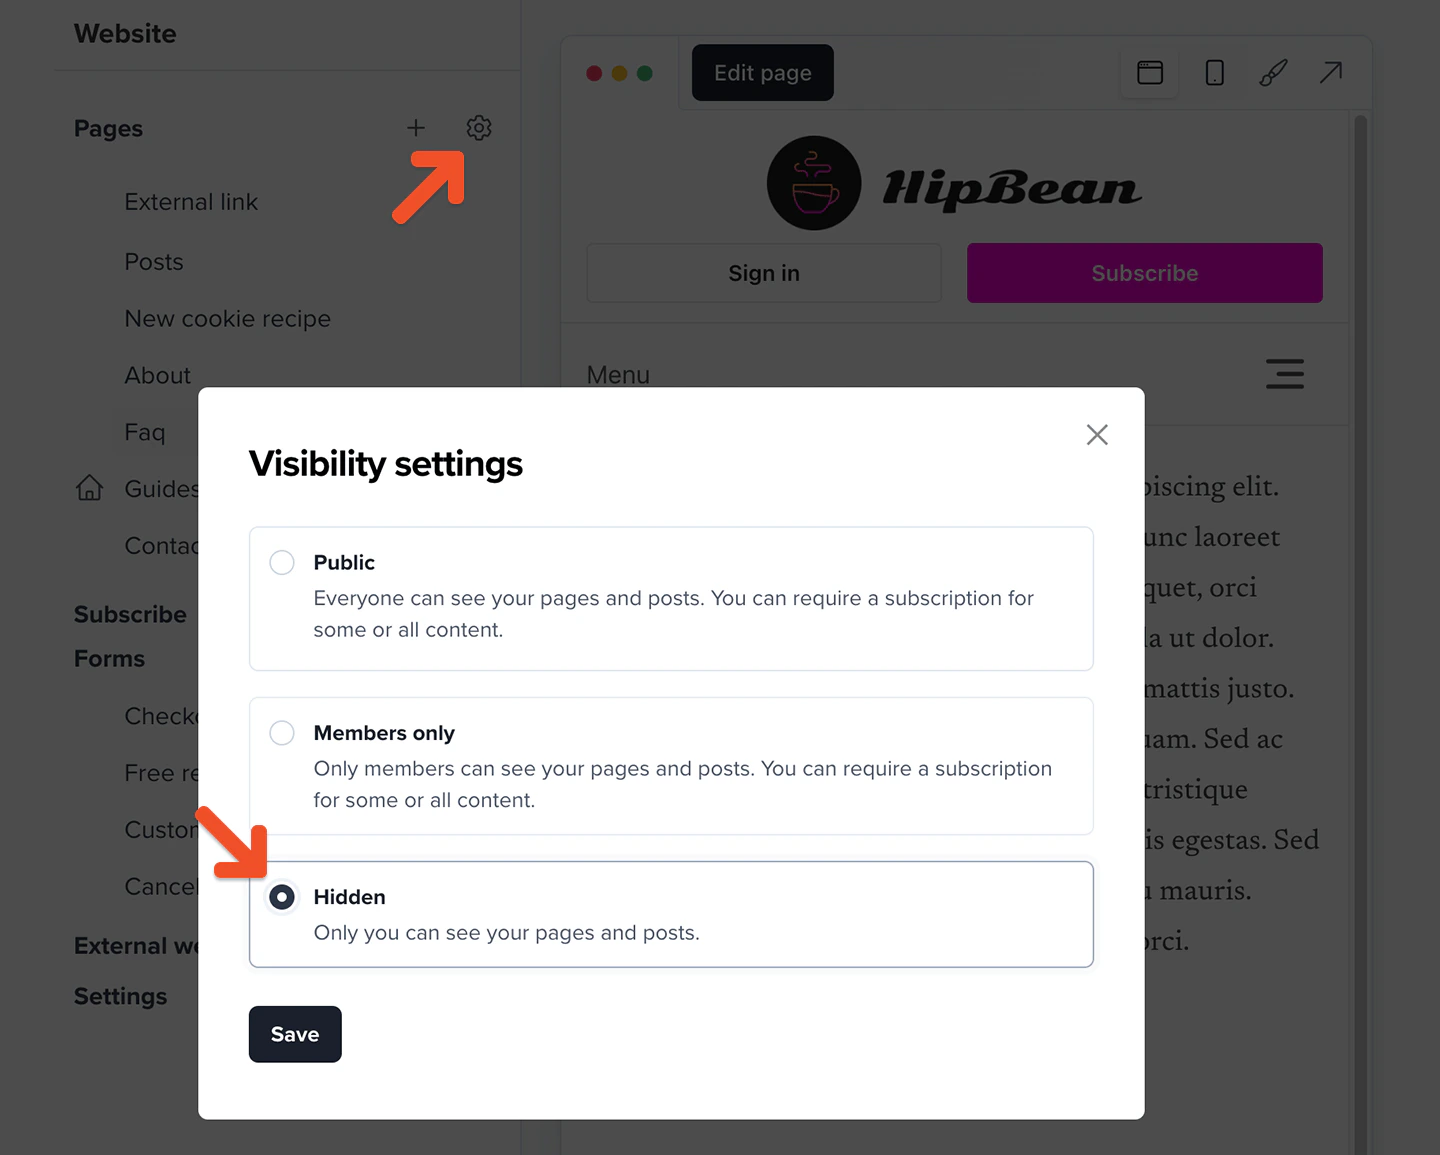 To enable the website again, go to the **Website** tab, click the **gear** icon, and select either **Public** or **Members-only**.
 ## Create a new page
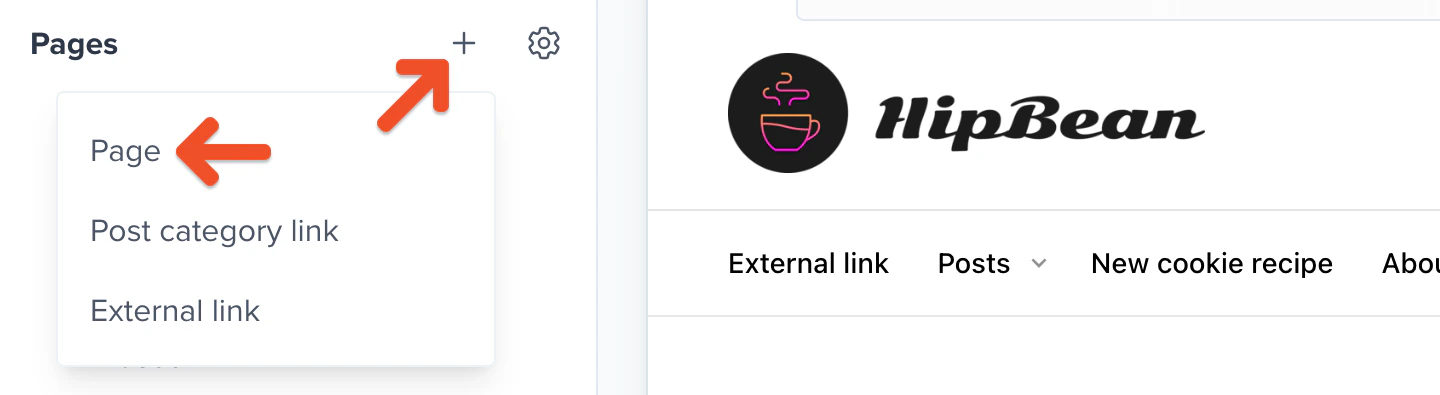
To create a new page, go to the **Website** tab, click the **plus** icon next to *Pages,* and click **Page**.
## Create a new page
To create a new page, go to the **Website** tab, click the **plus** icon next to *Pages,* and click **Page**.
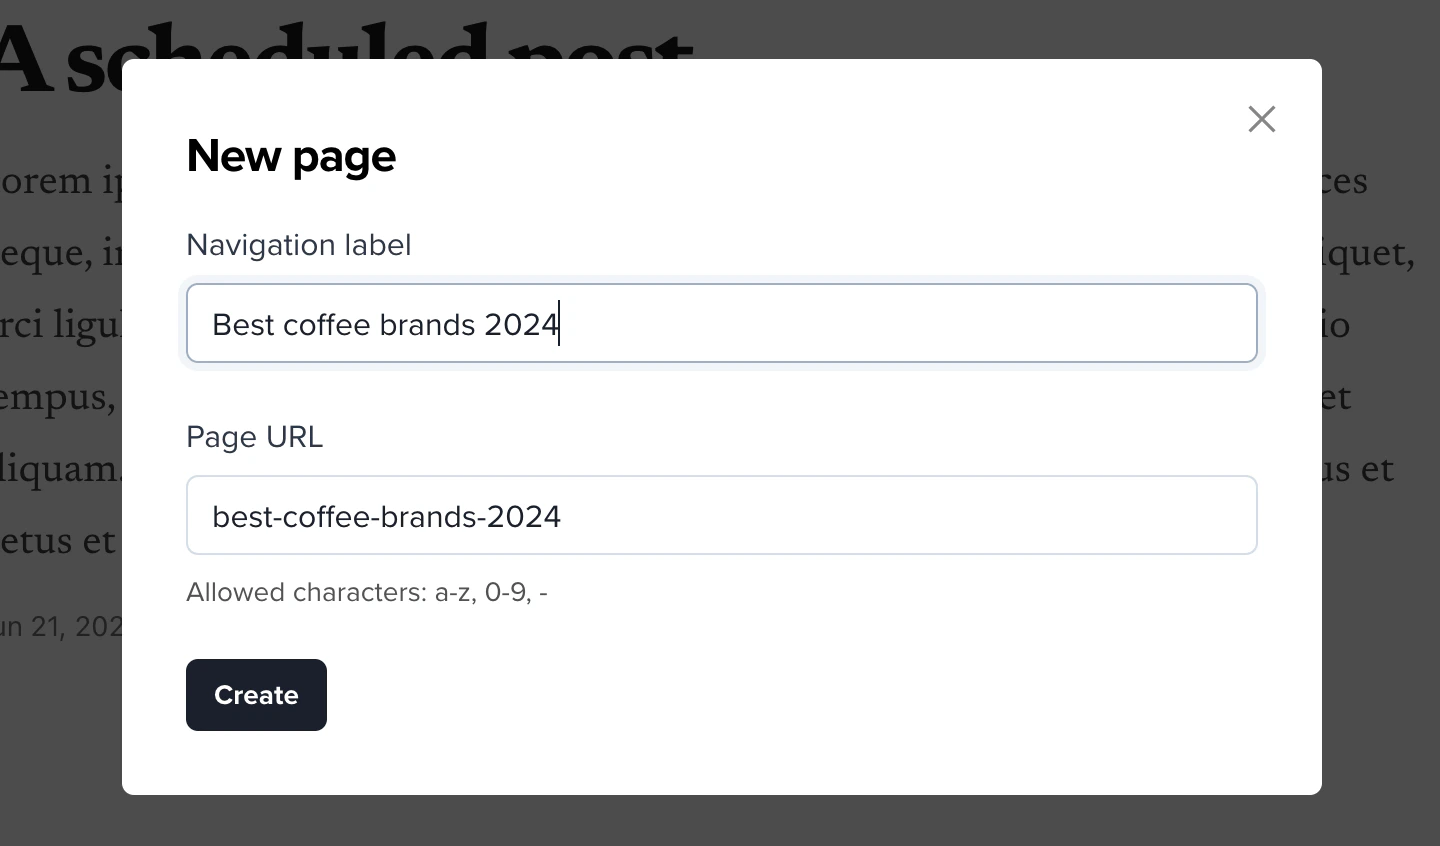
 Enter a navigation label and page URL, then click **Create.**
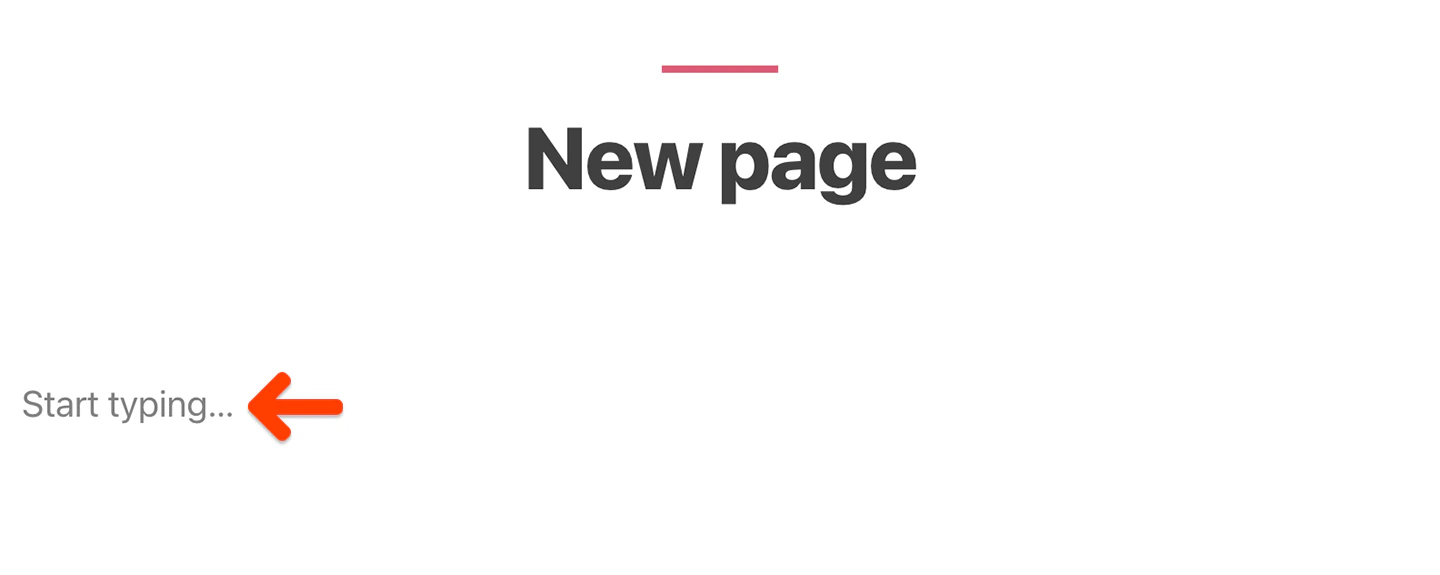
 An empty content block will be included by default. Click **Start typing...** to customize the content of your page.
 ## Add content to the page
Click the **plus** icon in the top right corner to add a new block to the page.
## Add content to the page
Click the **plus** icon in the top right corner to add a new block to the page.
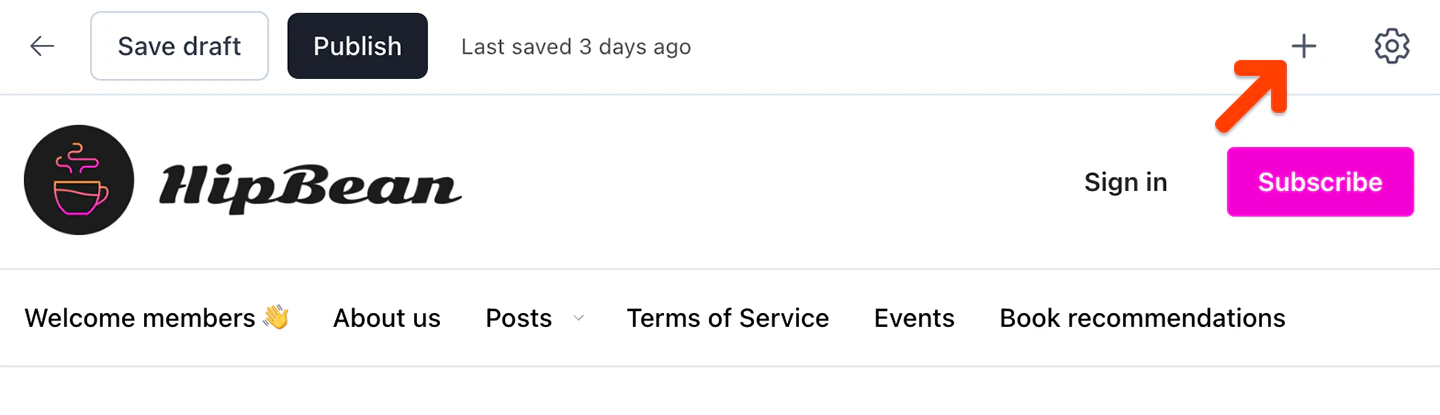 You can also hover your cursor over an existing block and click the **plus** icon at the bottom of it to add a new block below it.
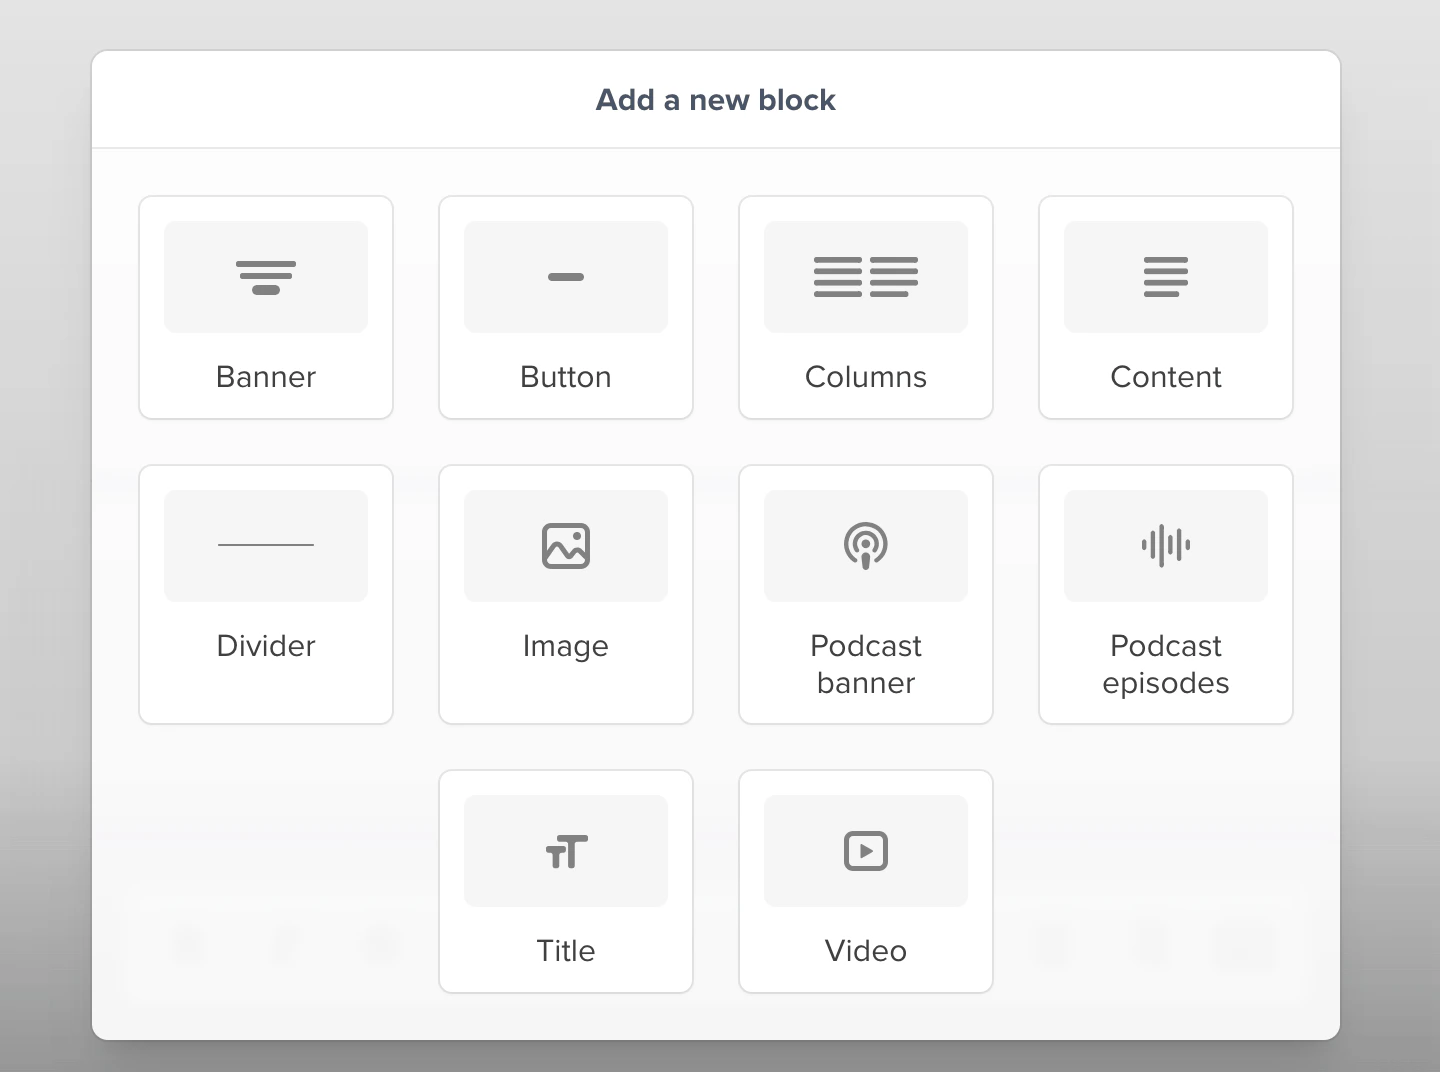
 Pick the type of block you'd like to add. There are several types of blocks you can add to your page: Banner, Button, Columns, Content, Divider, Image, Title, Video, Podcast banner, or Podcast episodes.
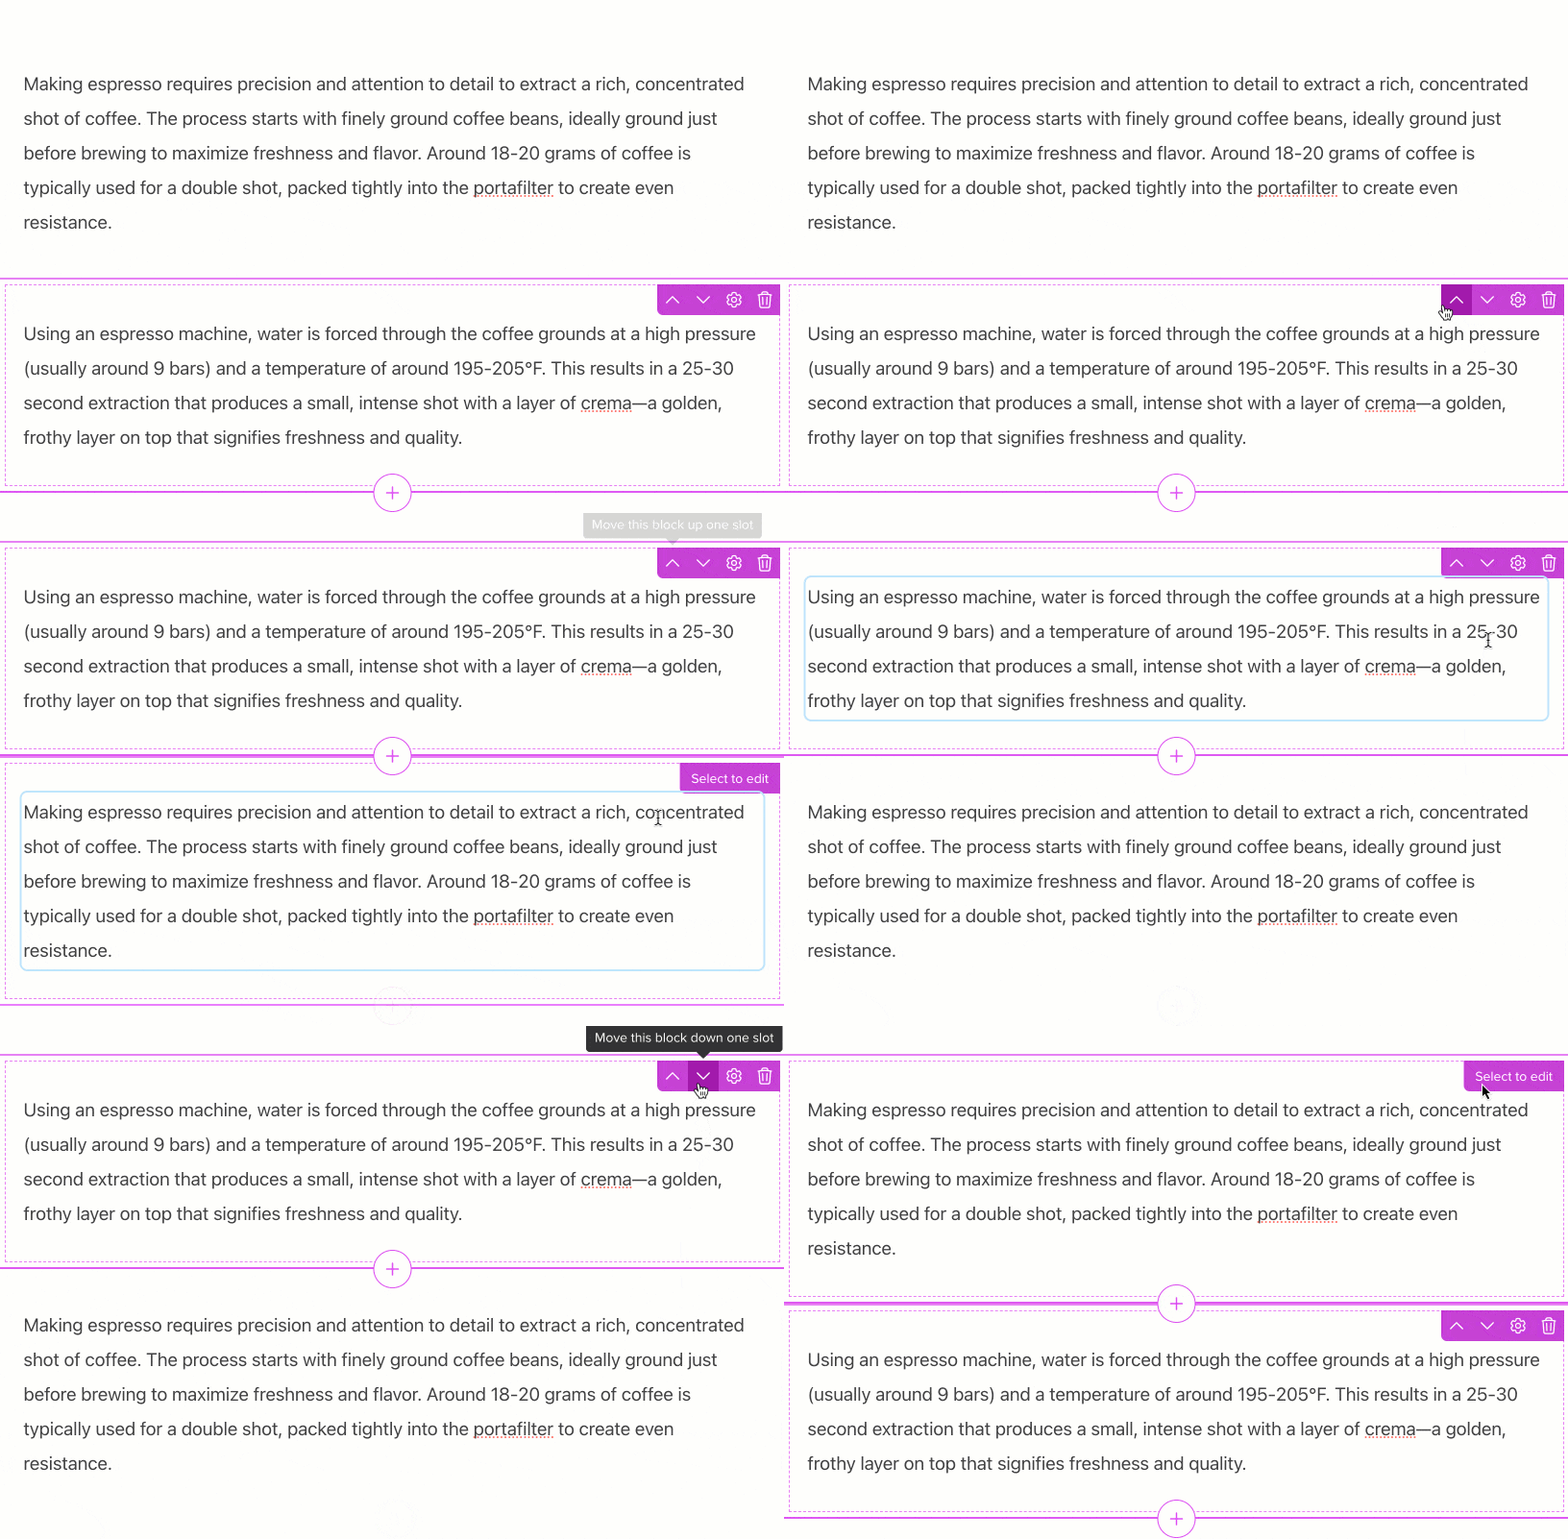
 To rearrange the order of your content blocks, click the block you want to move to select it, then click the **up** or **down** icons that appear in the top right corner of the block.
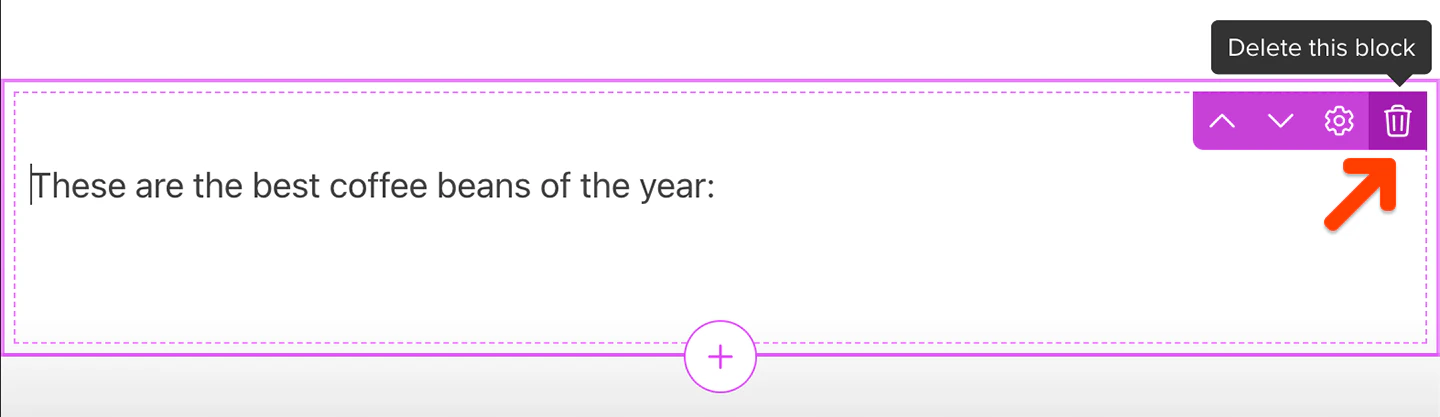
 To delete a content block, hover your cursor over the block you want to delete, then click the **trash can** button that appears in the top right corner of the block.
 ## Customize blocks
#### Banner block settings
Banner blocks may include a background image, a subheading, and a button, although only the title is required.
Banner blocks can have a background color or a background image. If you decide to add a background image, we recommend an image that is at least 1920px wide to ensure the best display quality.
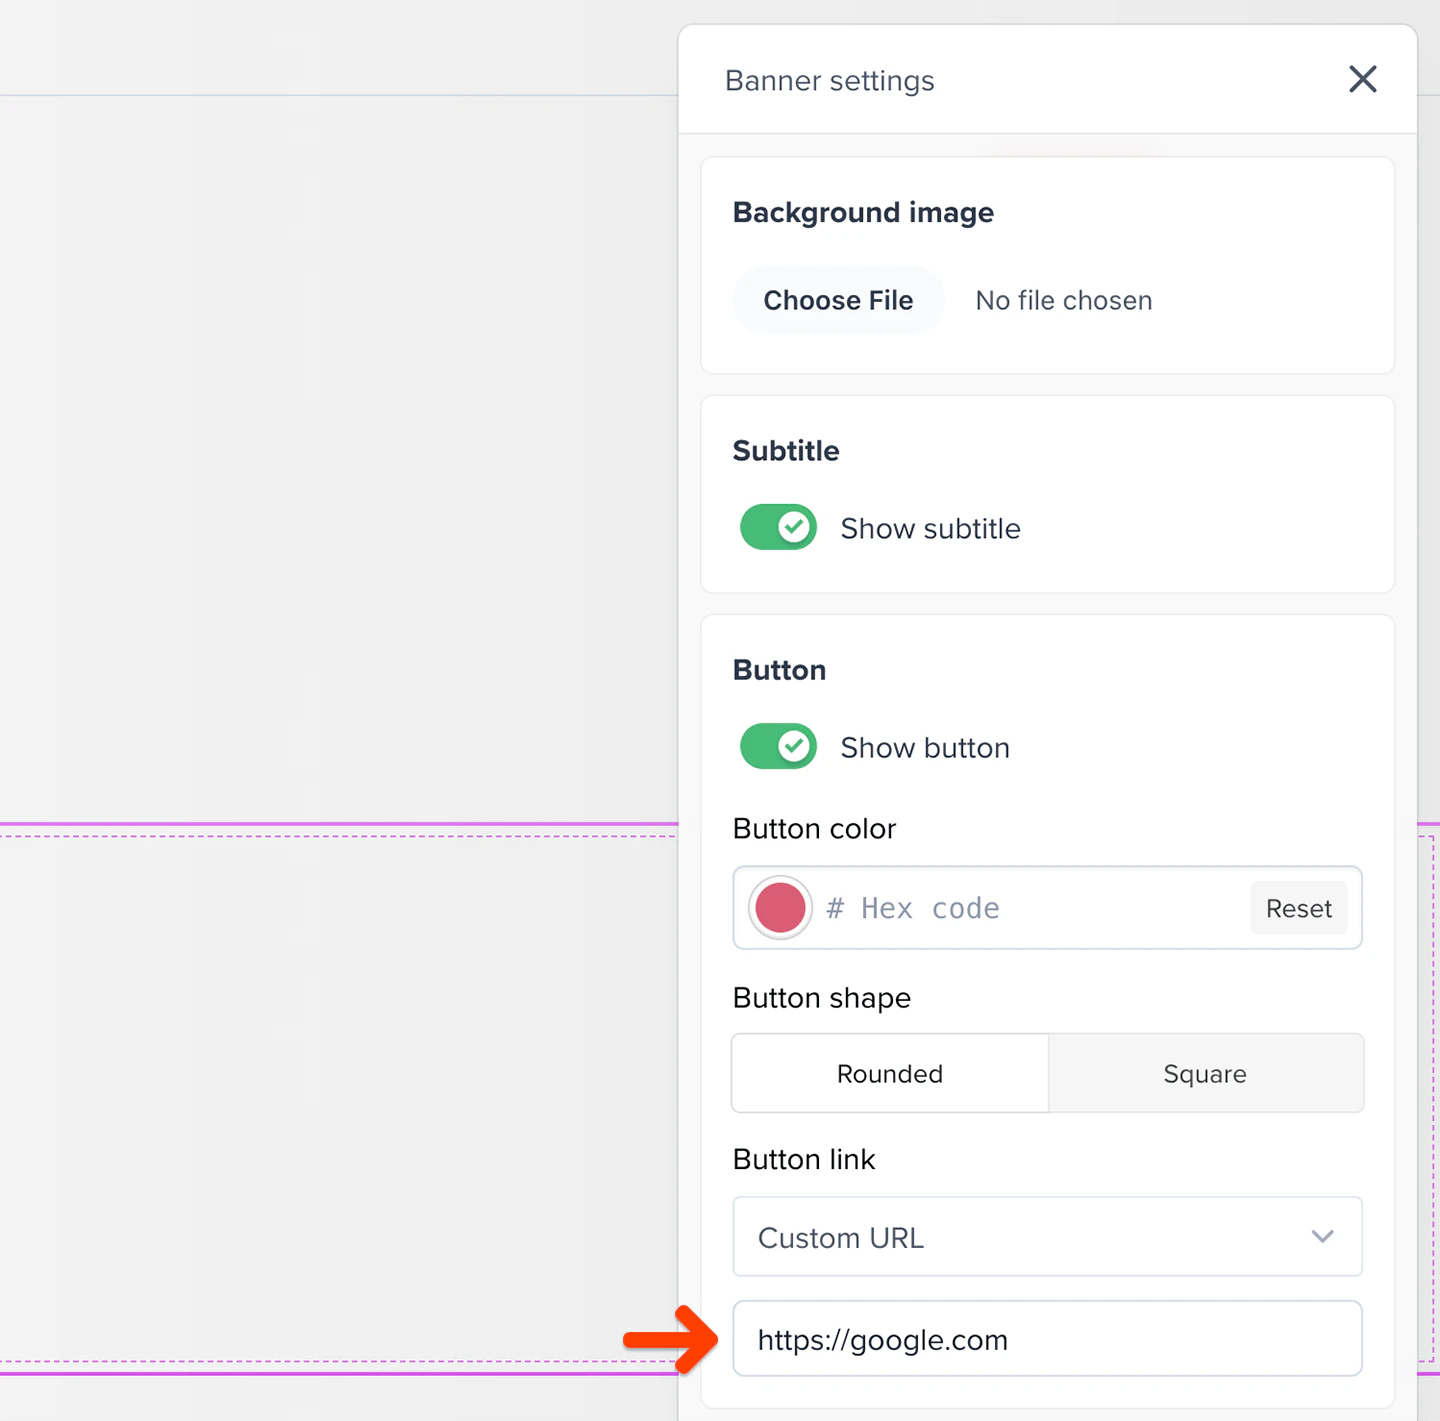
You can optionally add a subtitle and a button to the banner. If you enable the banner's button, you'll be able to choose the button's color, shape (rounded or square), and the link or destination that visitors will be taken to when they click it, whether that's your [subscribe page](/website-builder/pages/subscribe-page/) or a custom URL.
## Customize blocks
#### Banner block settings
Banner blocks may include a background image, a subheading, and a button, although only the title is required.
Banner blocks can have a background color or a background image. If you decide to add a background image, we recommend an image that is at least 1920px wide to ensure the best display quality.
You can optionally add a subtitle and a button to the banner. If you enable the banner's button, you'll be able to choose the button's color, shape (rounded or square), and the link or destination that visitors will be taken to when they click it, whether that's your [subscribe page](/website-builder/pages/subscribe-page/) or a custom URL.
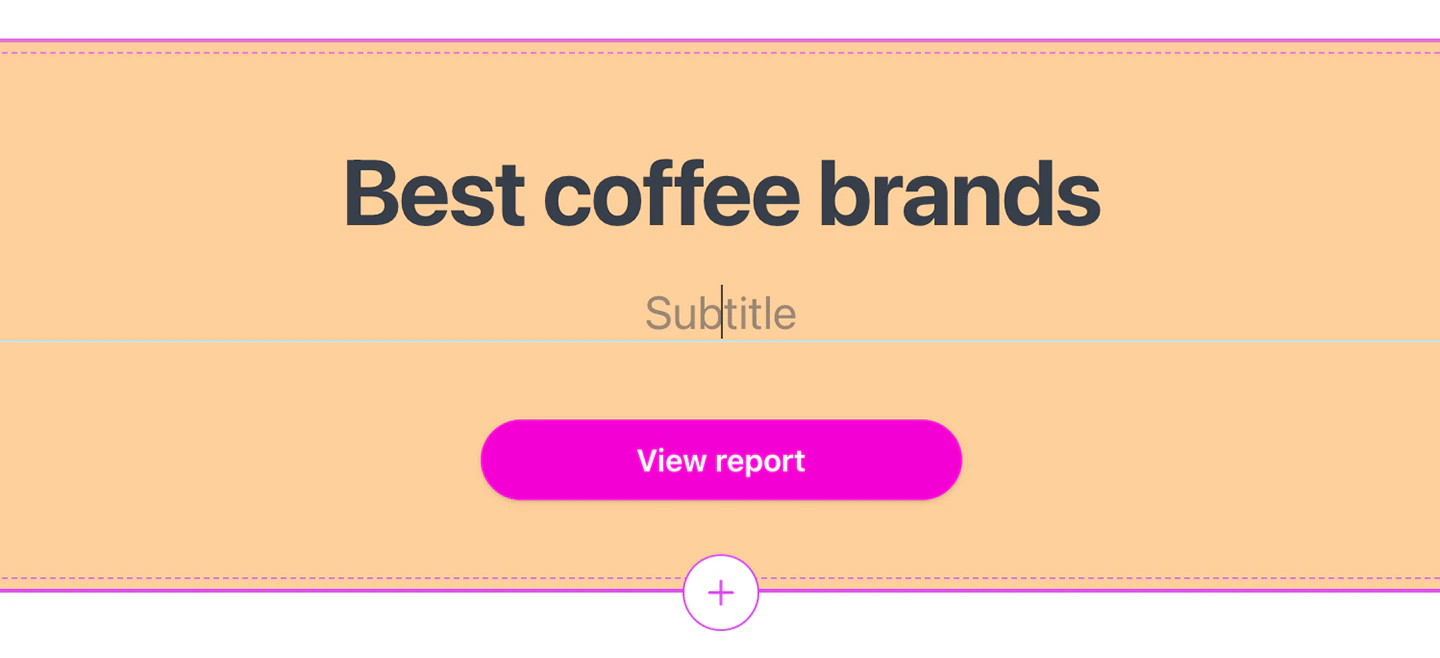
 Click any of the labels in the preview area to edit them.
 #### Button block settings
Button blocks are simple buttons that can be linked to a URL.
You can choose a background color for your button block, as well as whether to align the button to the left or center.
You'll be able to choose the button's color, shape (rounded or square), and the link or destination that visitors will be taken to when they click it, whether that's your [subscribe page](/website-builder/pages/subscribe-page/) or a custom URL.
#### Button block settings
Button blocks are simple buttons that can be linked to a URL.
You can choose a background color for your button block, as well as whether to align the button to the left or center.
You'll be able to choose the button's color, shape (rounded or square), and the link or destination that visitors will be taken to when they click it, whether that's your [subscribe page](/website-builder/pages/subscribe-page/) or a custom URL.
 #### Columns block settings
Columns blocks allow you to show two columns of content side by side, whether it's two text columns, an image and text, or a title text.
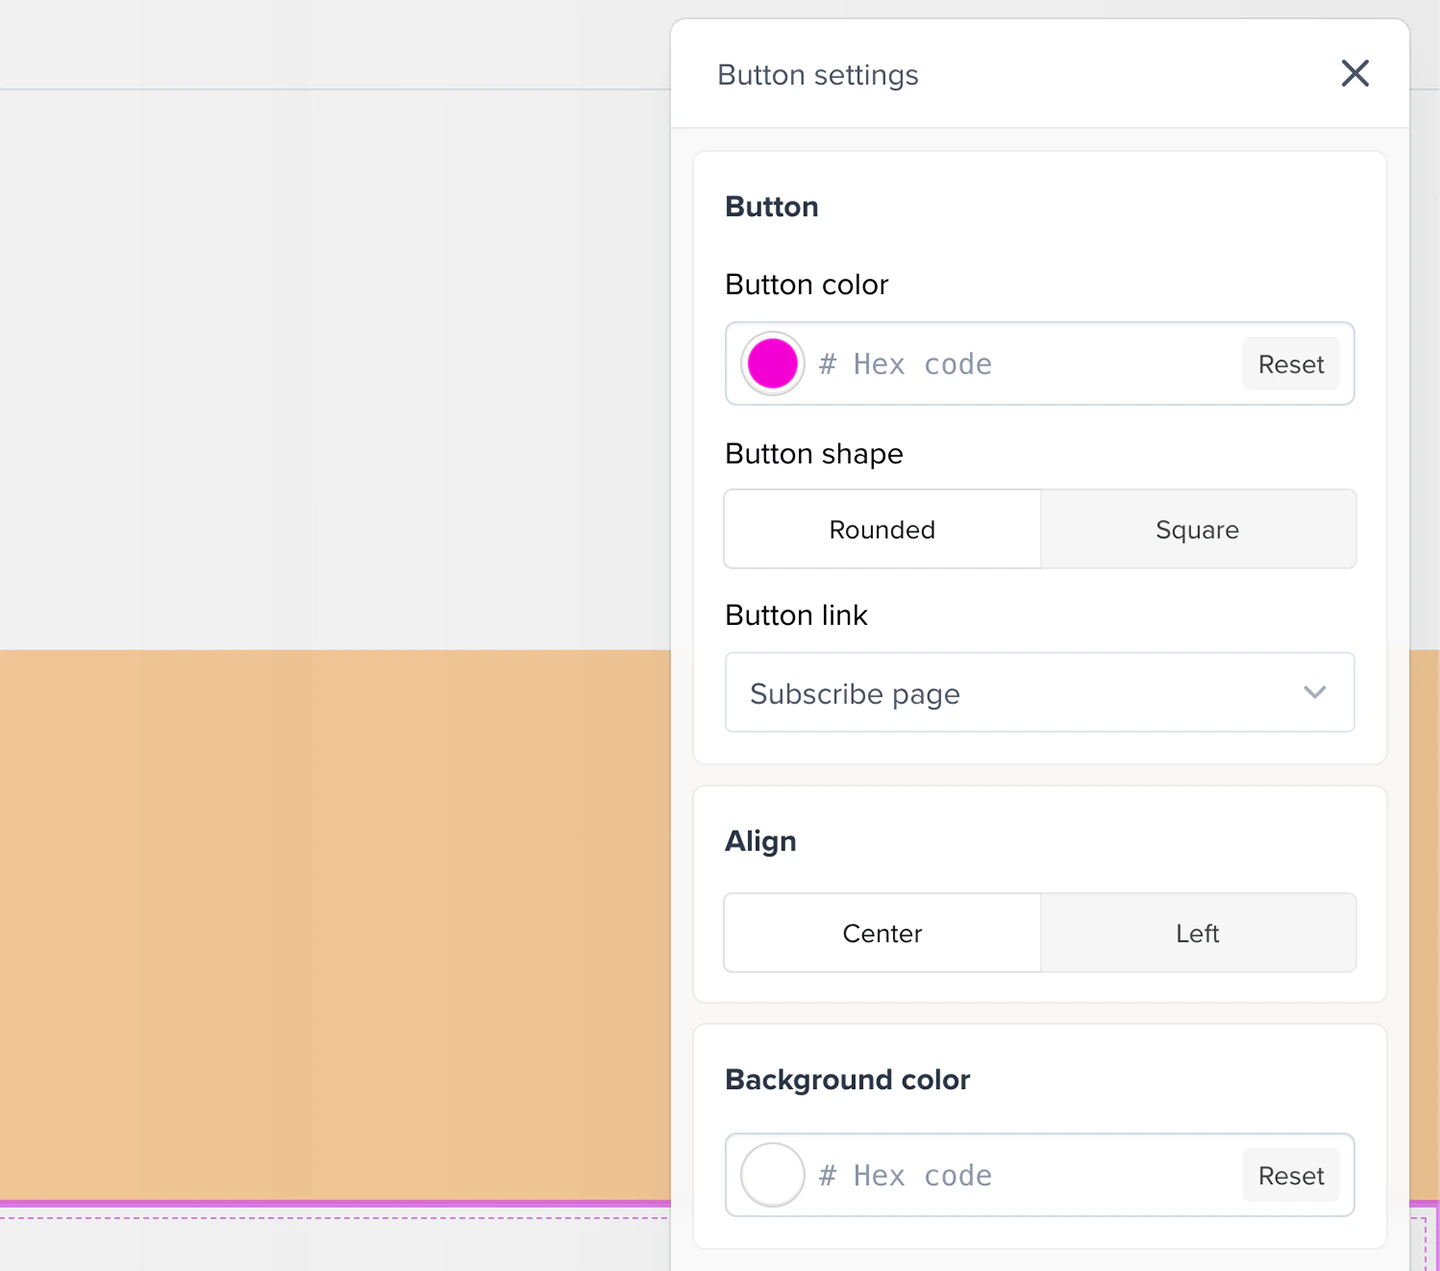
You can choose a background color for your columns block, as well as its layout. You can choose between two columns of text, an image and text, or a title and text.
#### Columns block settings
Columns blocks allow you to show two columns of content side by side, whether it's two text columns, an image and text, or a title text.
You can choose a background color for your columns block, as well as its layout. You can choose between two columns of text, an image and text, or a title and text.
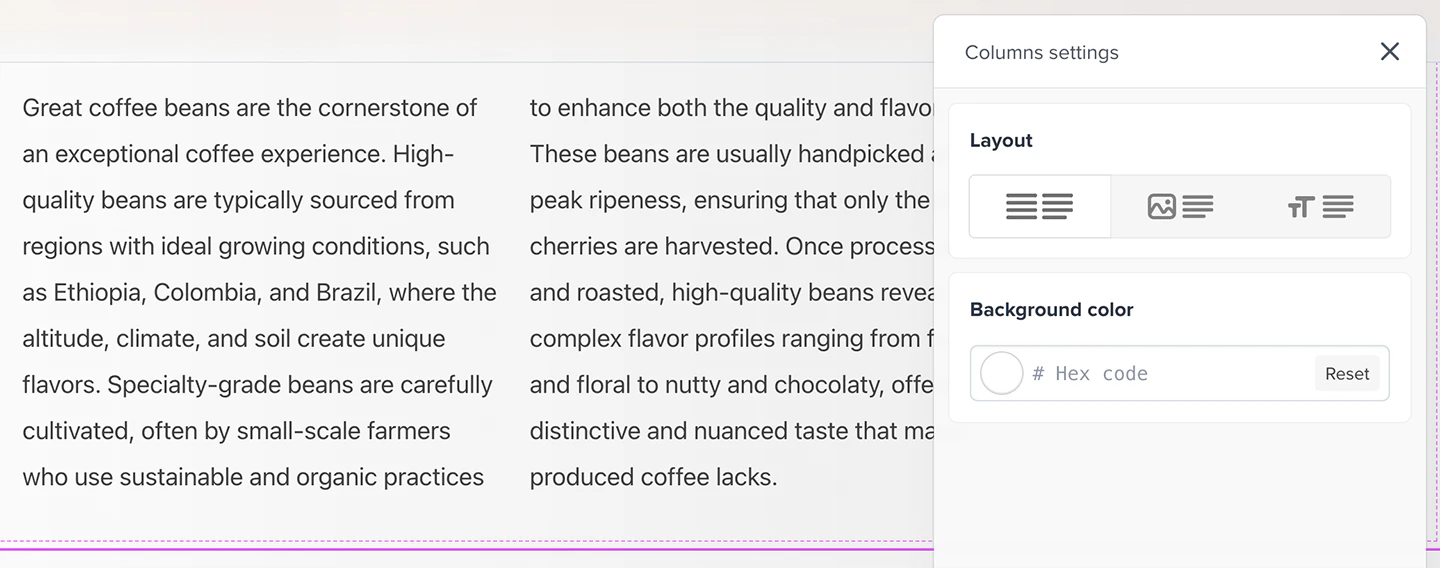 If you choose an image and text layout, you can upload an image, choose its tint, and set its opacity. You can also choose whether the image should be aligned to the left or right.
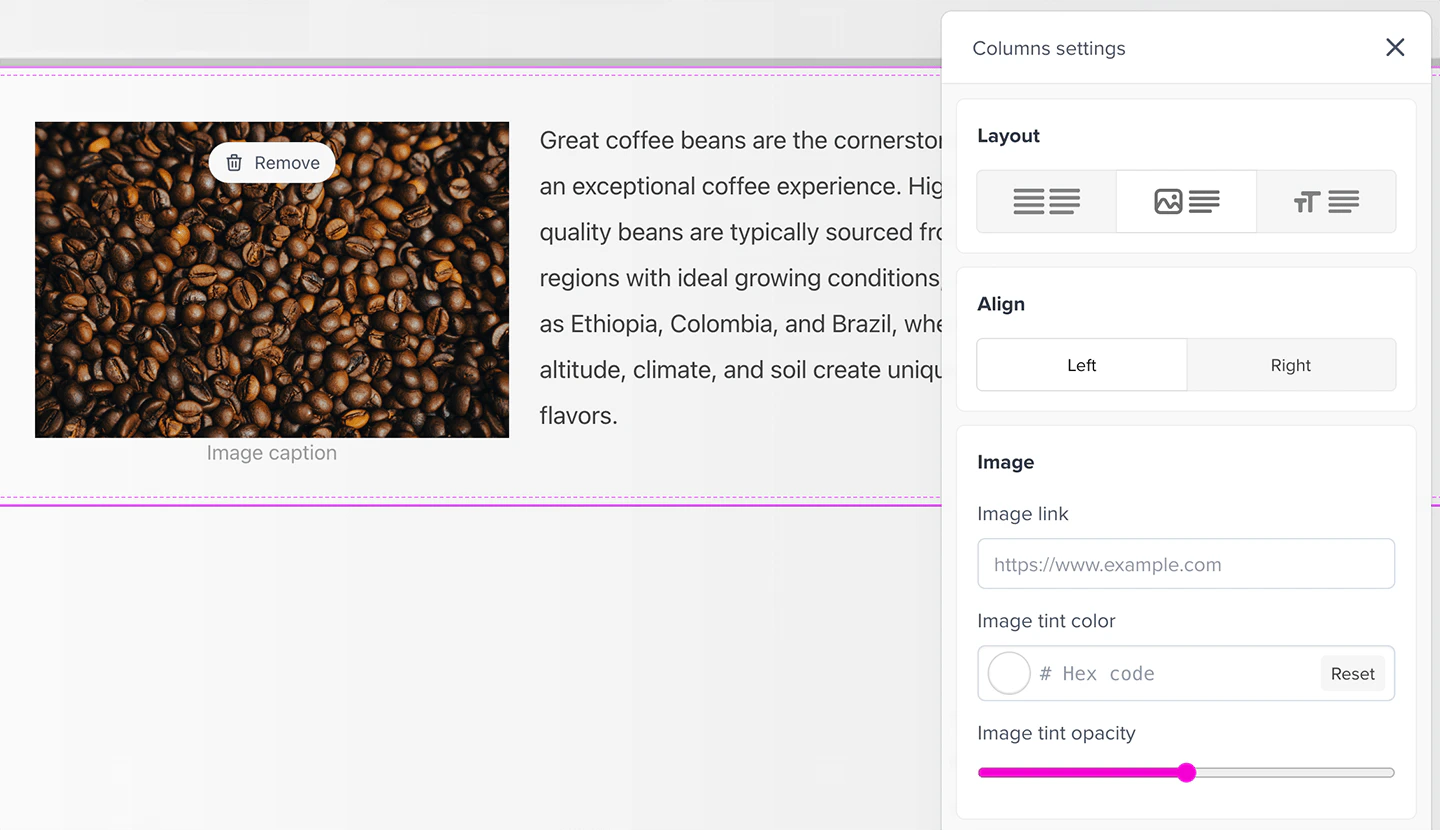 If you choose a title and text layout, you can choose whether the text should be aligned to the left or right.
 #### Content block settings
Content blocks are simple text blocks, although they can contain images and videos as well.
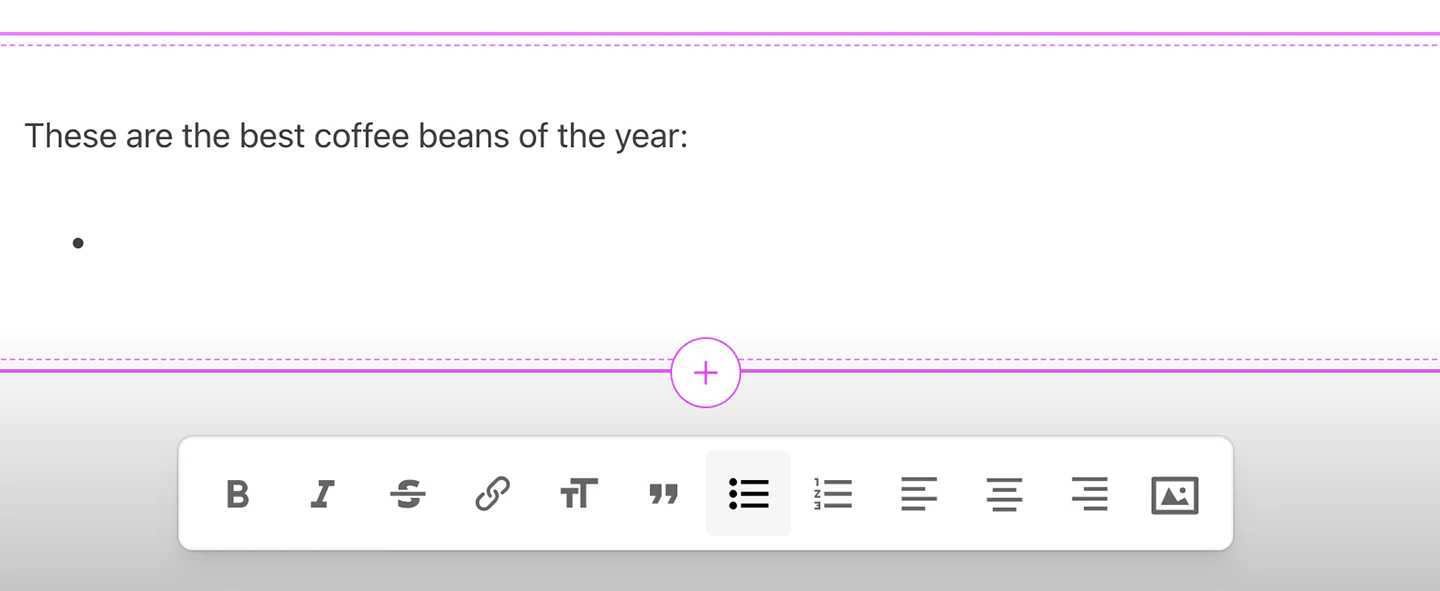
Use the icons at the bottom of the page to format your content and add elements like links and images.
#### Content block settings
Content blocks are simple text blocks, although they can contain images and videos as well.
Use the icons at the bottom of the page to format your content and add elements like links and images.
 You can also drag and drop images from your computer into the content editor.
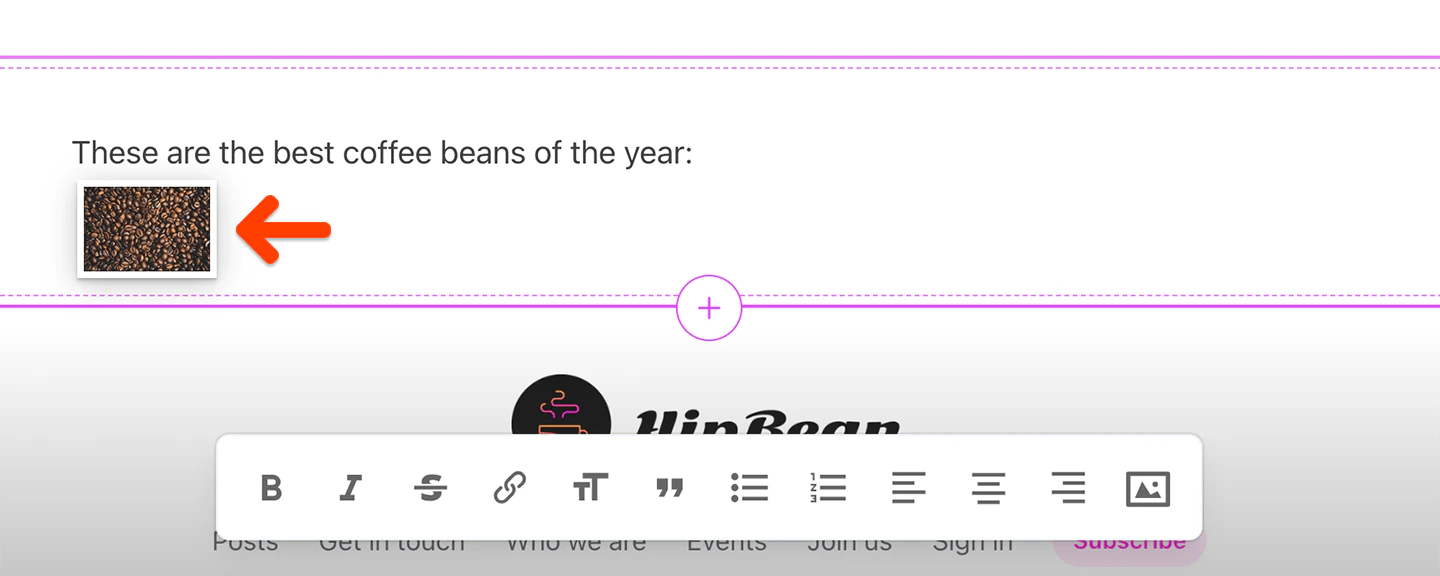 Images will be automatically resized to fit the width of the content area.
If you'd like an image to appear smaller than the full width of the content editor, use your favorite image-editing app or a free online tool like [this one](https://onlinetools.com/image/pad-image) to add some margins to the left and right of the image before uploading it.
If you'd like to make the image cover the full width of the page, or if you'd like to use a different background color around it, [add an image block](#image-block-settings) to unlock further customization.
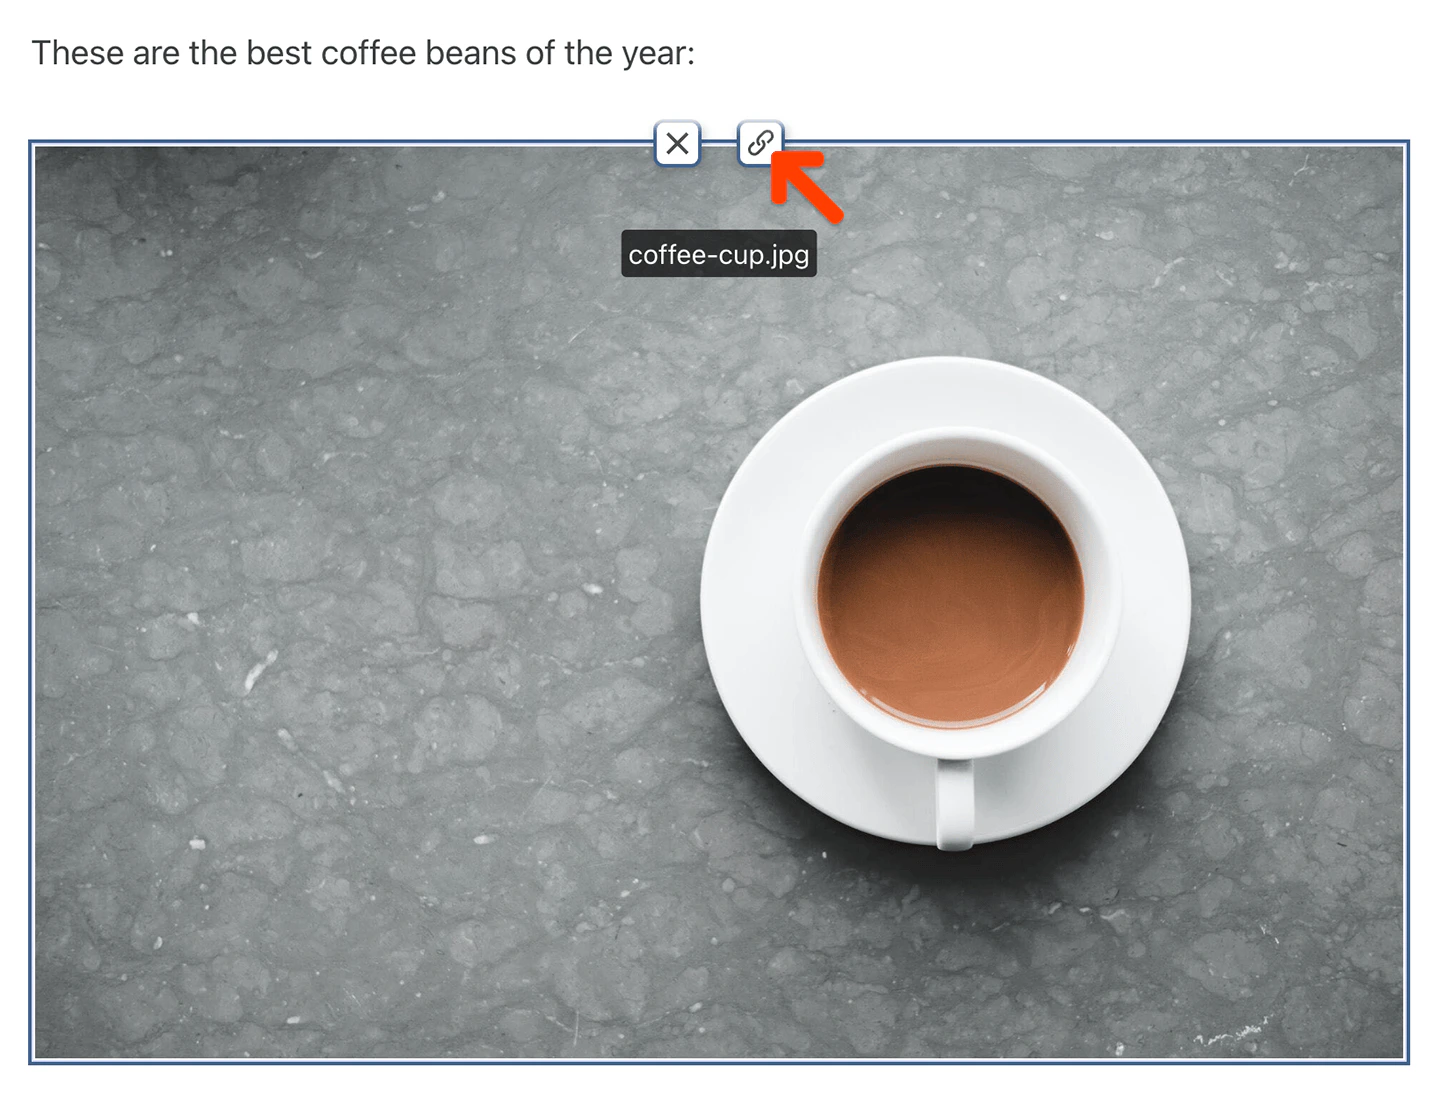
To turn an image into a clickable link, click the image in the editor, then click the **link** icon that appears on it.
Images will be automatically resized to fit the width of the content area.
If you'd like an image to appear smaller than the full width of the content editor, use your favorite image-editing app or a free online tool like [this one](https://onlinetools.com/image/pad-image) to add some margins to the left and right of the image before uploading it.
If you'd like to make the image cover the full width of the page, or if you'd like to use a different background color around it, [add an image block](#image-block-settings) to unlock further customization.
To turn an image into a clickable link, click the image in the editor, then click the **link** icon that appears on it.
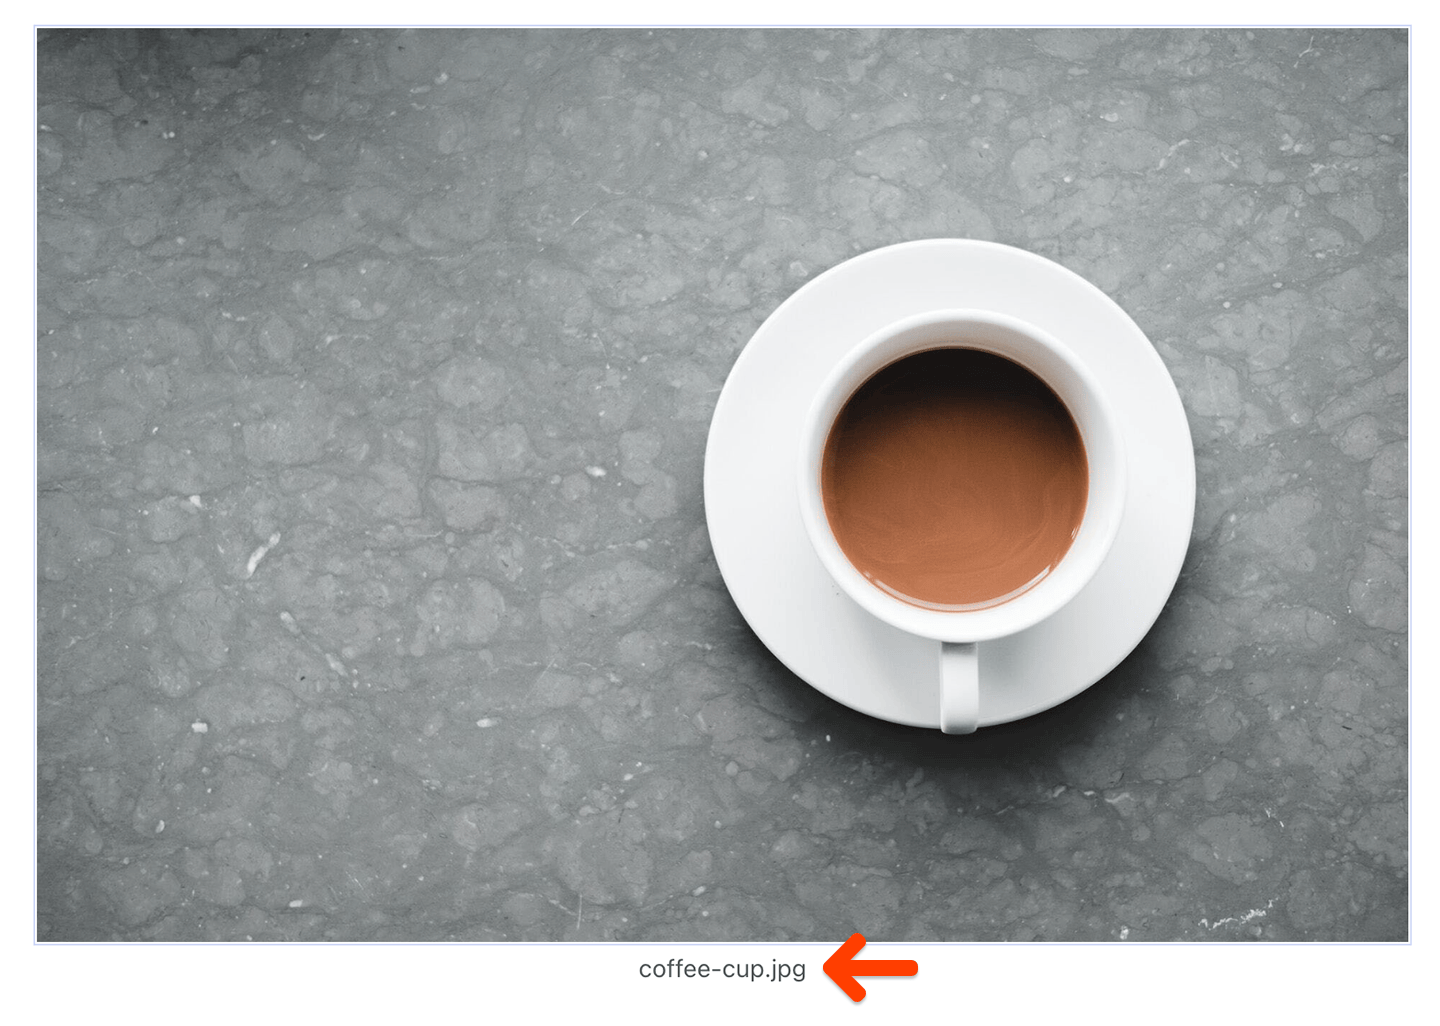
 Memberful will automatically use the name of the image file as the caption. Click the caption to enter a custom one.
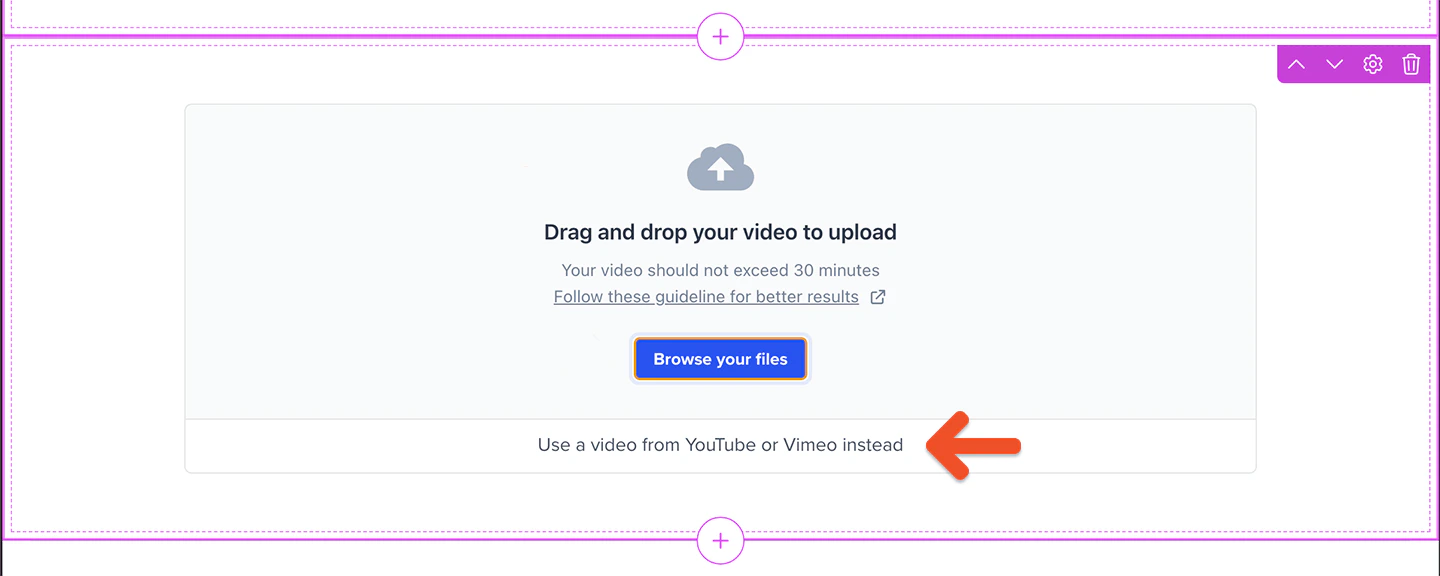
 To embed a video, paste the URL of a video from YouTube or Vimeo into the content editor, and it will be automatically embedded. Only YouTube and Vimeo videos are supported at this time.
While you're in the editor, we'll display a thumbnail of your video as a placeholder, but it will be replaced with the actual embedded video when you publish the page or preview it by exiting the editor.
To embed a video, paste the URL of a video from YouTube or Vimeo into the content editor, and it will be automatically embedded. Only YouTube and Vimeo videos are supported at this time.
While you're in the editor, we'll display a thumbnail of your video as a placeholder, but it will be replaced with the actual embedded video when you publish the page or preview it by exiting the editor.
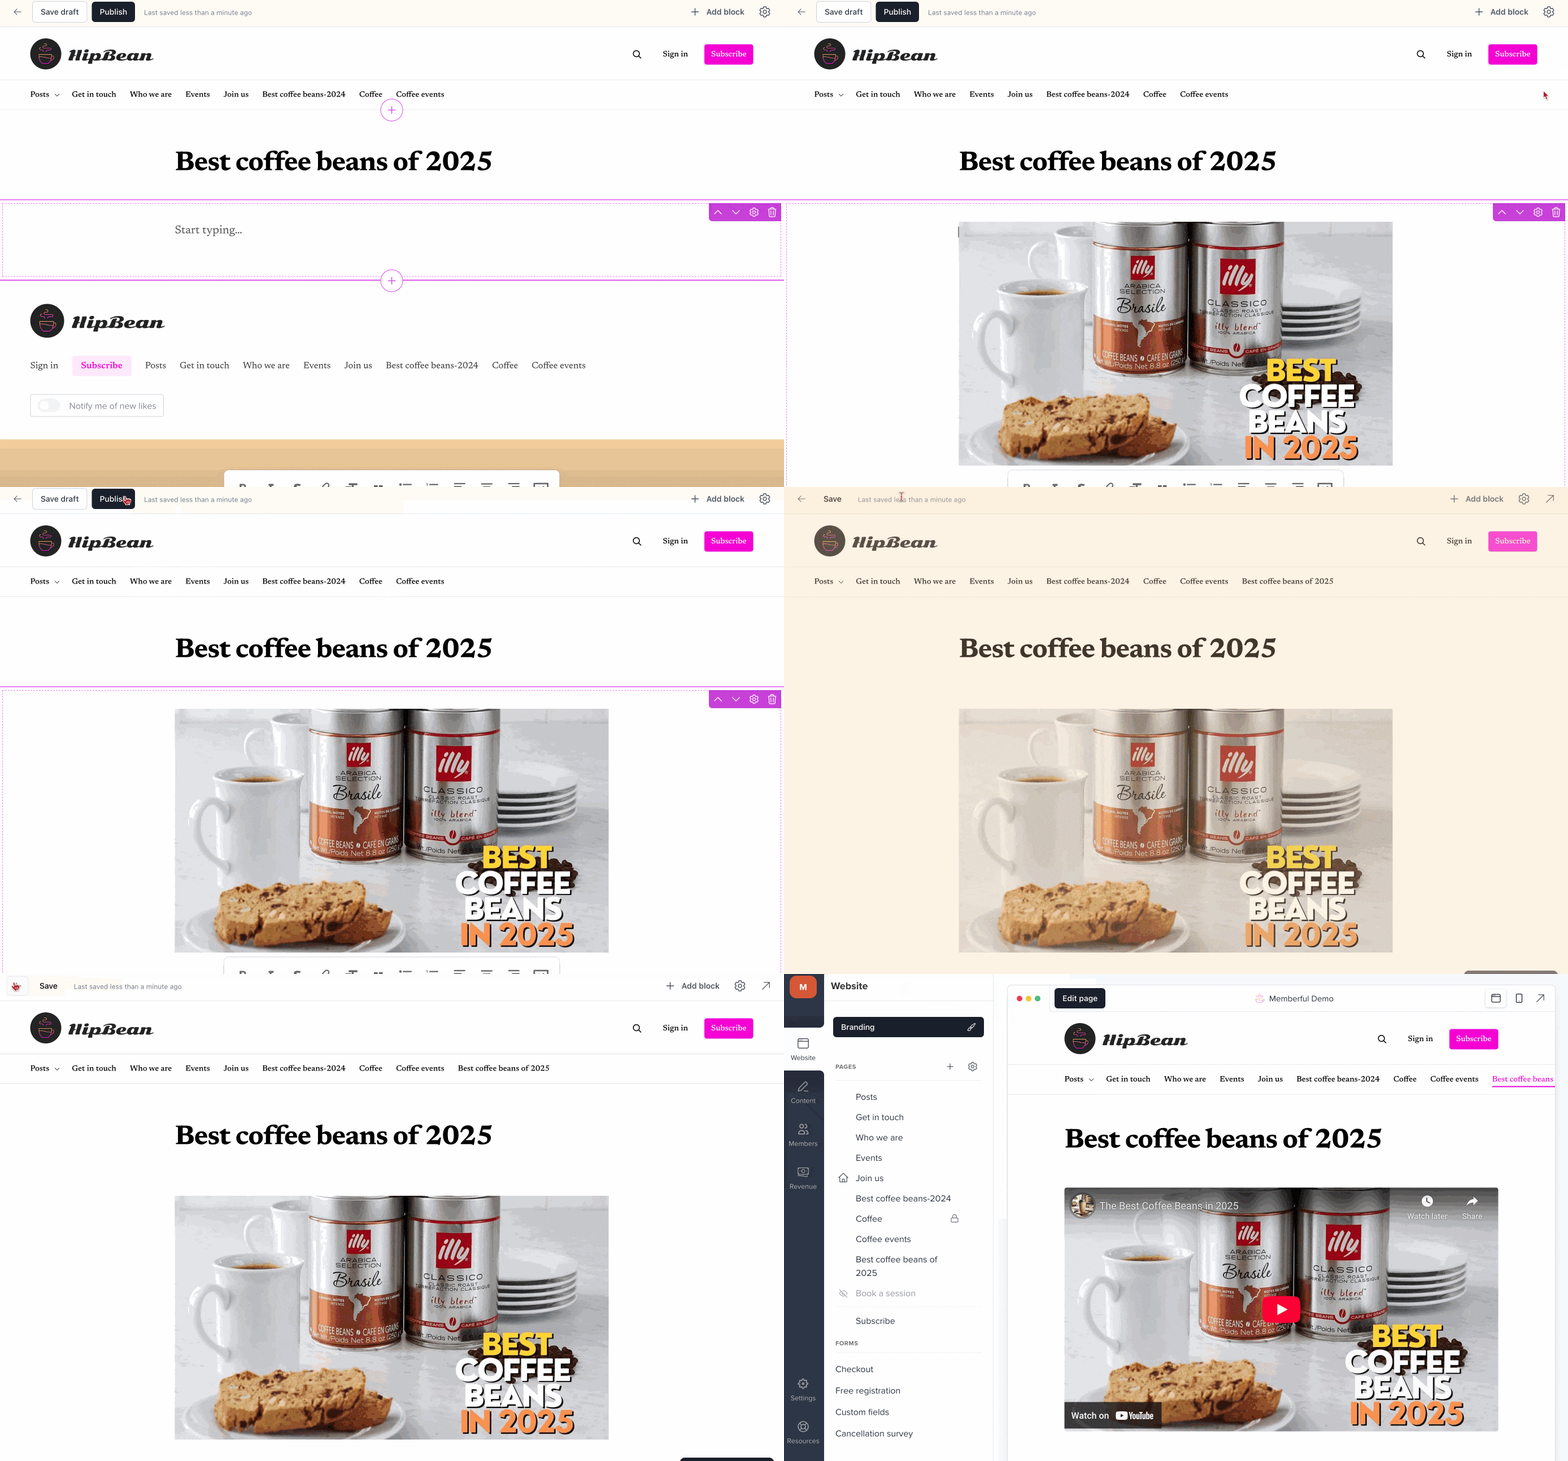 Videos will be automatically resized to fit the width of the content area. If you'd like to make the video cover the full width of the page, or if you'd like to use a different background color around it, [add a video block](#video-block-settings) to unlock further customization.
Additionally, you can configure who should be able to see this content, so you can display the content for members only. [Learn more about this setting](#select-who-can-see-a-content-block).
#### Divider block settings
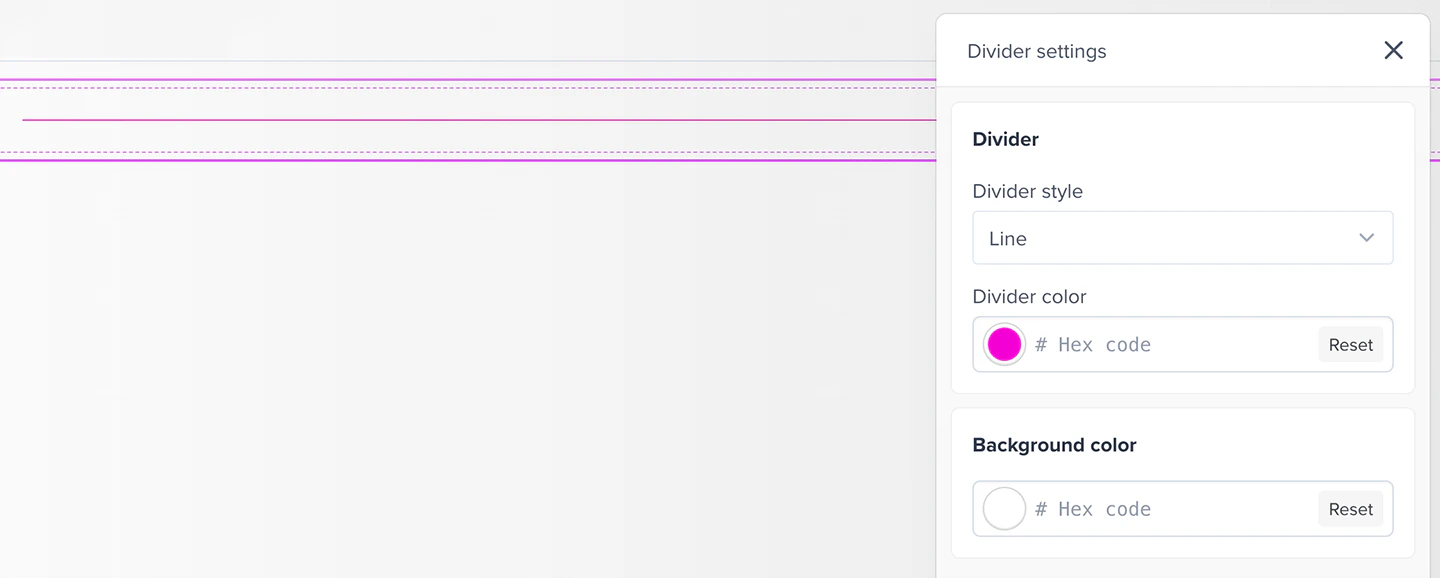
Divider blocks are horizontal lines that can be used to separate content.
Divider blocks allow you to pick the style and color of the divider, as well as the background color of the block.
Videos will be automatically resized to fit the width of the content area. If you'd like to make the video cover the full width of the page, or if you'd like to use a different background color around it, [add a video block](#video-block-settings) to unlock further customization.
Additionally, you can configure who should be able to see this content, so you can display the content for members only. [Learn more about this setting](#select-who-can-see-a-content-block).
#### Divider block settings
Divider blocks are horizontal lines that can be used to separate content.
Divider blocks allow you to pick the style and color of the divider, as well as the background color of the block.
 #### Image block settings
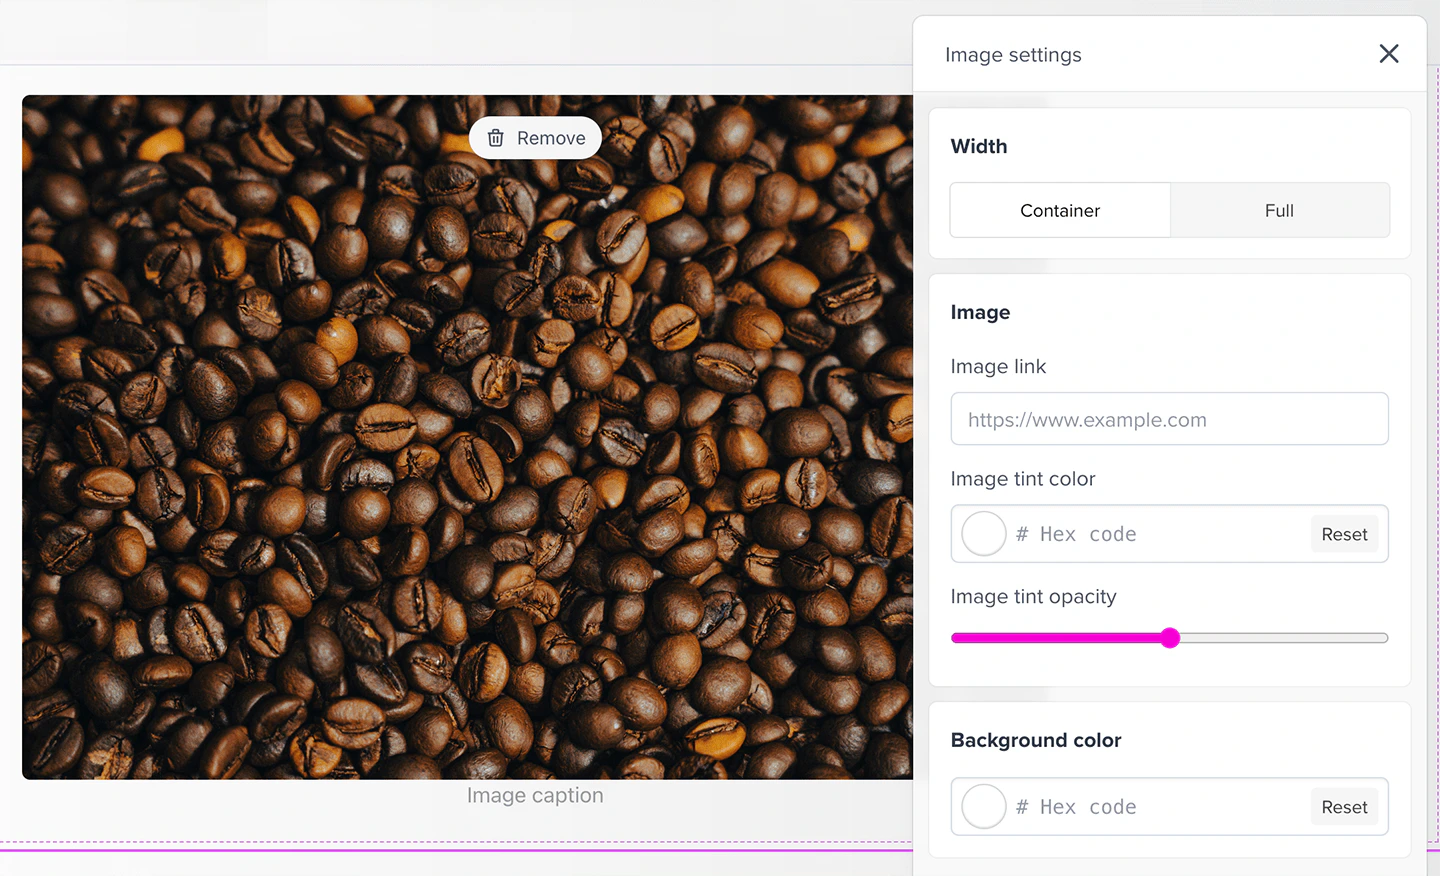
Image blocks allow you to display an image in its own block, as opposed to within a content block. This allows you to give it more room and put a different background color behind it, or to expand it to cover the whole width of the page.
Click the image placeholder or drag and drop a JPEG or PNG file into it to upload your image.
#### Image block settings
Image blocks allow you to display an image in its own block, as opposed to within a content block. This allows you to give it more room and put a different background color behind it, or to expand it to cover the whole width of the page.
Click the image placeholder or drag and drop a JPEG or PNG file into it to upload your image.
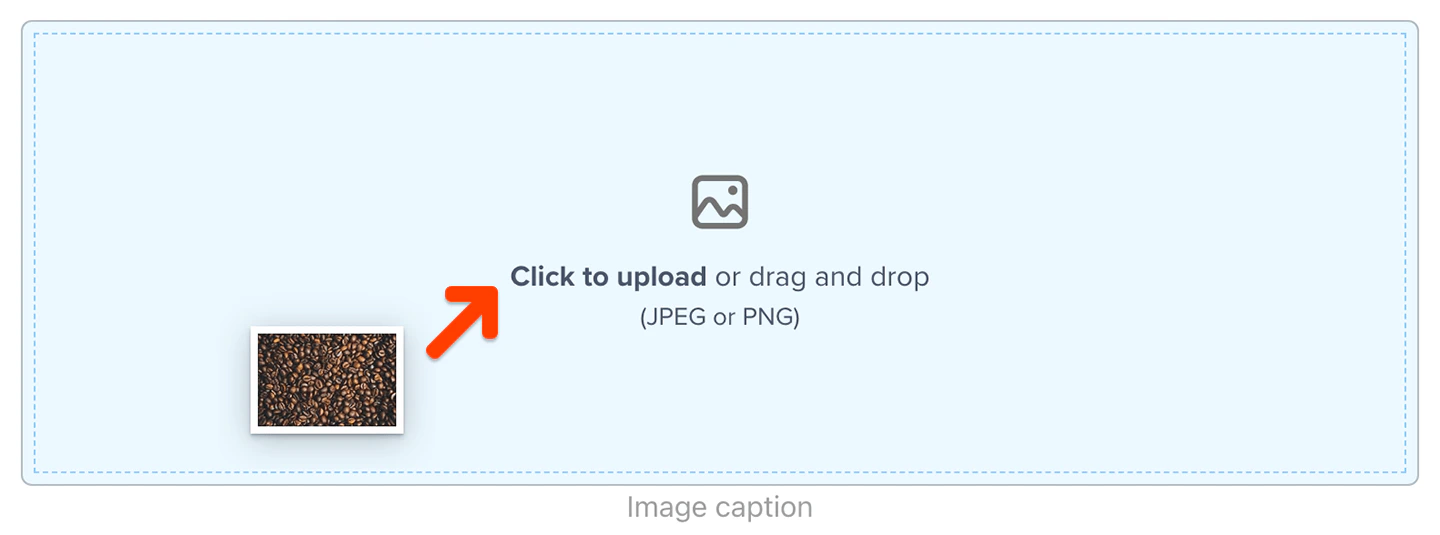 Memberful will automatically use the name of the image file as the caption. Click the caption to enter a custom one.
You can choose whether the image should be displayed at full width or within the confines of the main container (aligned with text content).
Memberful will automatically use the name of the image file as the caption. Click the caption to enter a custom one.
You can choose whether the image should be displayed at full width or within the confines of the main container (aligned with text content).
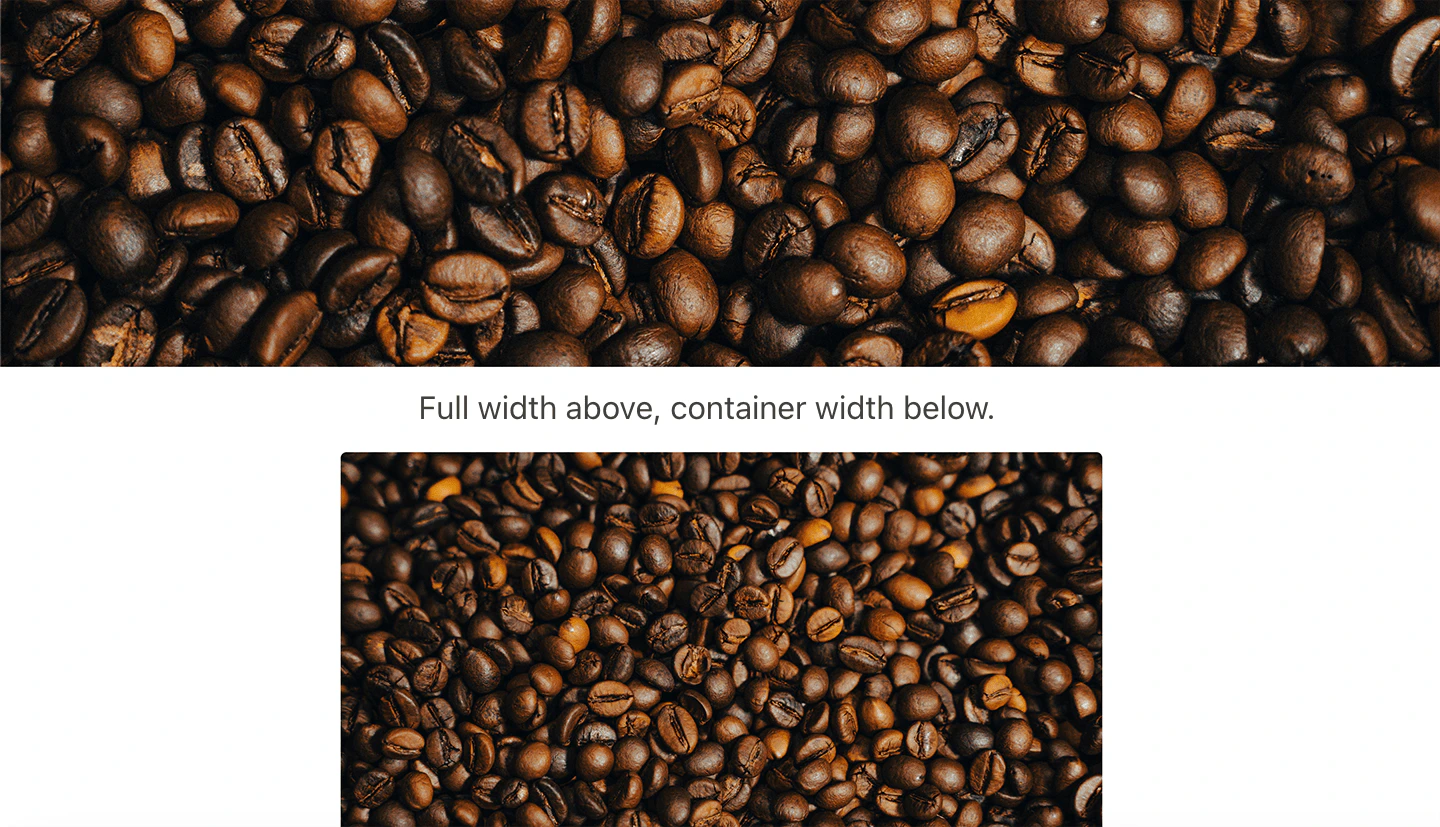 You can also choose whether the image should be clickable and where it should link to, as well as the tint color and opacity of the image.
You can also choose a background color for the block (only visible if the video isn't full width).
You can also choose whether the image should be clickable and where it should link to, as well as the tint color and opacity of the image.
You can also choose a background color for the block (only visible if the video isn't full width).
 #### Title block settings
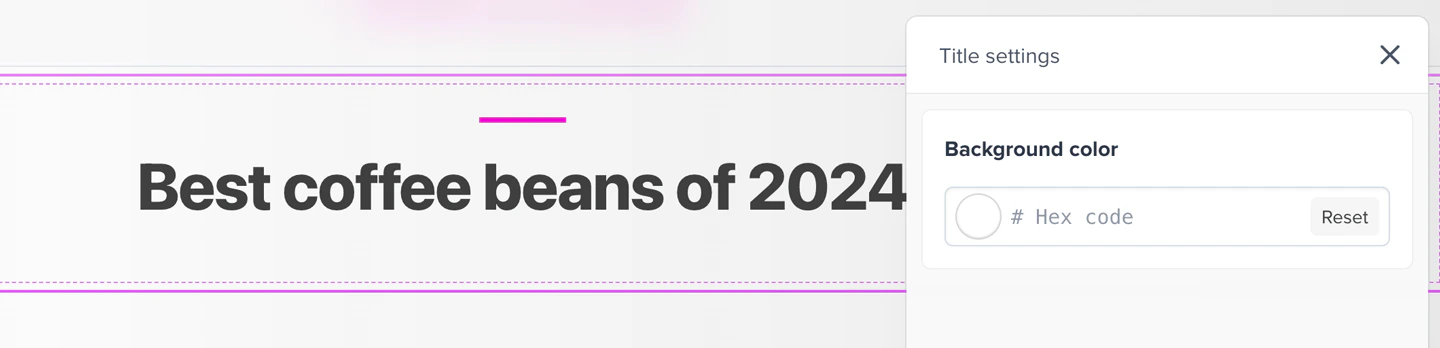
Title blocks allow you to add a headline to your page.
You can choose a background color for the block.
#### Title block settings
Title blocks allow you to add a headline to your page.
You can choose a background color for the block.
 #### Video block settings
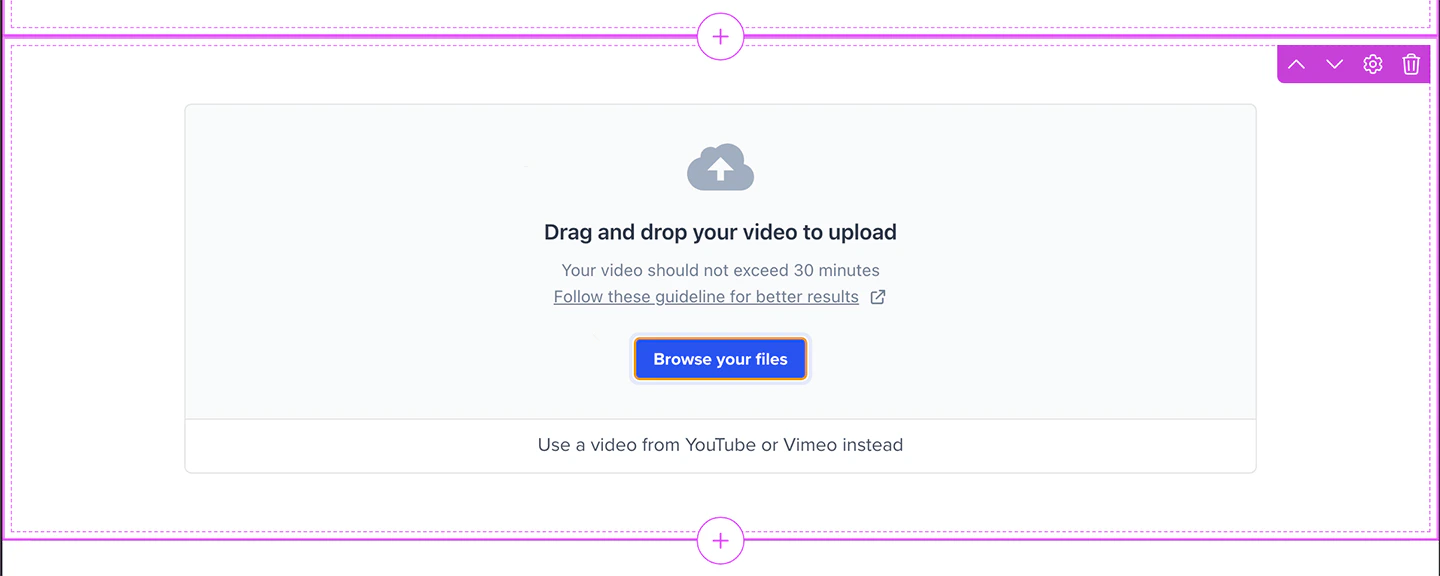
Video blocks allow you to upload hosted videos or embed video URLs to display a video in its own block, as opposed to within a content block. This allows you to give it more room and put a different background color behind it, or to expand it to cover the whole width of the page.
#### Video block settings
Video blocks allow you to upload hosted videos or embed video URLs to display a video in its own block, as opposed to within a content block. This allows you to give it more room and put a different background color behind it, or to expand it to cover the whole width of the page.
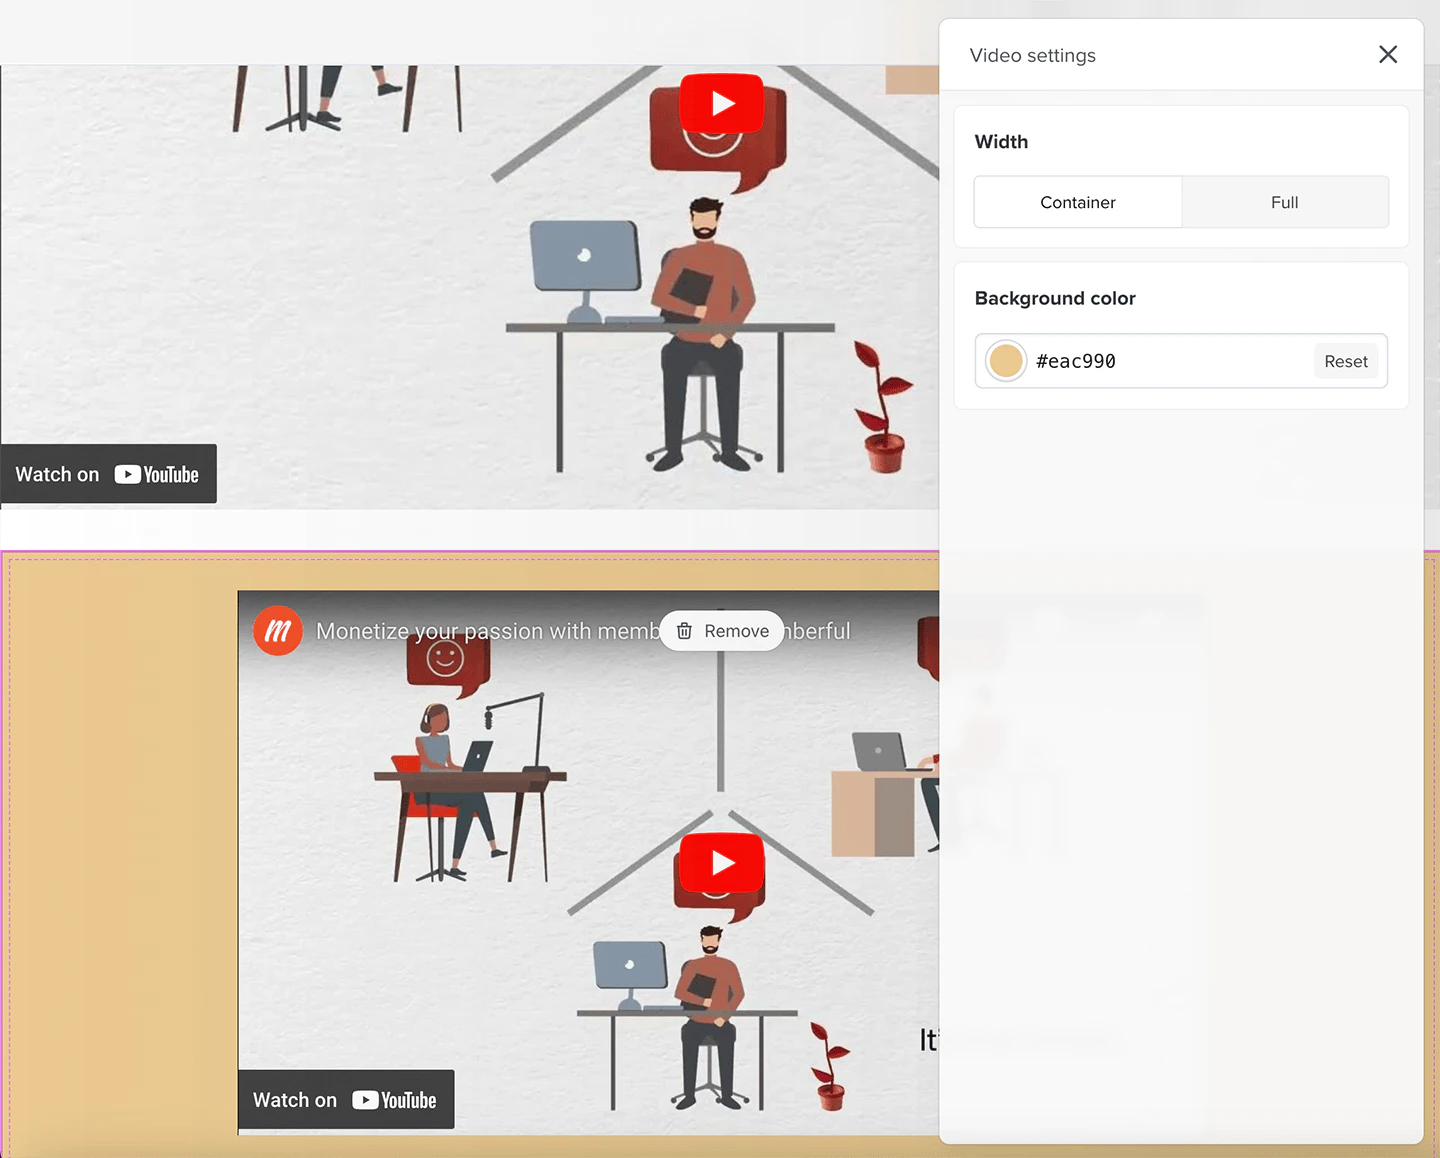
 You can choose whether the video should be displayed at full width or within the confines of the main container (aligned with text content).
You can also choose a background color for the block (only visible if the video isn't full width).
You can choose whether the video should be displayed at full width or within the confines of the main container (aligned with text content).
You can also choose a background color for the block (only visible if the video isn't full width).
 #### Podcast banner block settings
Podcast banner blocks allow you to showcase a members-only podcast on your page.
Members will see the podcast's title, cover art, description, and a button with a call to action.
#### Podcast banner block settings
Podcast banner blocks allow you to showcase a members-only podcast on your page.
Members will see the podcast's title, cover art, description, and a button with a call to action.
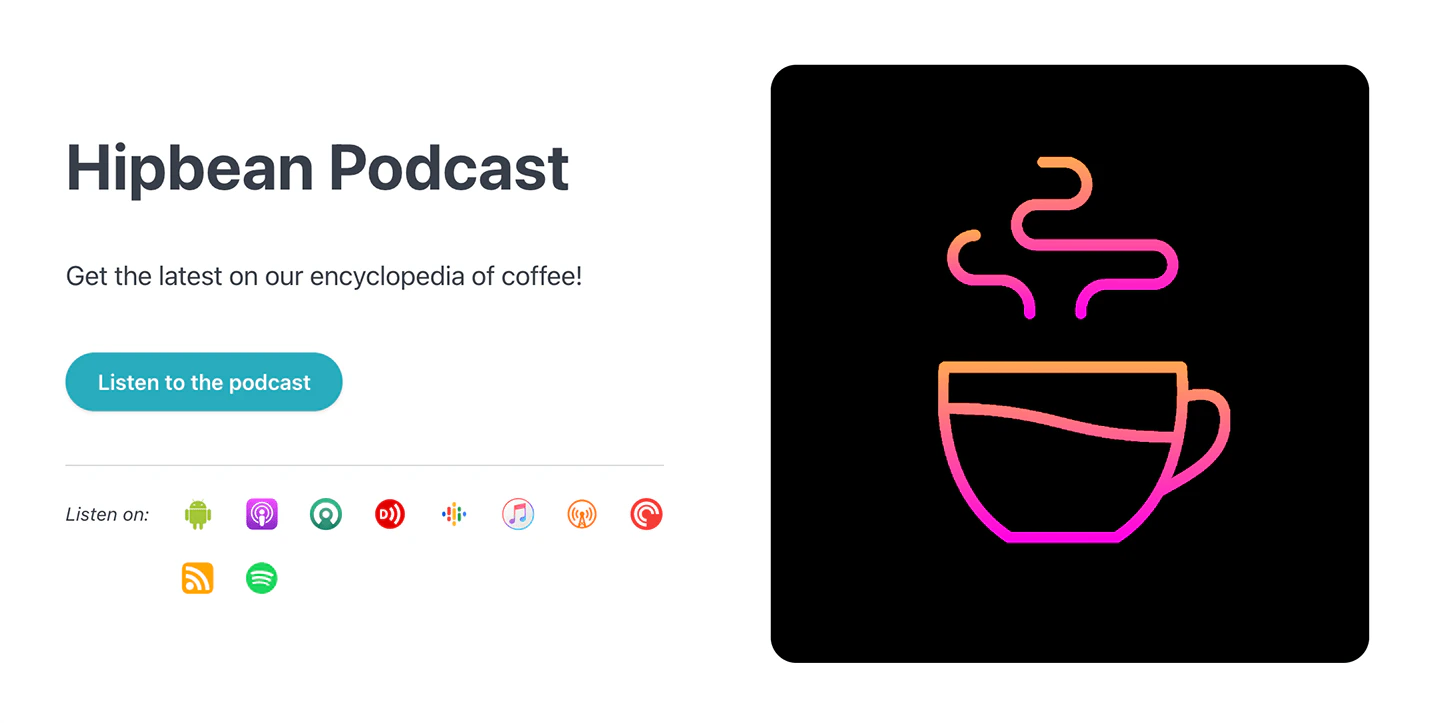 Once you select a podcast, the title and cover art are loaded from the RSS feed and cannot be edited. The description is also fetched from the RSS feed but it can be edited.
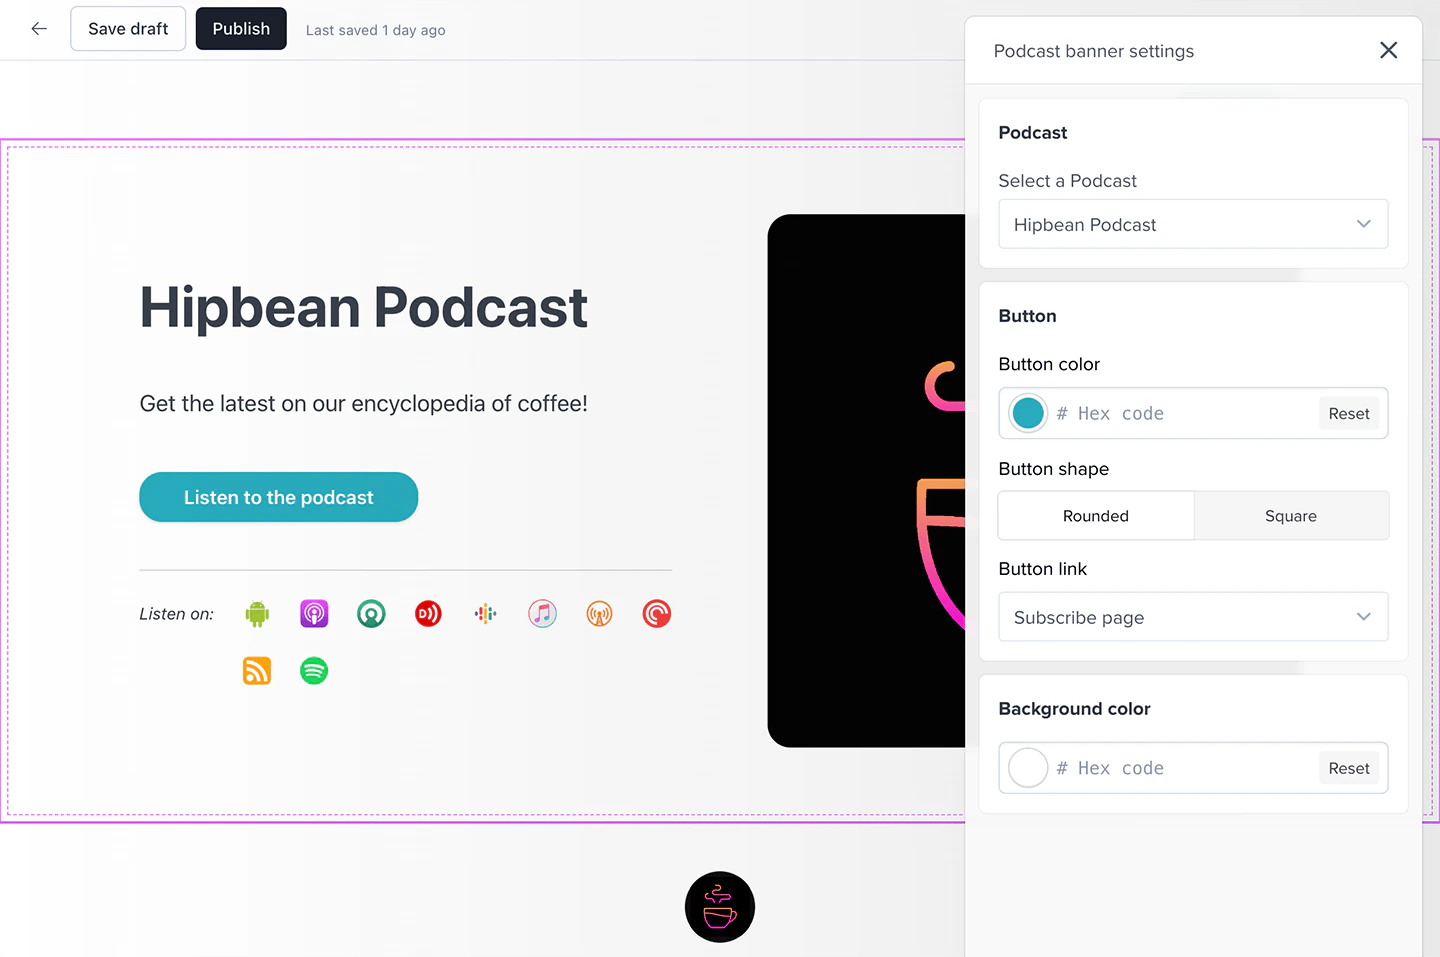
You'll be able to choose the button's label, color and shape (rounded or square), in addition to the link or destination that visitors will be taken to when they click it, whether that's your [subscribe page](/website-builder/pages/subscribe-page/) or a custom URL. You can also choose a background color for the block.
Once you select a podcast, the title and cover art are loaded from the RSS feed and cannot be edited. The description is also fetched from the RSS feed but it can be edited.
You'll be able to choose the button's label, color and shape (rounded or square), in addition to the link or destination that visitors will be taken to when they click it, whether that's your [subscribe page](/website-builder/pages/subscribe-page/) or a custom URL. You can also choose a background color for the block.
 #### Podcast episodes block settings
The podcast episodes block allows you to display a list of podcast episodes on your page.
#### Podcast episodes block settings
The podcast episodes block allows you to display a list of podcast episodes on your page.
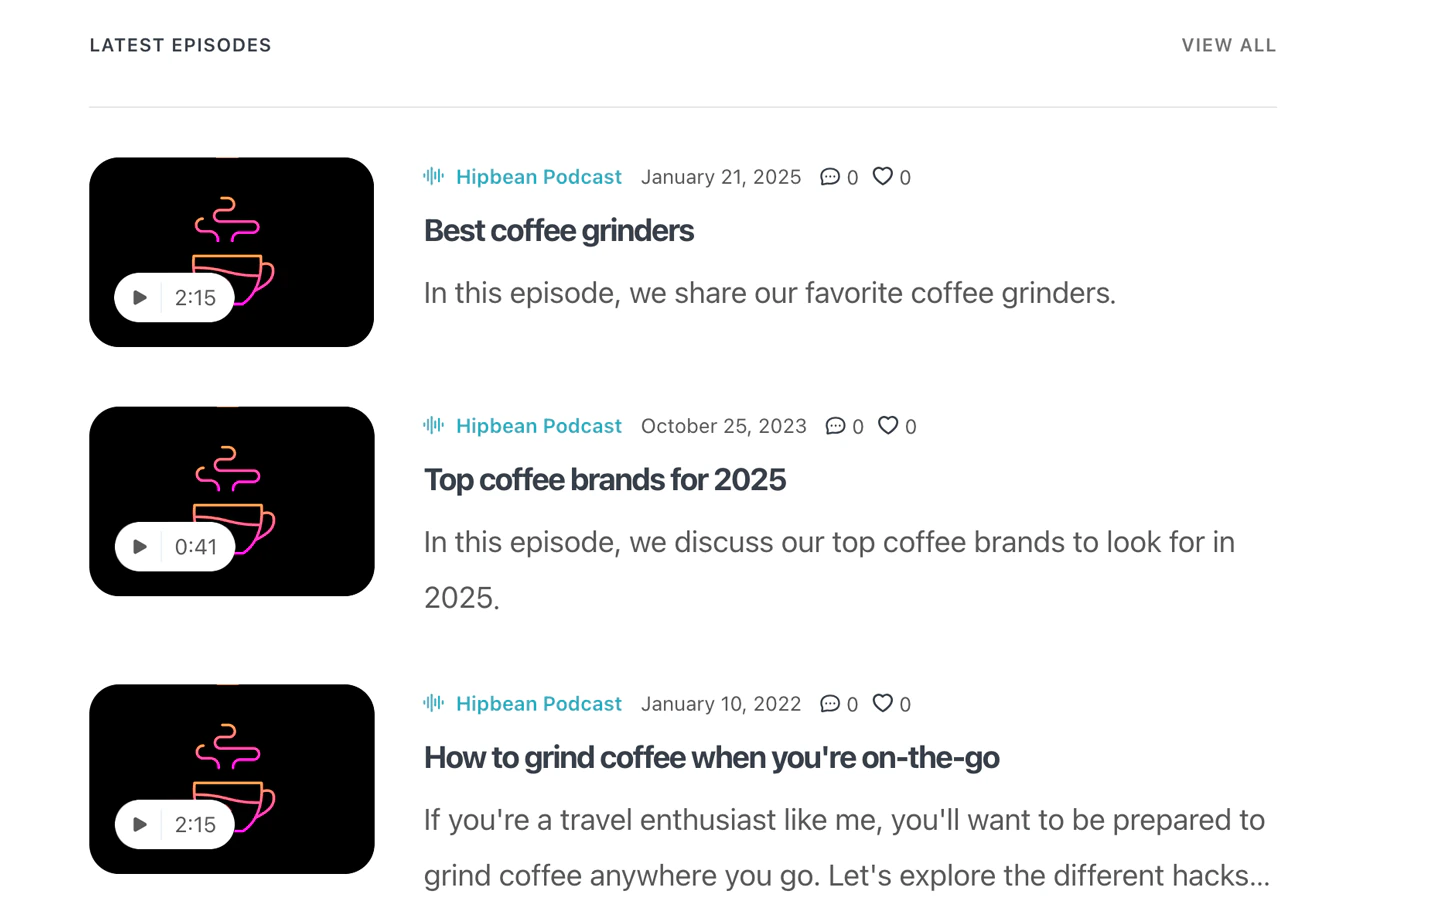 Once you select a podcast, Memberful will display a list of episodes, each with its own cover art if it exists, or the podcast's cover art if it doesn't. The episode's title, description, and duration (if available) will also be displayed. The "view all" link takes the member to an archive page that lists the podcast's episodes.
Episodes are also posts, and if the post is assigned to a category, we'll display a link to the category as well.
The only setting for this block is the selection of which podcast to display.
## Upload videos to a page
You can upload video files via video blocks or drag and drop video files into your page for *paid members*. When creating your video files we recommend following our [video processing guidelines](/website-builder/video-content/video-processing) to ensure ideal streaming.
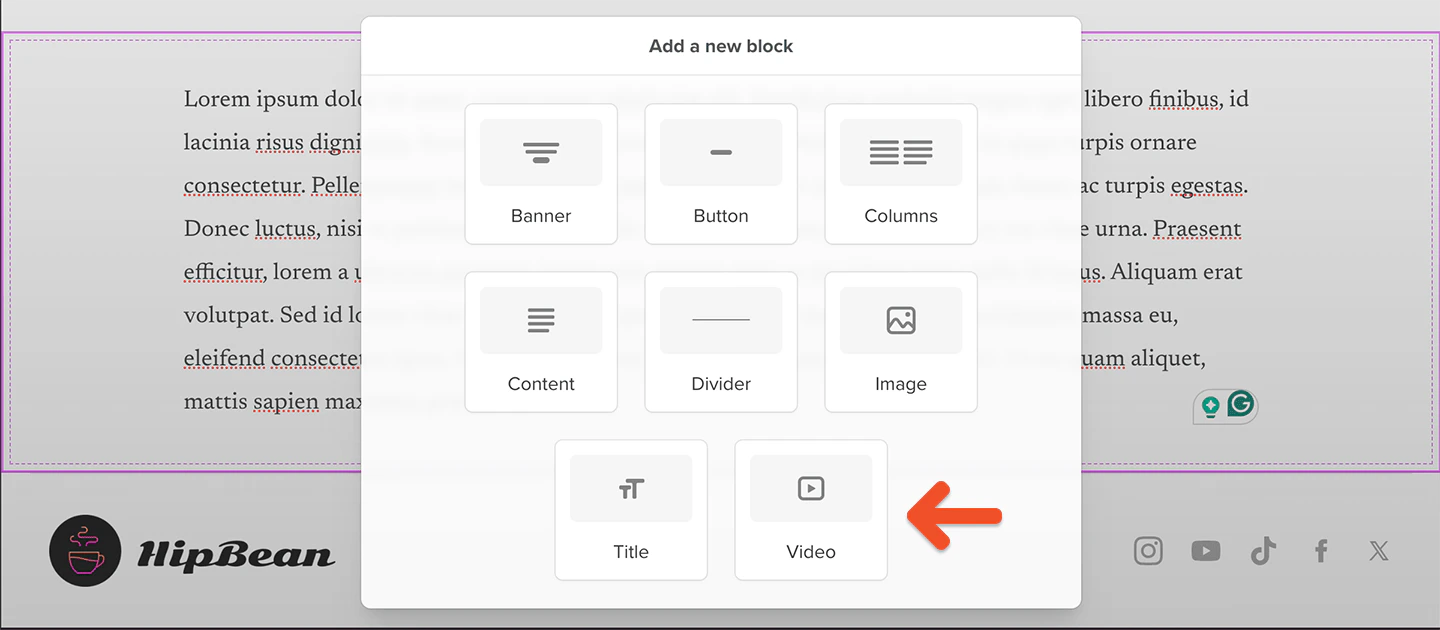
To upload your video, go to your page, [add content to your page](/website-builder/pages/create-a-page/#add-content-to-the-page) and click the **Video** block icon:
Once you select a podcast, Memberful will display a list of episodes, each with its own cover art if it exists, or the podcast's cover art if it doesn't. The episode's title, description, and duration (if available) will also be displayed. The "view all" link takes the member to an archive page that lists the podcast's episodes.
Episodes are also posts, and if the post is assigned to a category, we'll display a link to the category as well.
The only setting for this block is the selection of which podcast to display.
## Upload videos to a page
You can upload video files via video blocks or drag and drop video files into your page for *paid members*. When creating your video files we recommend following our [video processing guidelines](/website-builder/video-content/video-processing) to ensure ideal streaming.
To upload your video, go to your page, [add content to your page](/website-builder/pages/create-a-page/#add-content-to-the-page) and click the **Video** block icon:
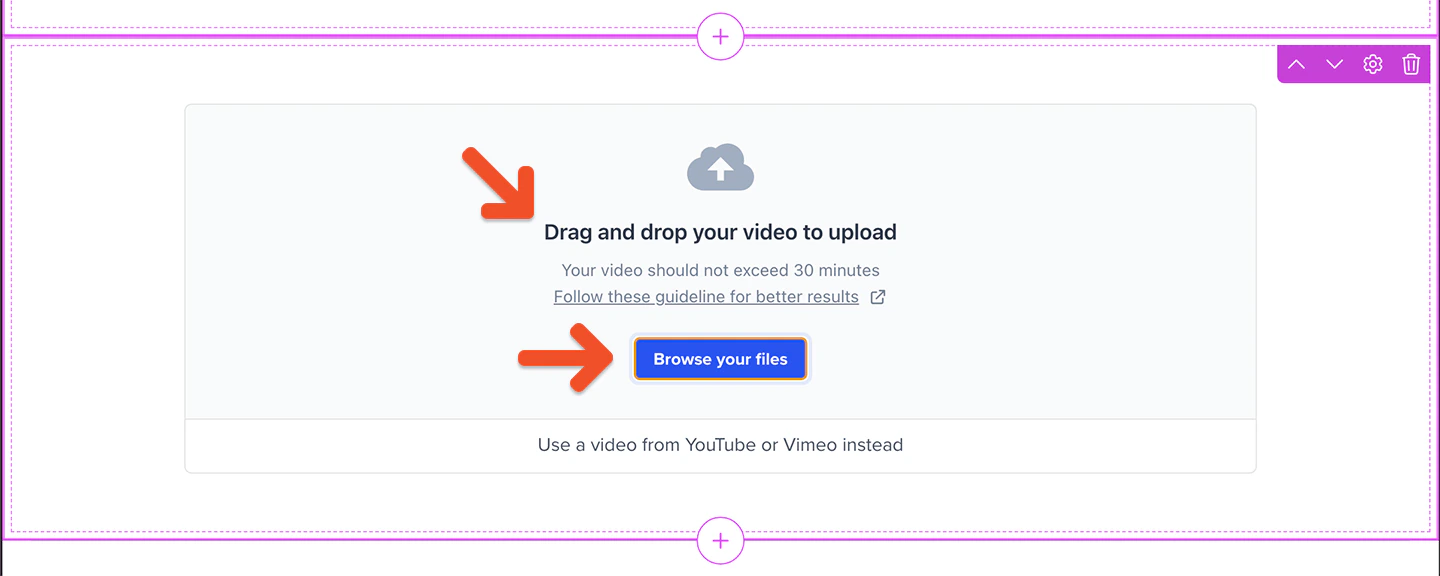
 **Drag and drop** your video or click **Browse your files** to select the video file to upload:
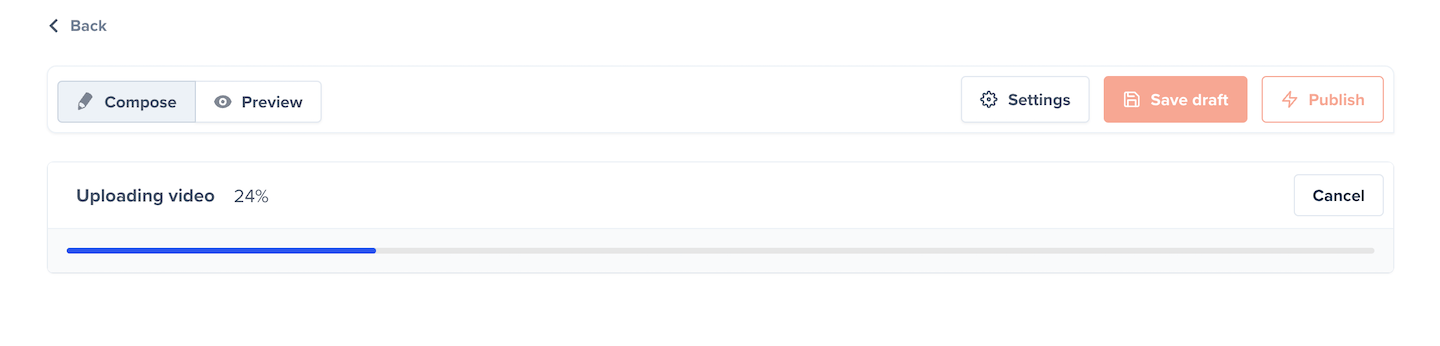
 A progress bar keeps you informed as your video uploads and processes. If a post is saved while the video is still processing, the video will only be visible on the website after the processing is complete.
[Learn more](/website-builder/video-content/video-processing#review-available-processing-messages) about the video upload messages available.
A progress bar keeps you informed as your video uploads and processes. If a post is saved while the video is still processing, the video will only be visible on the website after the processing is complete.
[Learn more](/website-builder/video-content/video-processing#review-available-processing-messages) about the video upload messages available.
 If you run into errors, [learn more](/website-builder/video-content/video-processing#troubleshooting-video-files) about troubleshooting videos.
## Select who can see a content block
You can choose who can see individual content blocks on your page.
To do so, click the **gear** icon in the top-right corner of the content block you want to configure. Then, select the appropriate option under *Who can read this content?*
If you run into errors, [learn more](/website-builder/video-content/video-processing#troubleshooting-video-files) about troubleshooting videos.
## Select who can see a content block
You can choose who can see individual content blocks on your page.
To do so, click the **gear** icon in the top-right corner of the content block you want to configure. Then, select the appropriate option under *Who can read this content?*
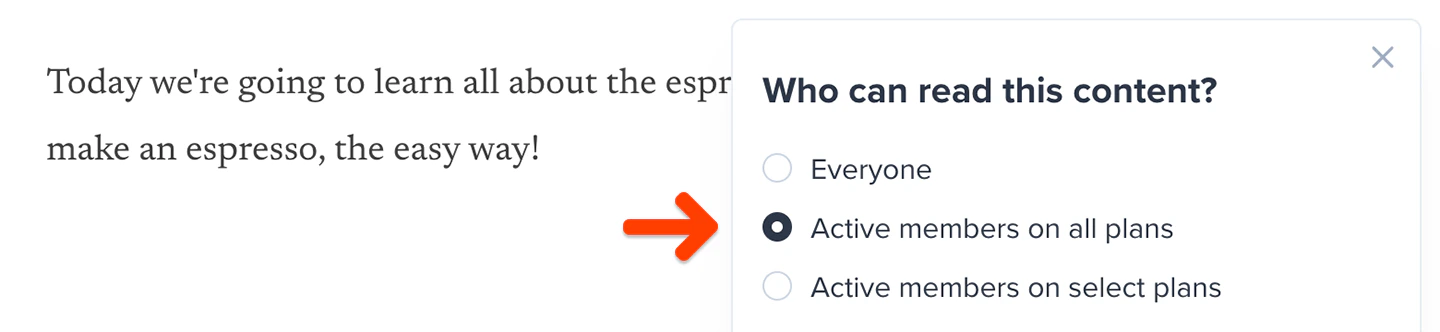 A content block on your page can be made available to everyone (including non-members), active members on *all* plans, or only to active members on *select* plans. However, a page with uploaded video can only be made available to paid members on *all* plans or *select* plans.
When you choose to target only members on select plans, you can choose which plans should be included.
A content block on your page can be made available to everyone (including non-members), active members on *all* plans, or only to active members on *select* plans. However, a page with uploaded video can only be made available to paid members on *all* plans or *select* plans.
When you choose to target only members on select plans, you can choose which plans should be included.
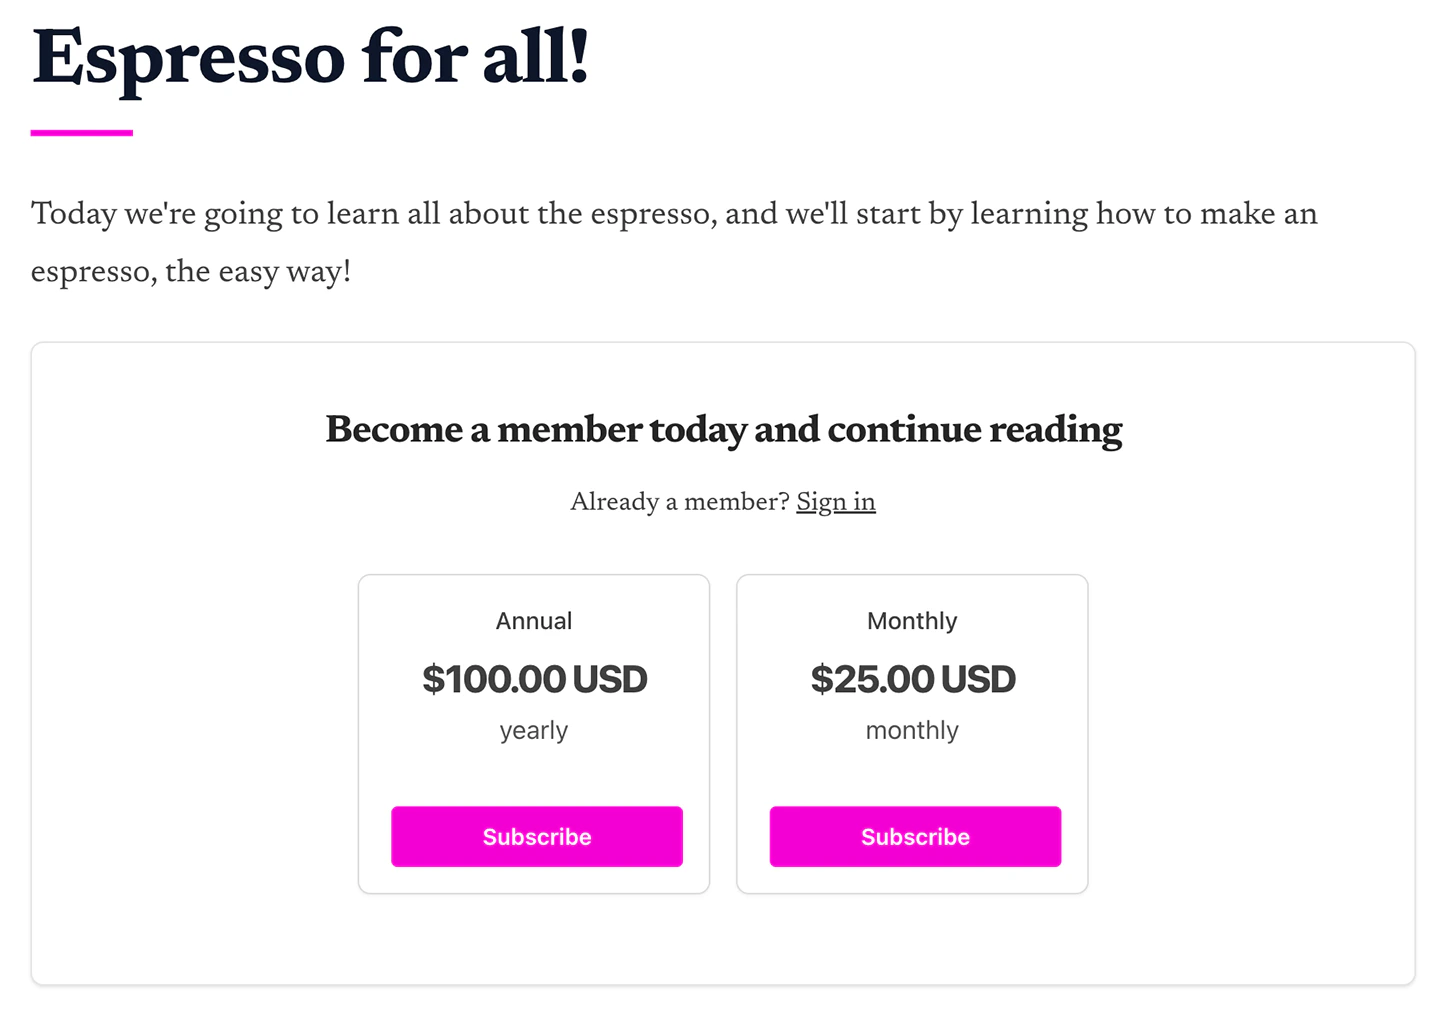
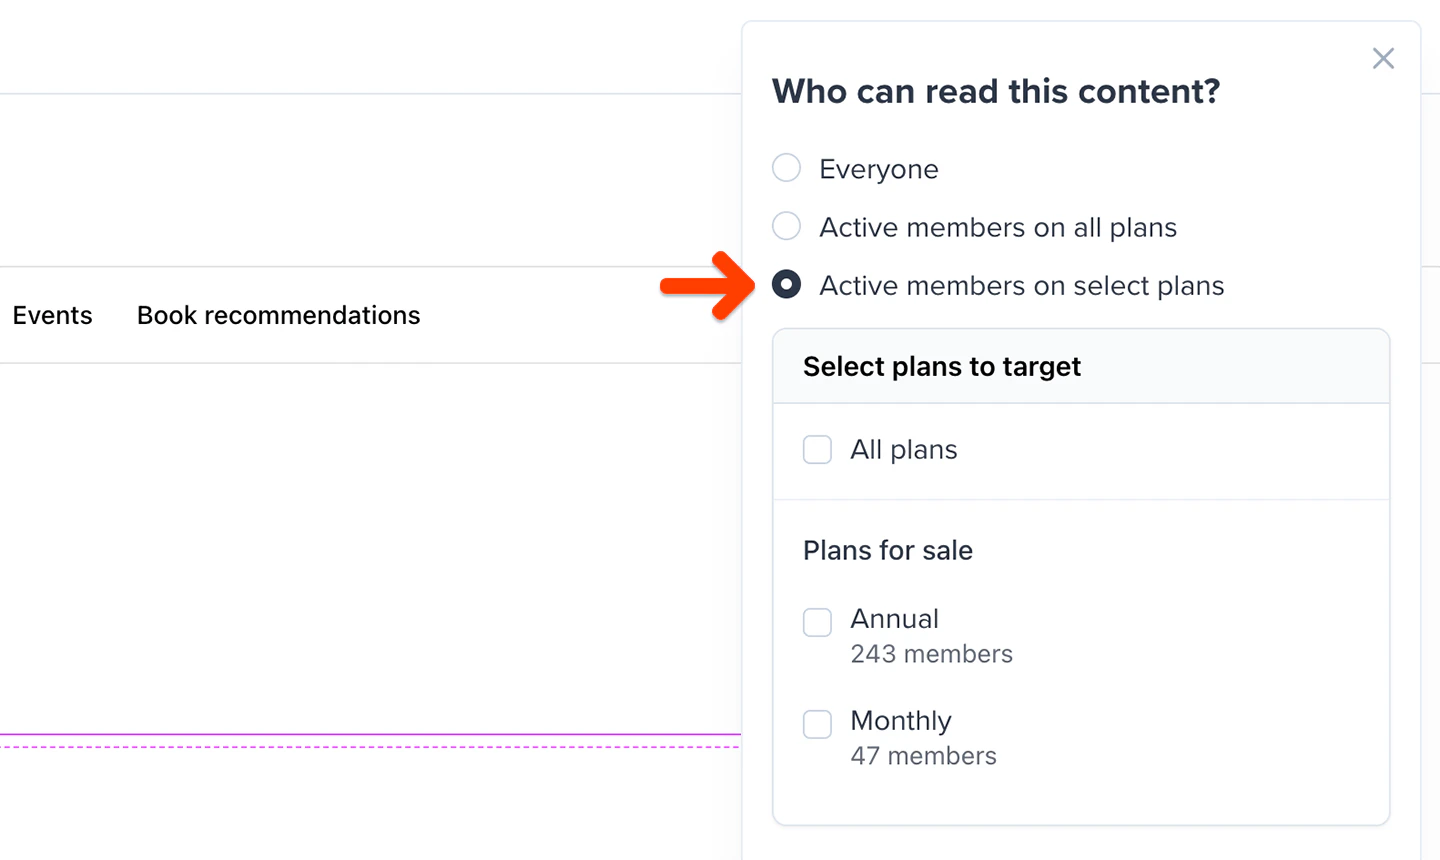 If your content block is set to be visible only to active members, you can choose whether to show a paywall or hide the content.
 Here's what a paywall looks like:
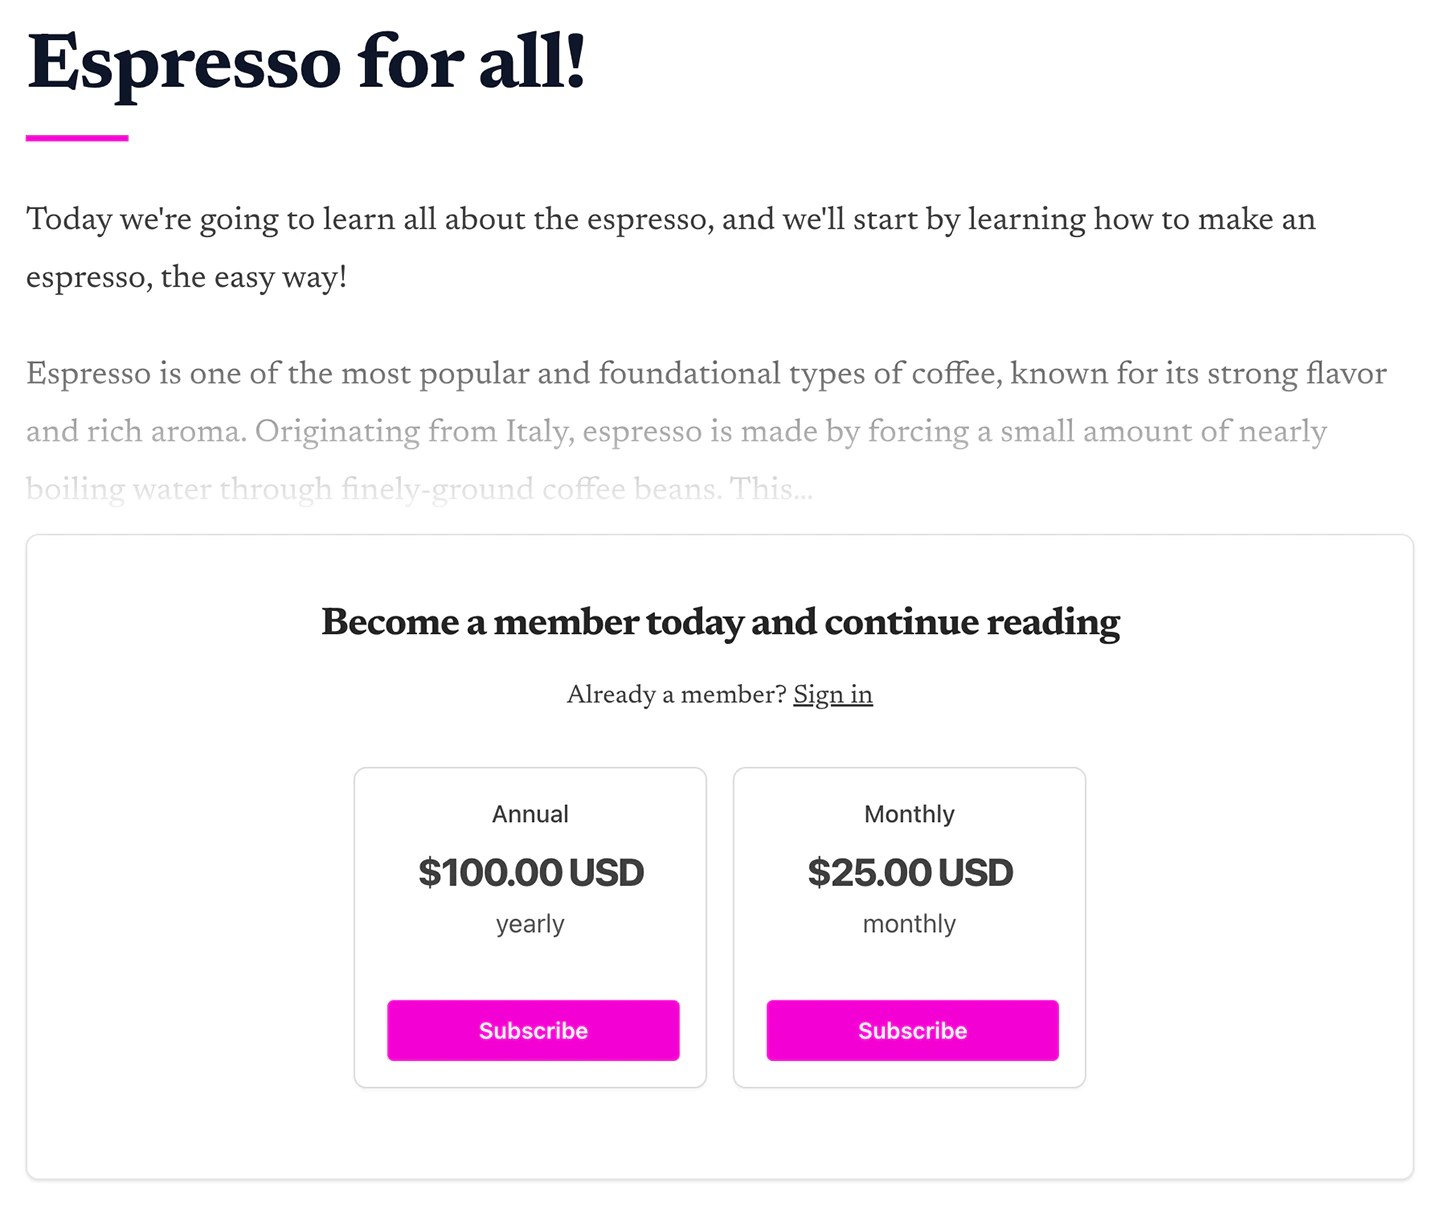
 If you choose to show a paywall, you can choose whether to show a short excerpt of the content block, before fading out into a paywall.
 Here's what a paywall with an excerpt looks like:
 ## Select who can see this page in the navigation
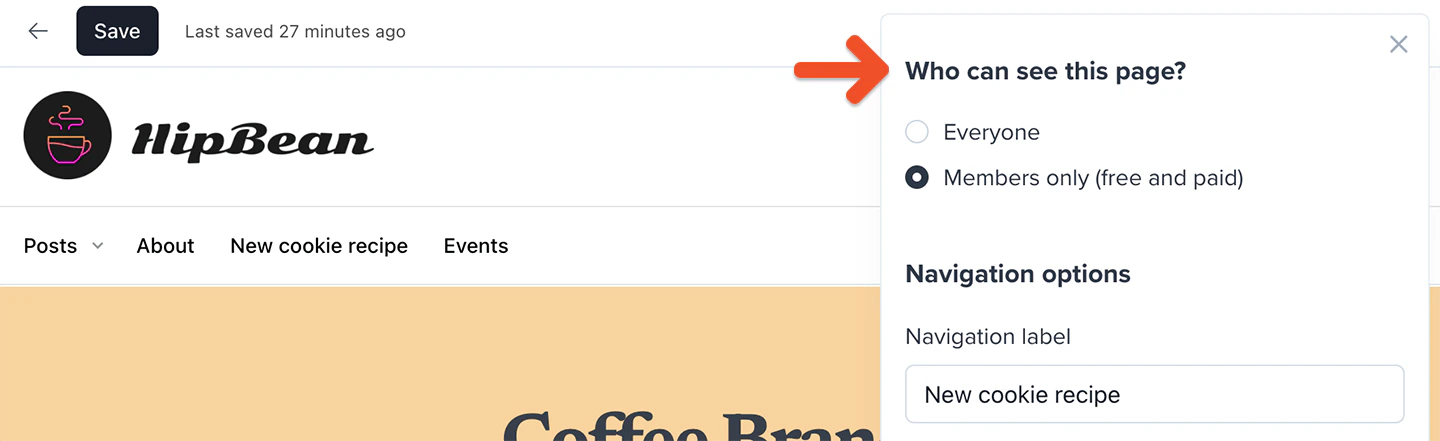
In addition to choosing who can view the content blocks on your page, you can choose who can see links to your page in their navigation: everyone (including non-members), or members only (free and paid).
To choose who can see your page in their navigation, click the **gear** icon in the top-right corner of the page editor or hover your cursor over the page in the list of pages and click the **gear** icon. Then, select the appropriate option under *Who can see this page?*
## Select who can see this page in the navigation
In addition to choosing who can view the content blocks on your page, you can choose who can see links to your page in their navigation: everyone (including non-members), or members only (free and paid).
To choose who can see your page in their navigation, click the **gear** icon in the top-right corner of the page editor or hover your cursor over the page in the list of pages and click the **gear** icon. Then, select the appropriate option under *Who can see this page?*
 ## Preview the page
Memberful shows a live preview of what the page will look like to your members. To see a more accurate preview of your page, exit the editor. The non-editable preview shows embedded videos and other elements that might not be accurately depicted while editing.
Keep in mind that the preview doesn't work exactly like your live member website, as the navigation elements won't be clickable, and the paywall inviting non-members to subscribe won't be displayed.
## Pick a navigation label
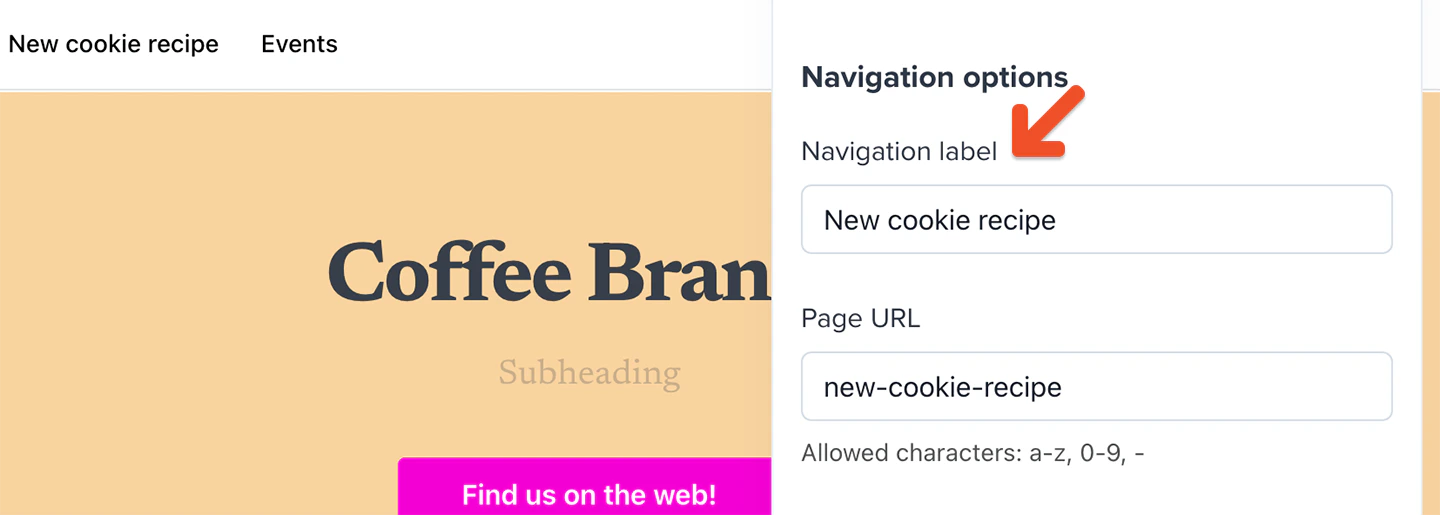
To choose a navigation label for your page, click the **gear** icon in the top-right corner of the page editor or hover your cursor over the page in the list of pages and click the **gear** icon. Then, enter the desired label under *Navigation label*.
## Preview the page
Memberful shows a live preview of what the page will look like to your members. To see a more accurate preview of your page, exit the editor. The non-editable preview shows embedded videos and other elements that might not be accurately depicted while editing.
Keep in mind that the preview doesn't work exactly like your live member website, as the navigation elements won't be clickable, and the paywall inviting non-members to subscribe won't be displayed.
## Pick a navigation label
To choose a navigation label for your page, click the **gear** icon in the top-right corner of the page editor or hover your cursor over the page in the list of pages and click the **gear** icon. Then, enter the desired label under *Navigation label*.
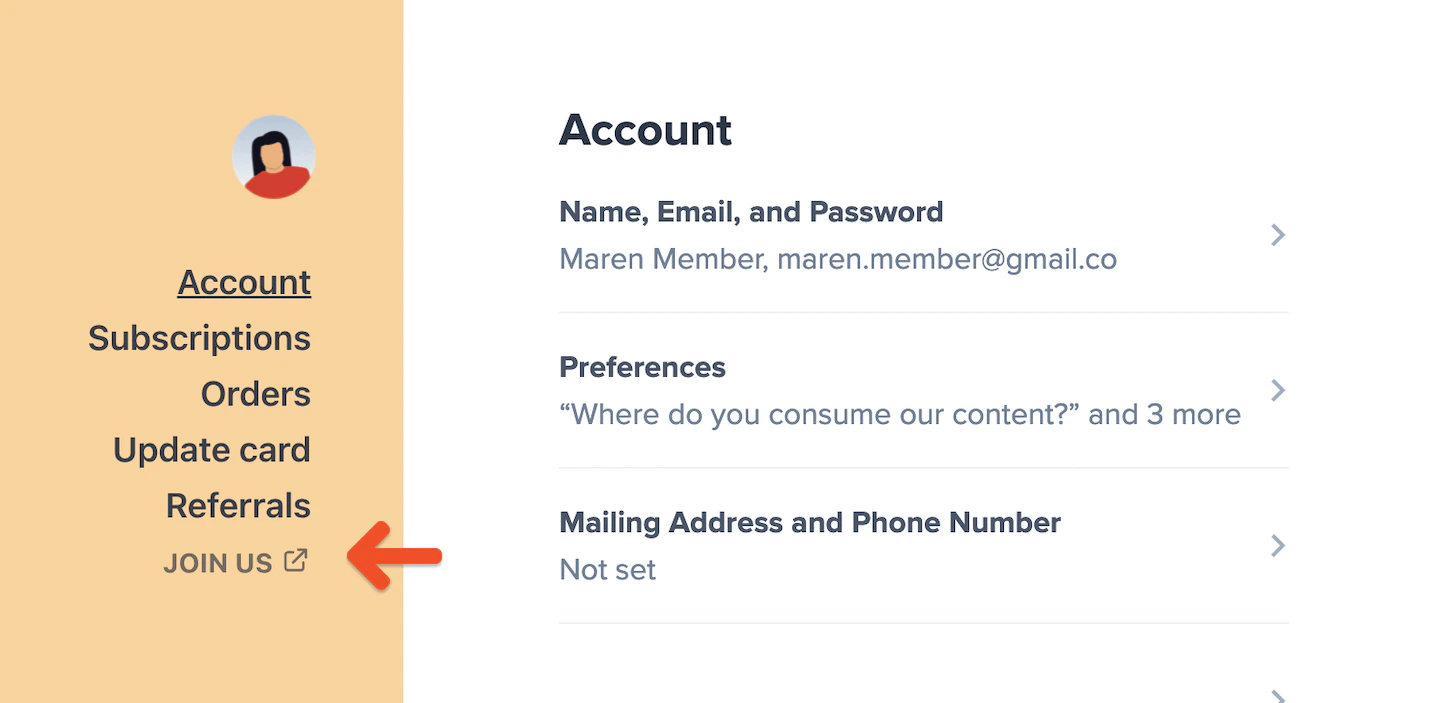
 If you later make this page your homepage, the navigation label will also be used in the member account area menu.
 ## Edit the page URL
Memberful will automatically generate a URL for your page based on the navigation label. You can specify a custom URL instead.
To do so, click the **gear** icon in the top-right corner of the page editor or hover your cursor over the page in the list of pages and click the **gear** icon. Then, enter the desired URL under *Page URL*.
## Edit the page URL
Memberful will automatically generate a URL for your page based on the navigation label. You can specify a custom URL instead.
To do so, click the **gear** icon in the top-right corner of the page editor or hover your cursor over the page in the list of pages and click the **gear** icon. Then, enter the desired URL under *Page URL*.
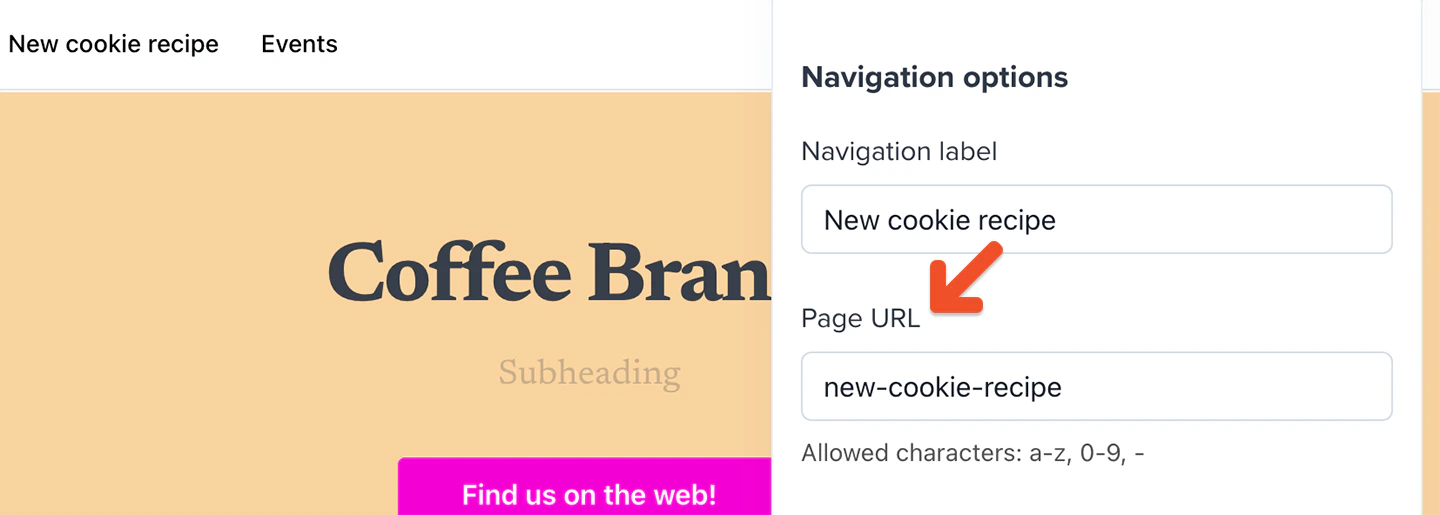 Keep in mind that this only determines what comes after your Memberful website's domain name and the /page/ subdirectory. For example, if your Memberful website is `https://hipbean.memberful.com`, and you enter `coffee-beans` as the page URL, the full URL for the page will be `https://hipbean.memberful.com/pages/coffee-beans`.
## Publish the page
While you're working on your page, you can save the current draft by clicking the **Save draft** button in the top-left corner of the page editor.
Keep in mind that this only determines what comes after your Memberful website's domain name and the /page/ subdirectory. For example, if your Memberful website is `https://hipbean.memberful.com`, and you enter `coffee-beans` as the page URL, the full URL for the page will be `https://hipbean.memberful.com/pages/coffee-beans`.
## Publish the page
While you're working on your page, you can save the current draft by clicking the **Save draft** button in the top-left corner of the page editor.
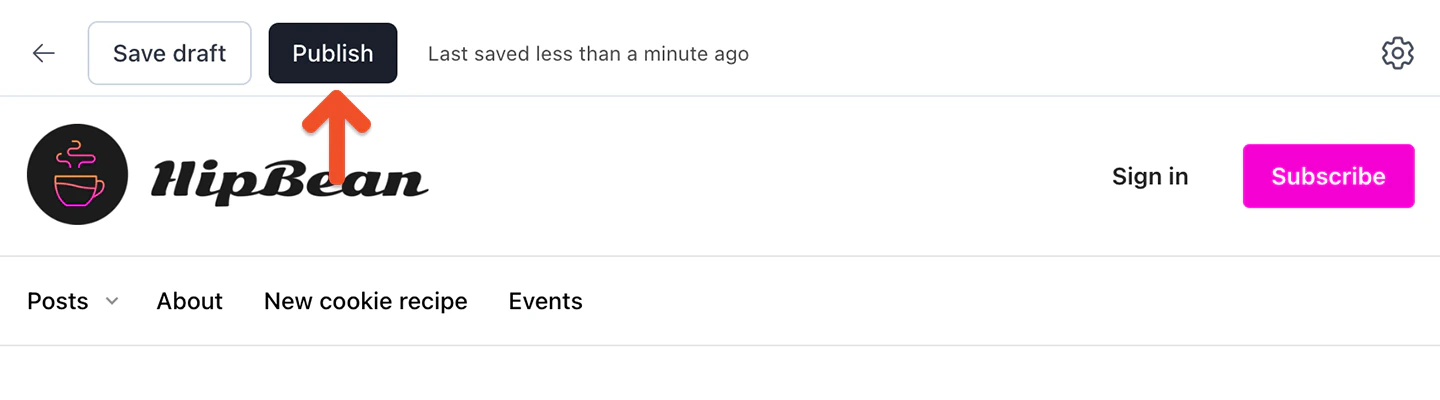
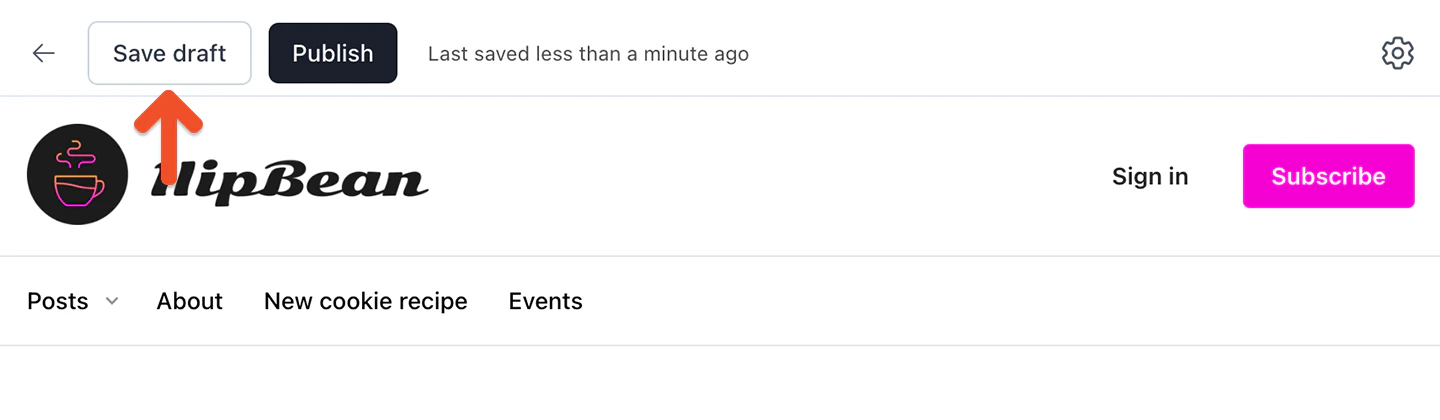 When you're ready to publish your page, click the **Publish** button in the top-left corner of the page editor.
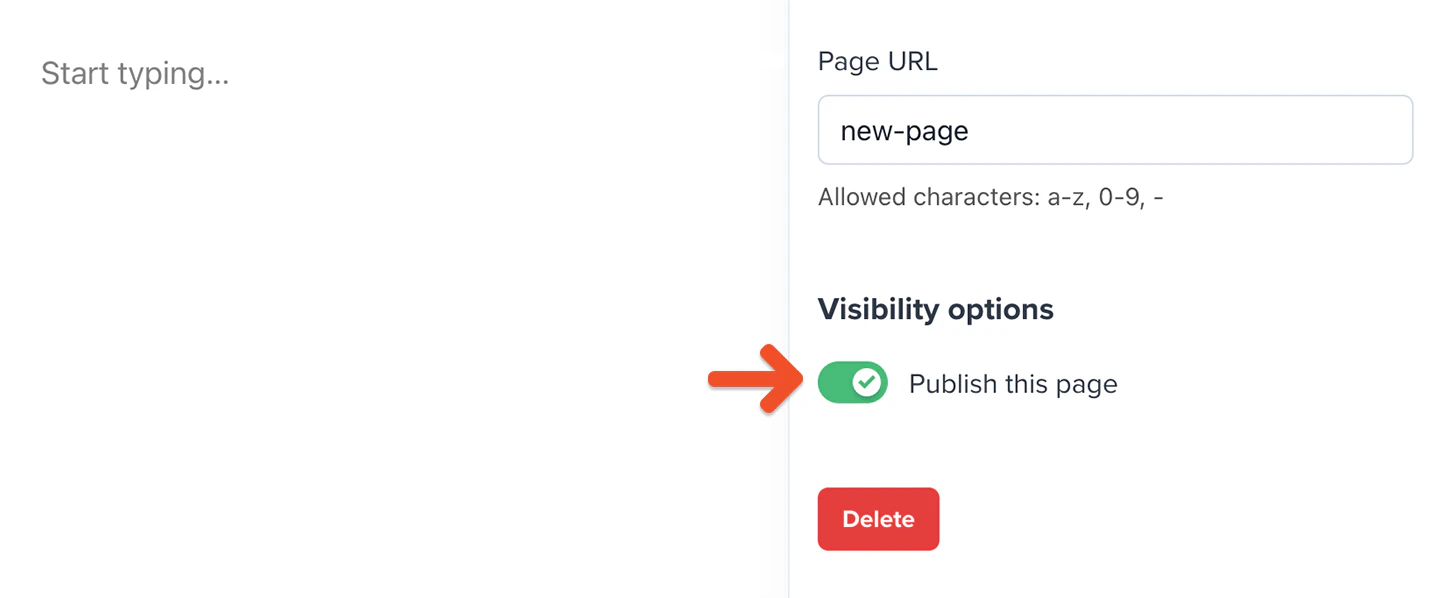
 Alternatively, you can publish it via the page's settings. Click the **gear** icon in the top-right corner of the page editor or hover your cursor over the page in the list of pages and click the **gear** icon. Then, enable **Publish this page**. If you later want to unpublish the page, you can disable this option.
 ## View a published page
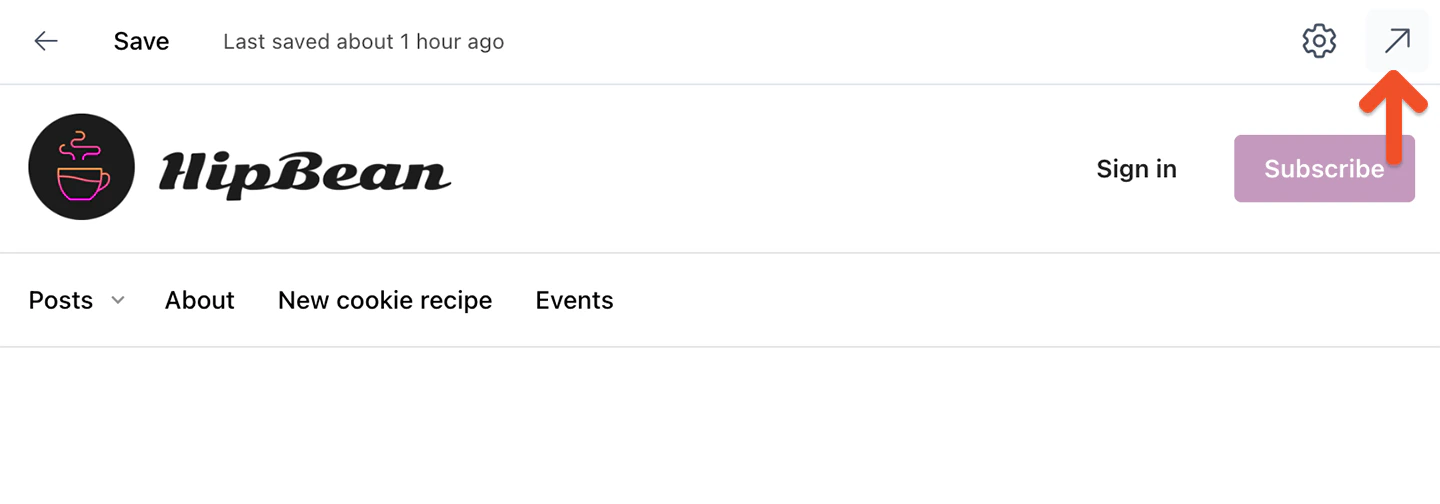
Once you've published a page and [enabled the member website](#enable-or-disable-the-member-website), you'll be able to view it on the live website by clicking the **arrow** icon in the top-right corner of the page editor.
## View a published page
Once you've published a page and [enabled the member website](#enable-or-disable-the-member-website), you'll be able to view it on the live website by clicking the **arrow** icon in the top-right corner of the page editor.